
Our work
Renovation projects & before-and-afters
Real homes, real results. Drag the sliders to compare before and after, or browse the gallery by room.
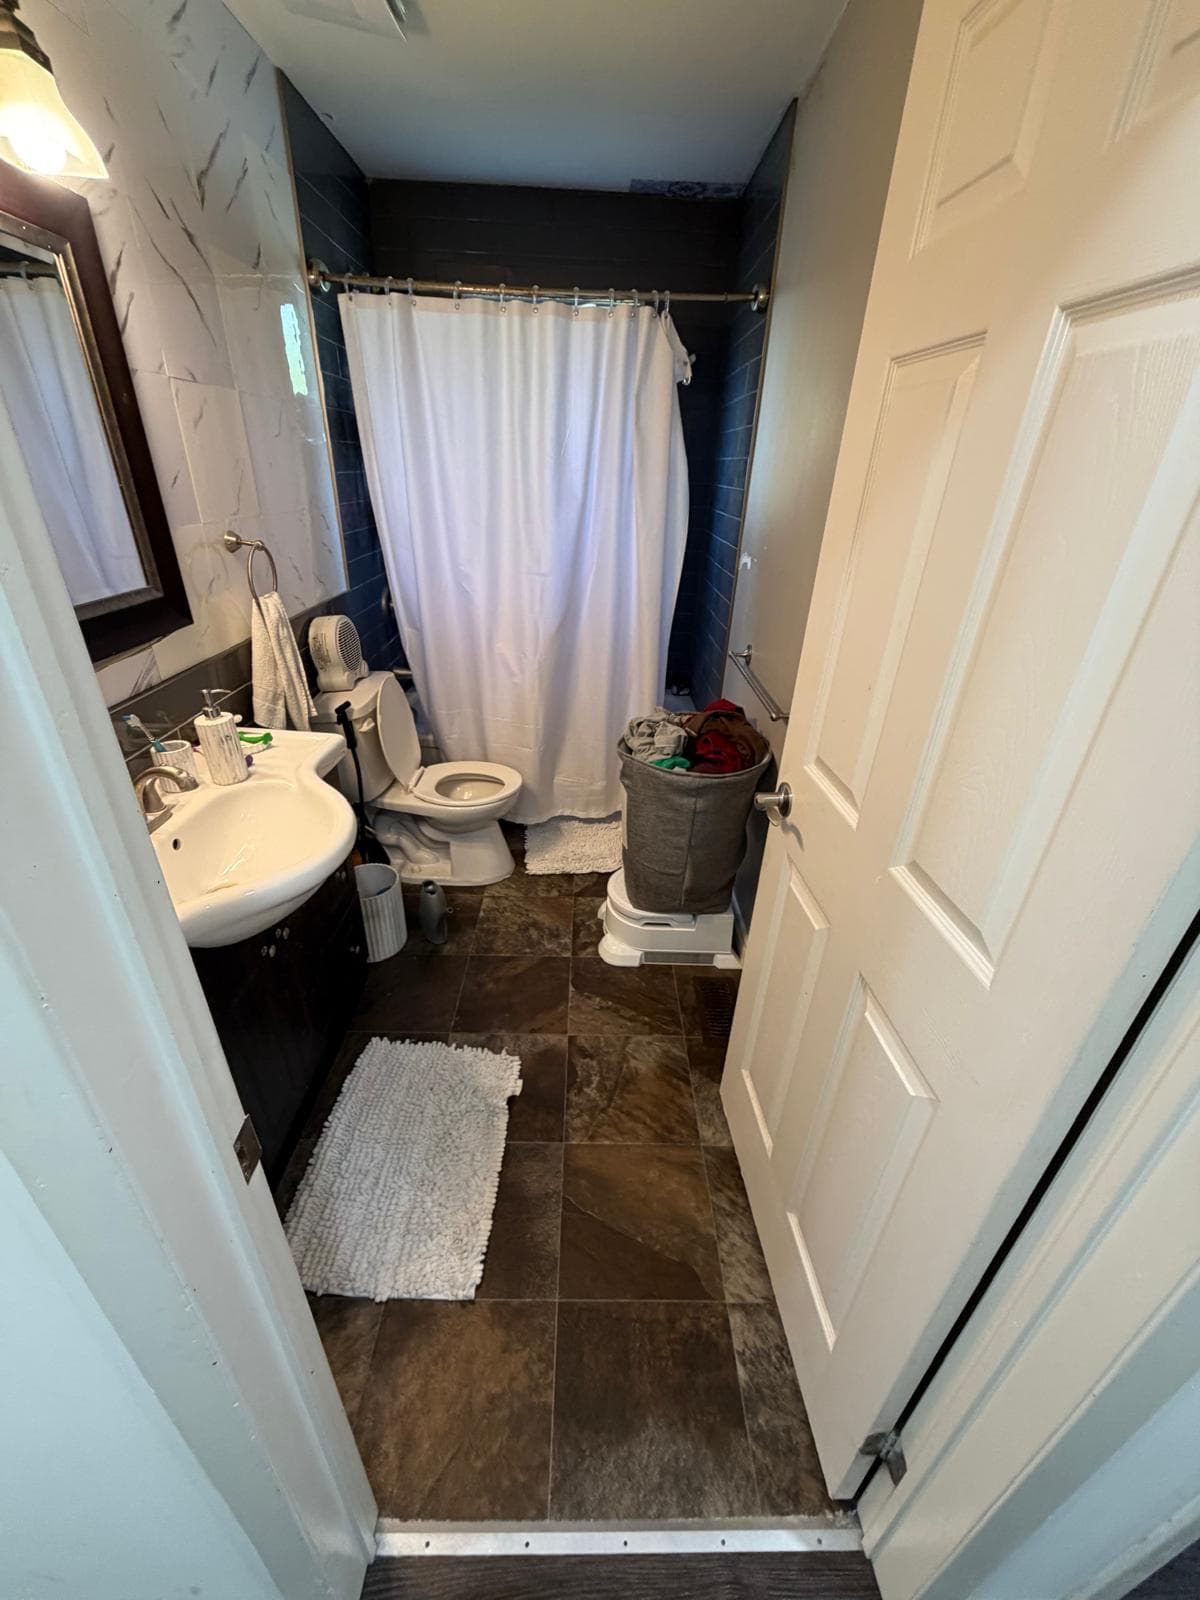
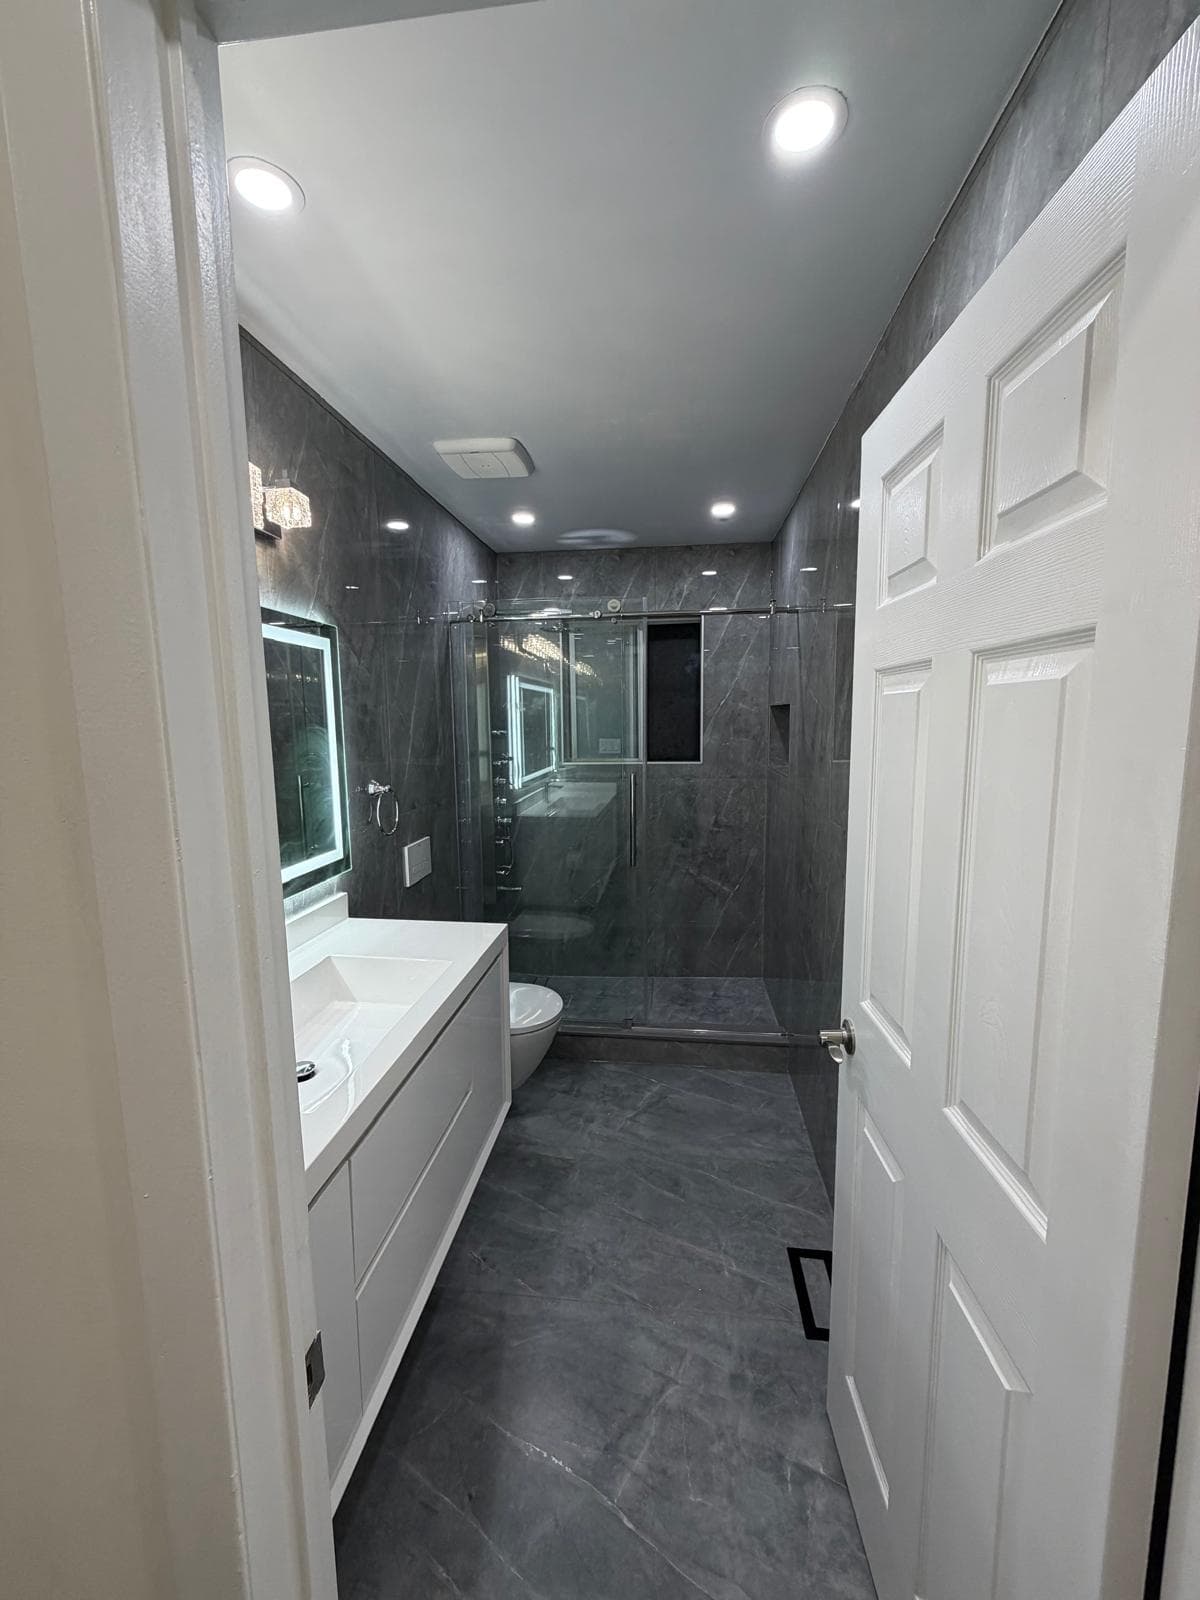
Before & after
Full Bathroom Renovation in Kitchener-Waterloo
Kitchener-Waterloo, Ontario
This dated bathroom had a curtain shower, a pedestal sink and worn floor tile. We took the room down to the studs and subfloor and rebuilt it as a modern spa-style bathroom with a glass walk-in shower, a wall-hung toilet and a floating vanity.
Drag the slider to compare the room before and after, then scroll through the build to see what goes on behind the tile.
- Gutted to the studs and subfloor
- Wall-hung toilet on an in-wall carrier
- Glass walk-in shower with built-in niches
- Cement board and sloped mortar shower base
- Liquid waterproofing membrane on all wet walls
- Large-format porcelain tile on walls and floor
- Floating vanity, LED mirror and pot lights
How we built it — behind the tile
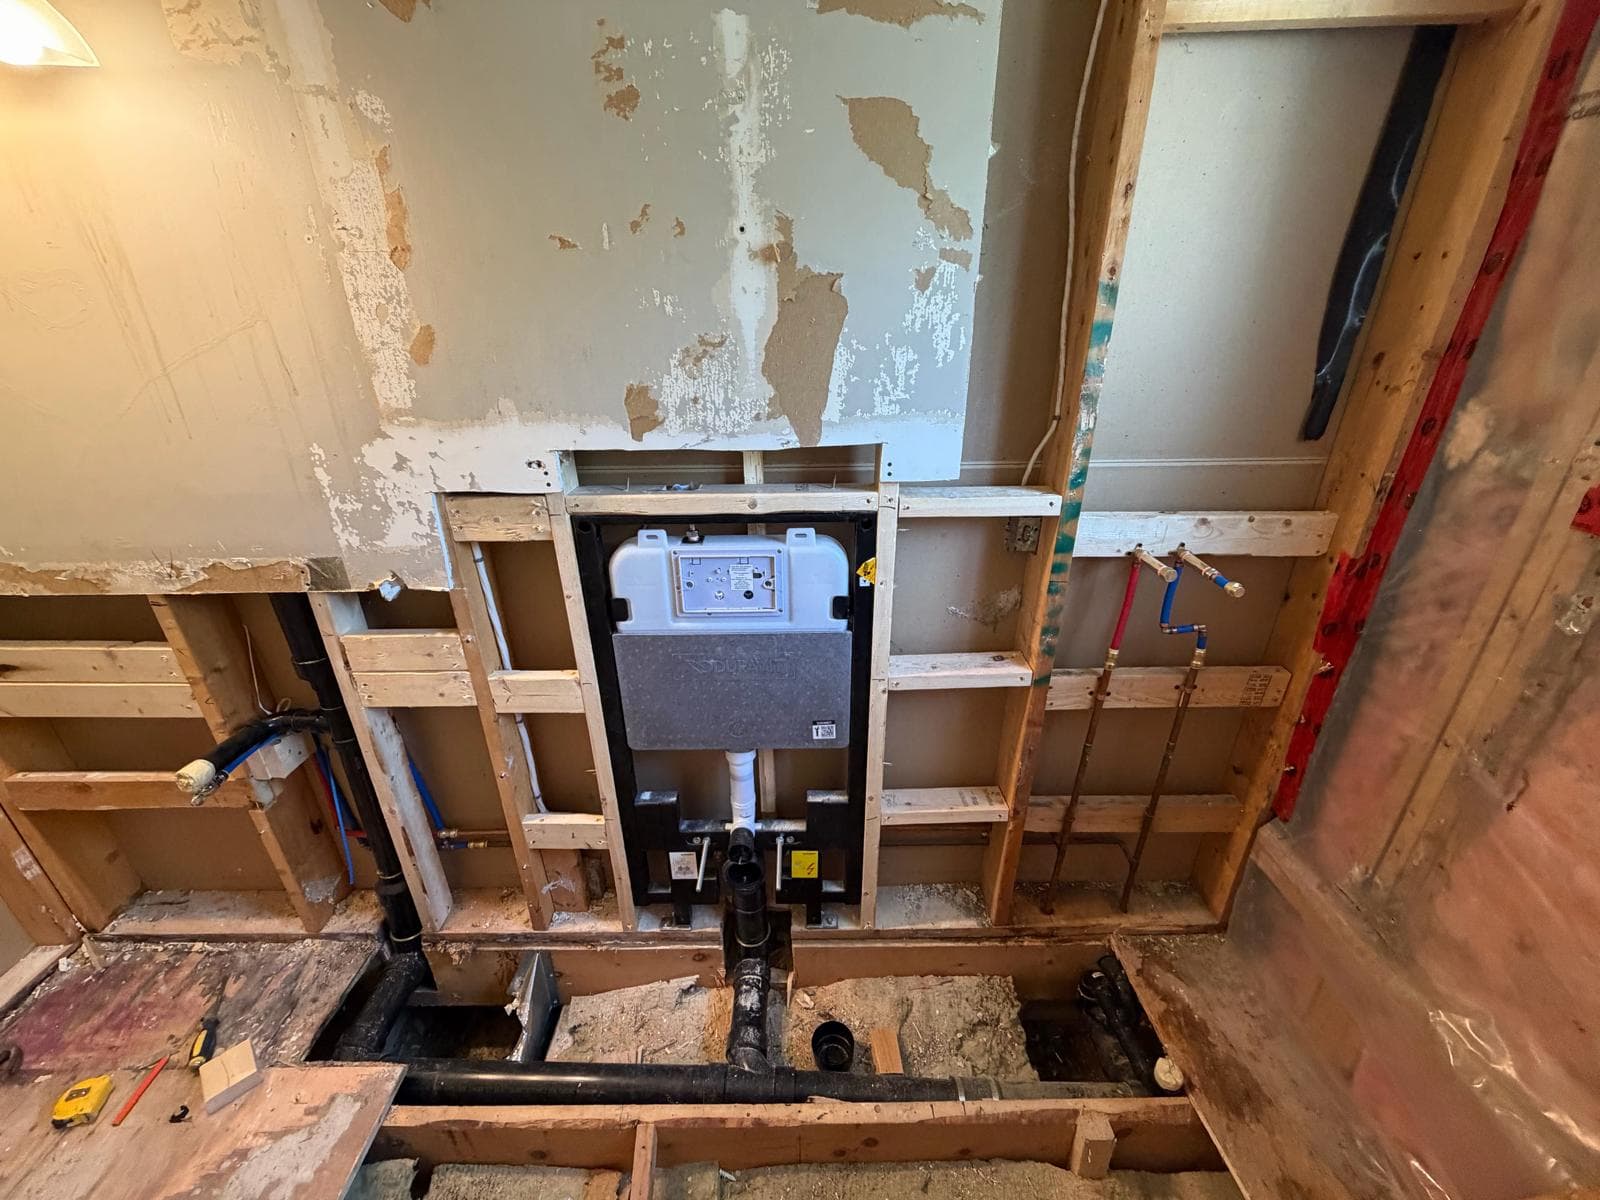 1
Demolition & plumbing rough-in
Walls and floor opened up, new drain and supply lines run, and an in-wall carrier installed for the floating toilet.
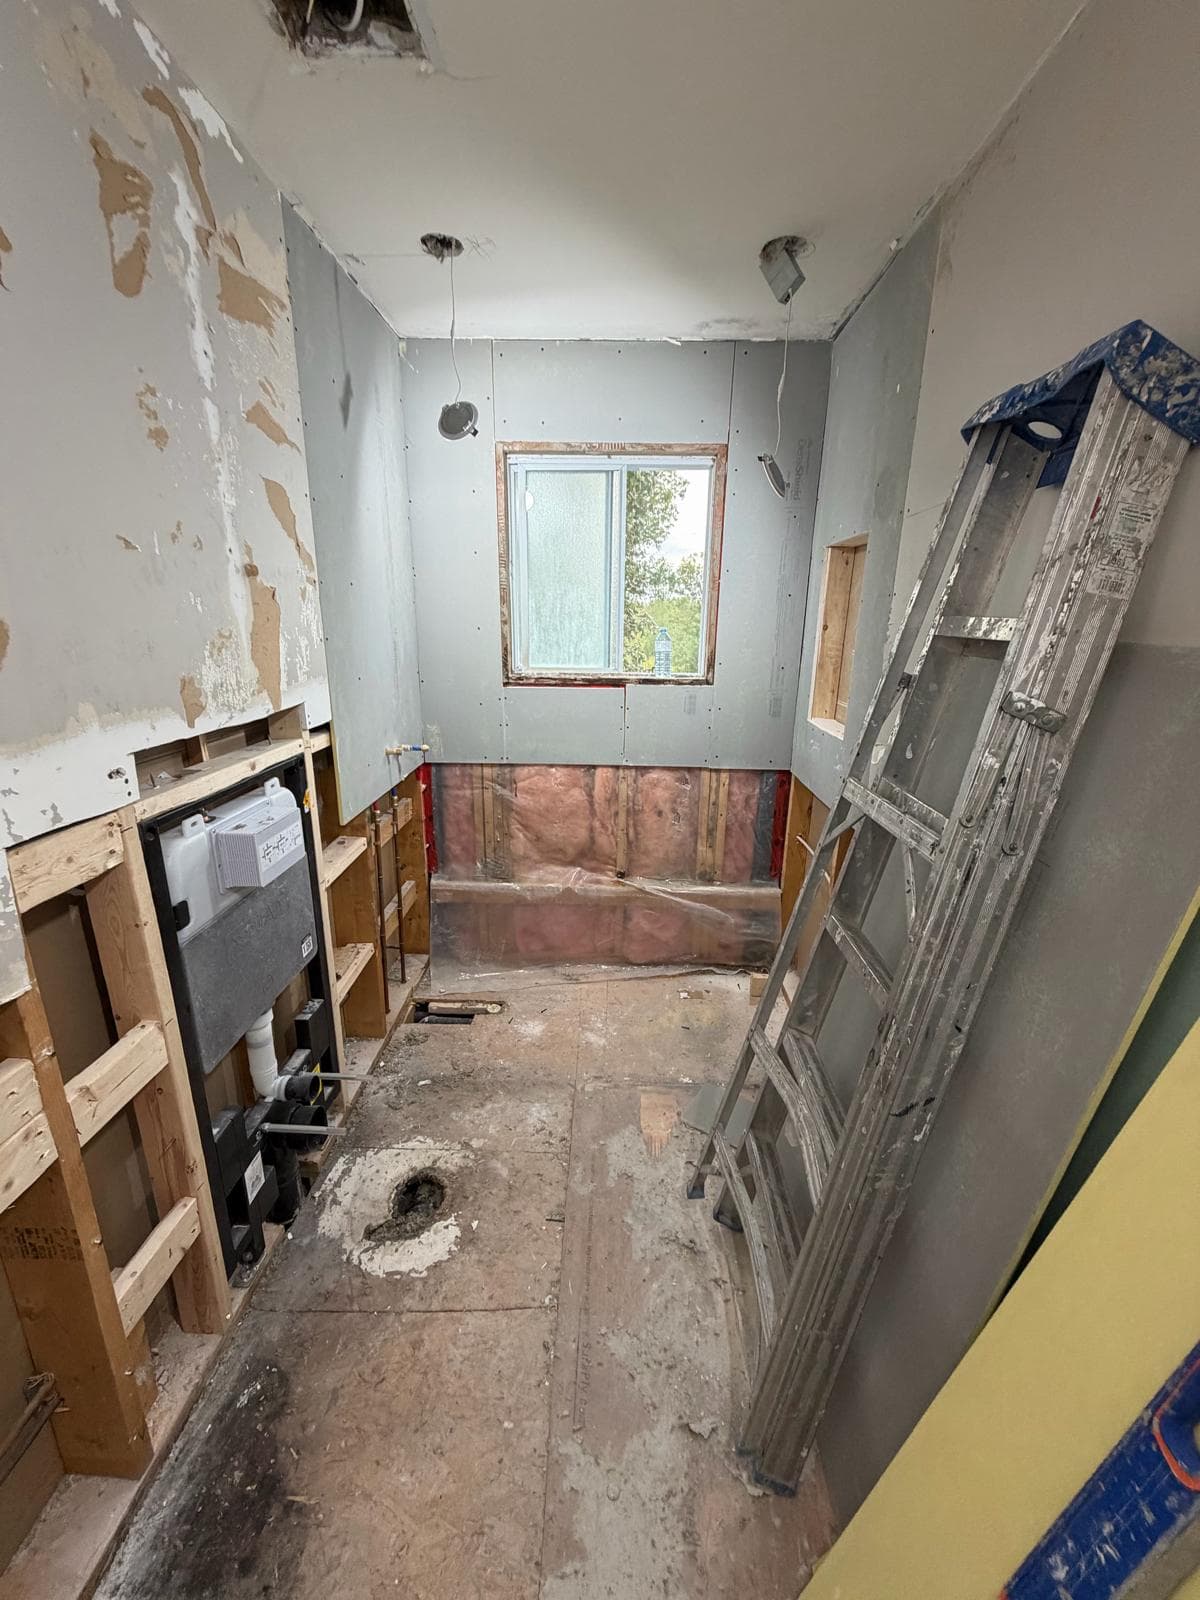 2
Framing & structural backing
Solid framing and backing so the wall-hung toilet, vanity and glass shower are anchored securely.
 3
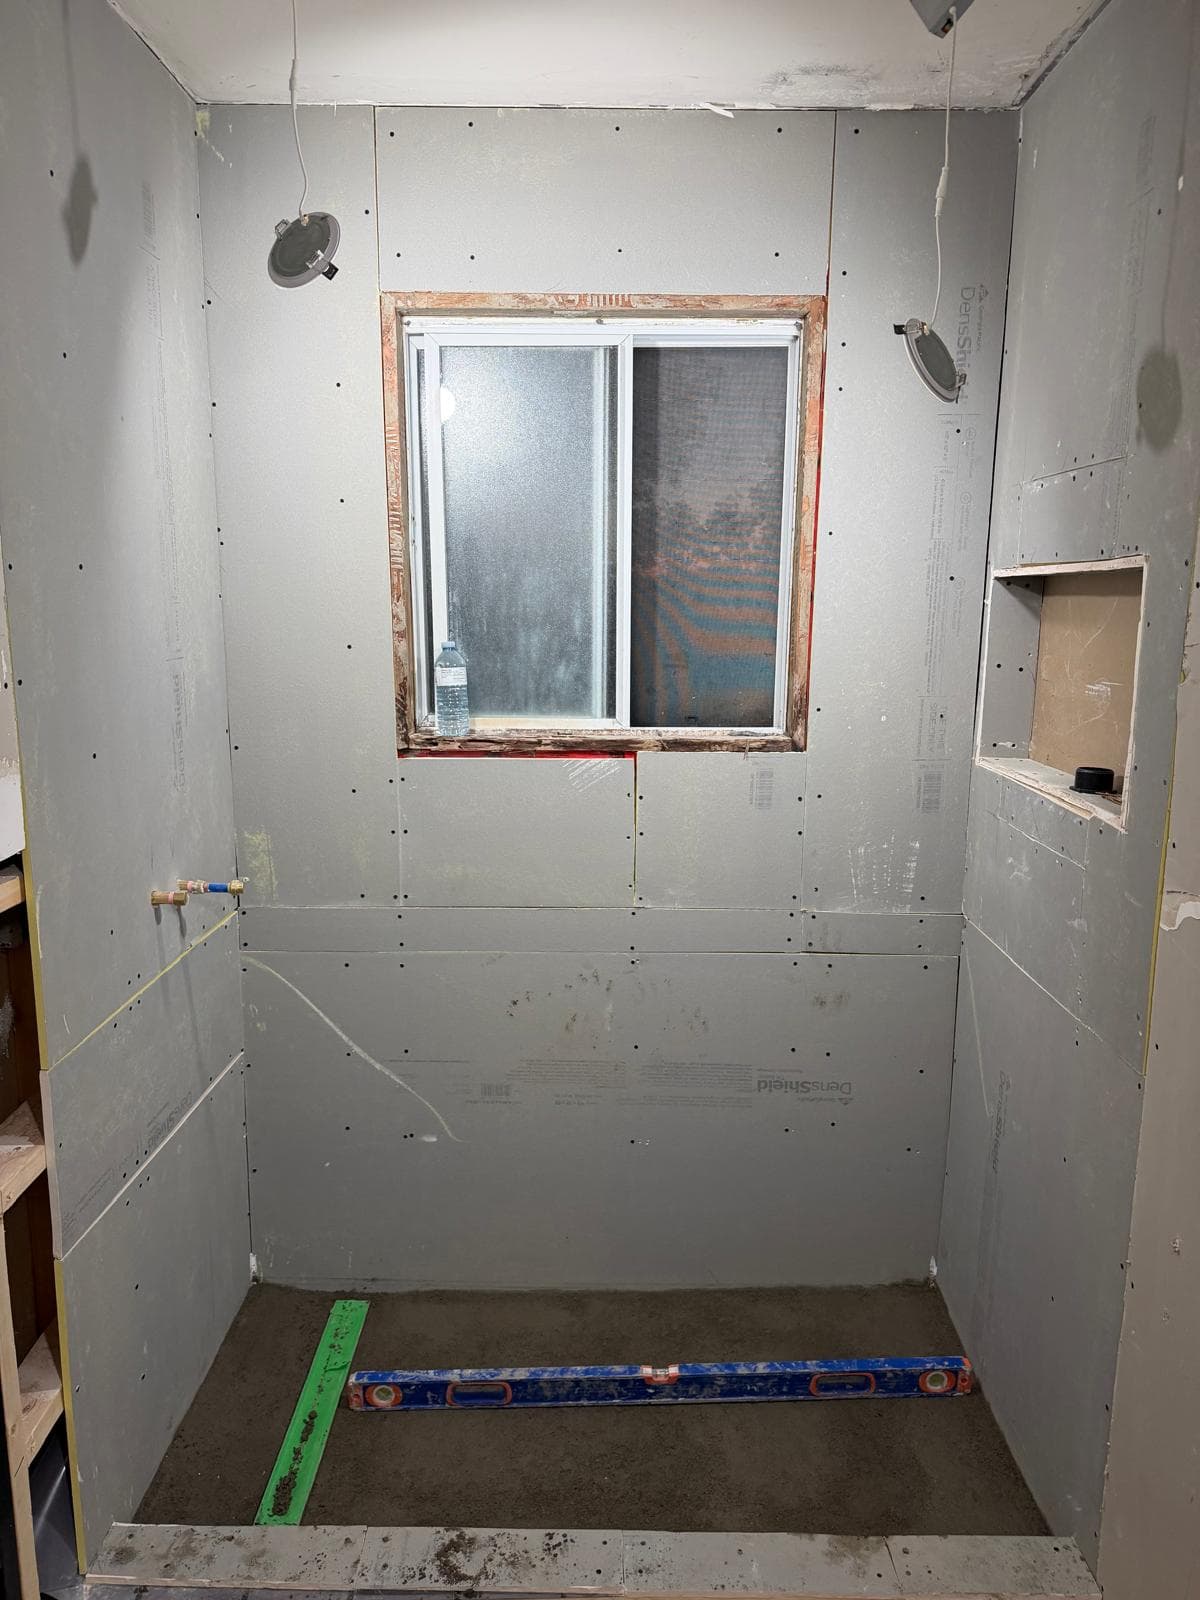
Cement board & shower base
Cement board on the shower walls, a recessed niche framed in, and a mortar base sloped to the drain.
 4
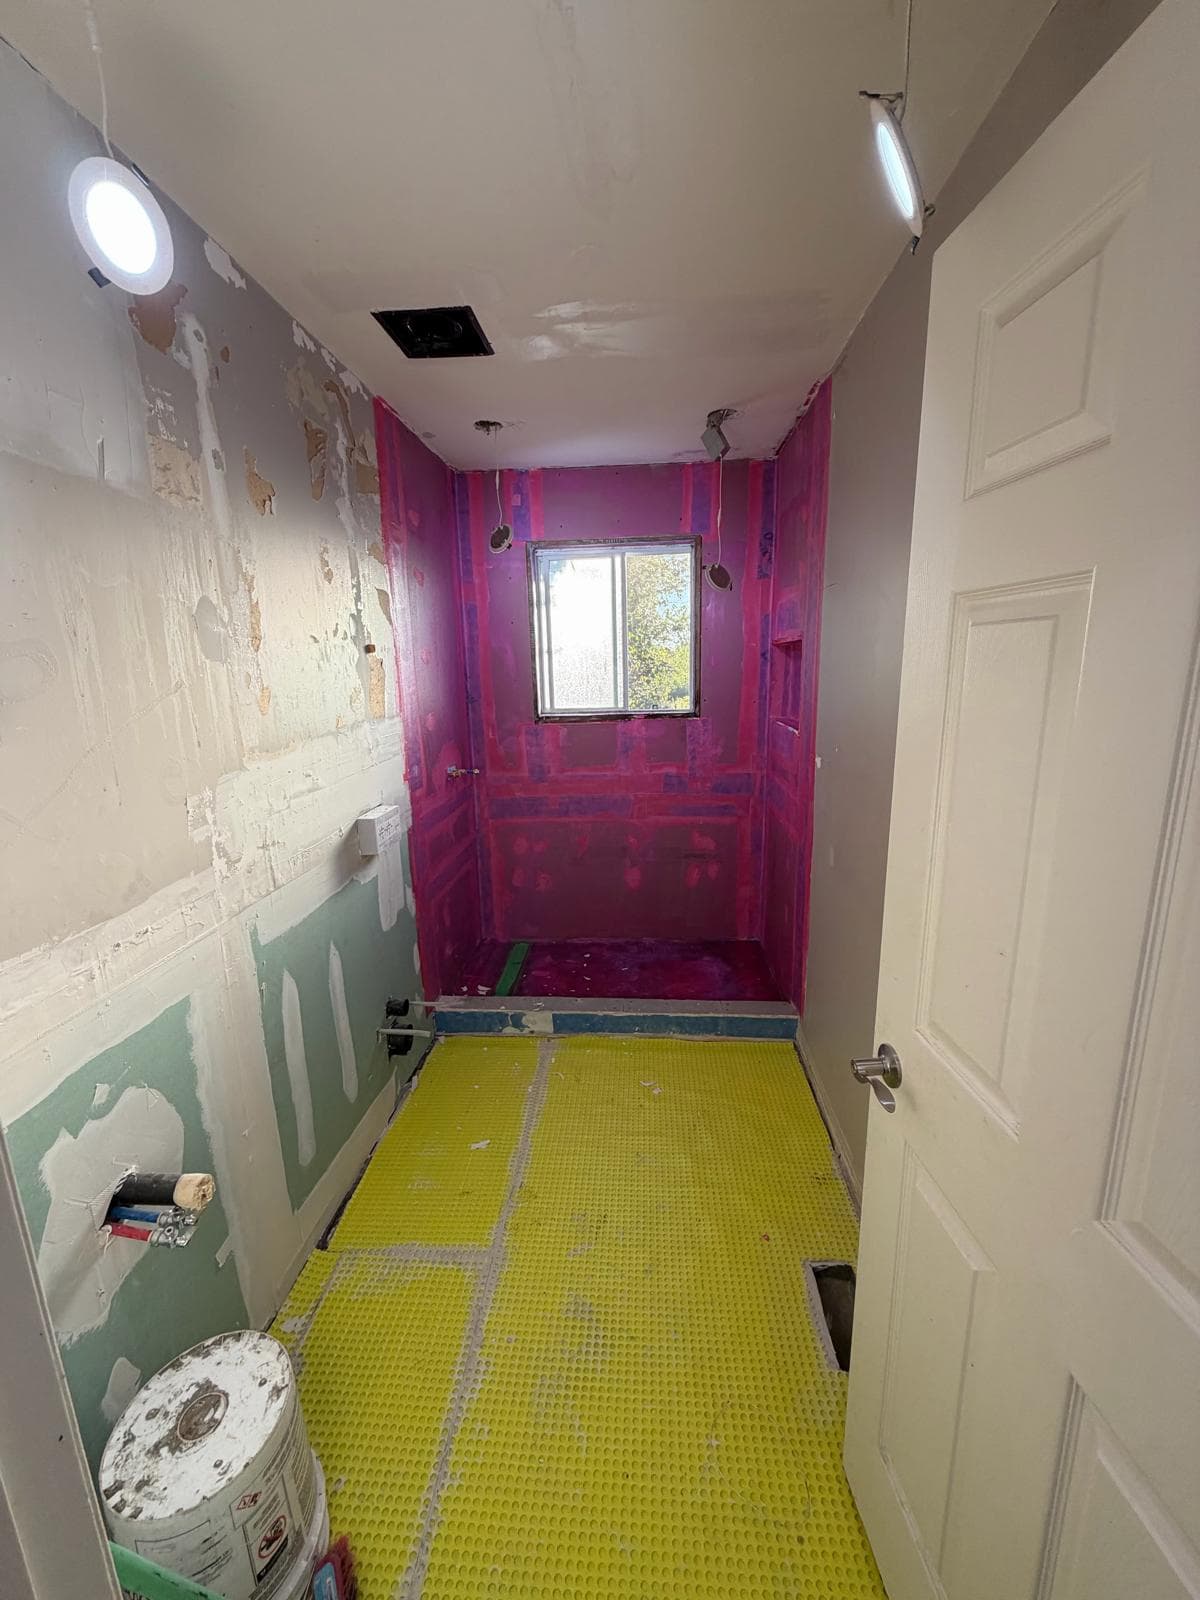
Waterproofing
A continuous waterproofing membrane on the shower walls and across the floor before any tile goes down.
 5
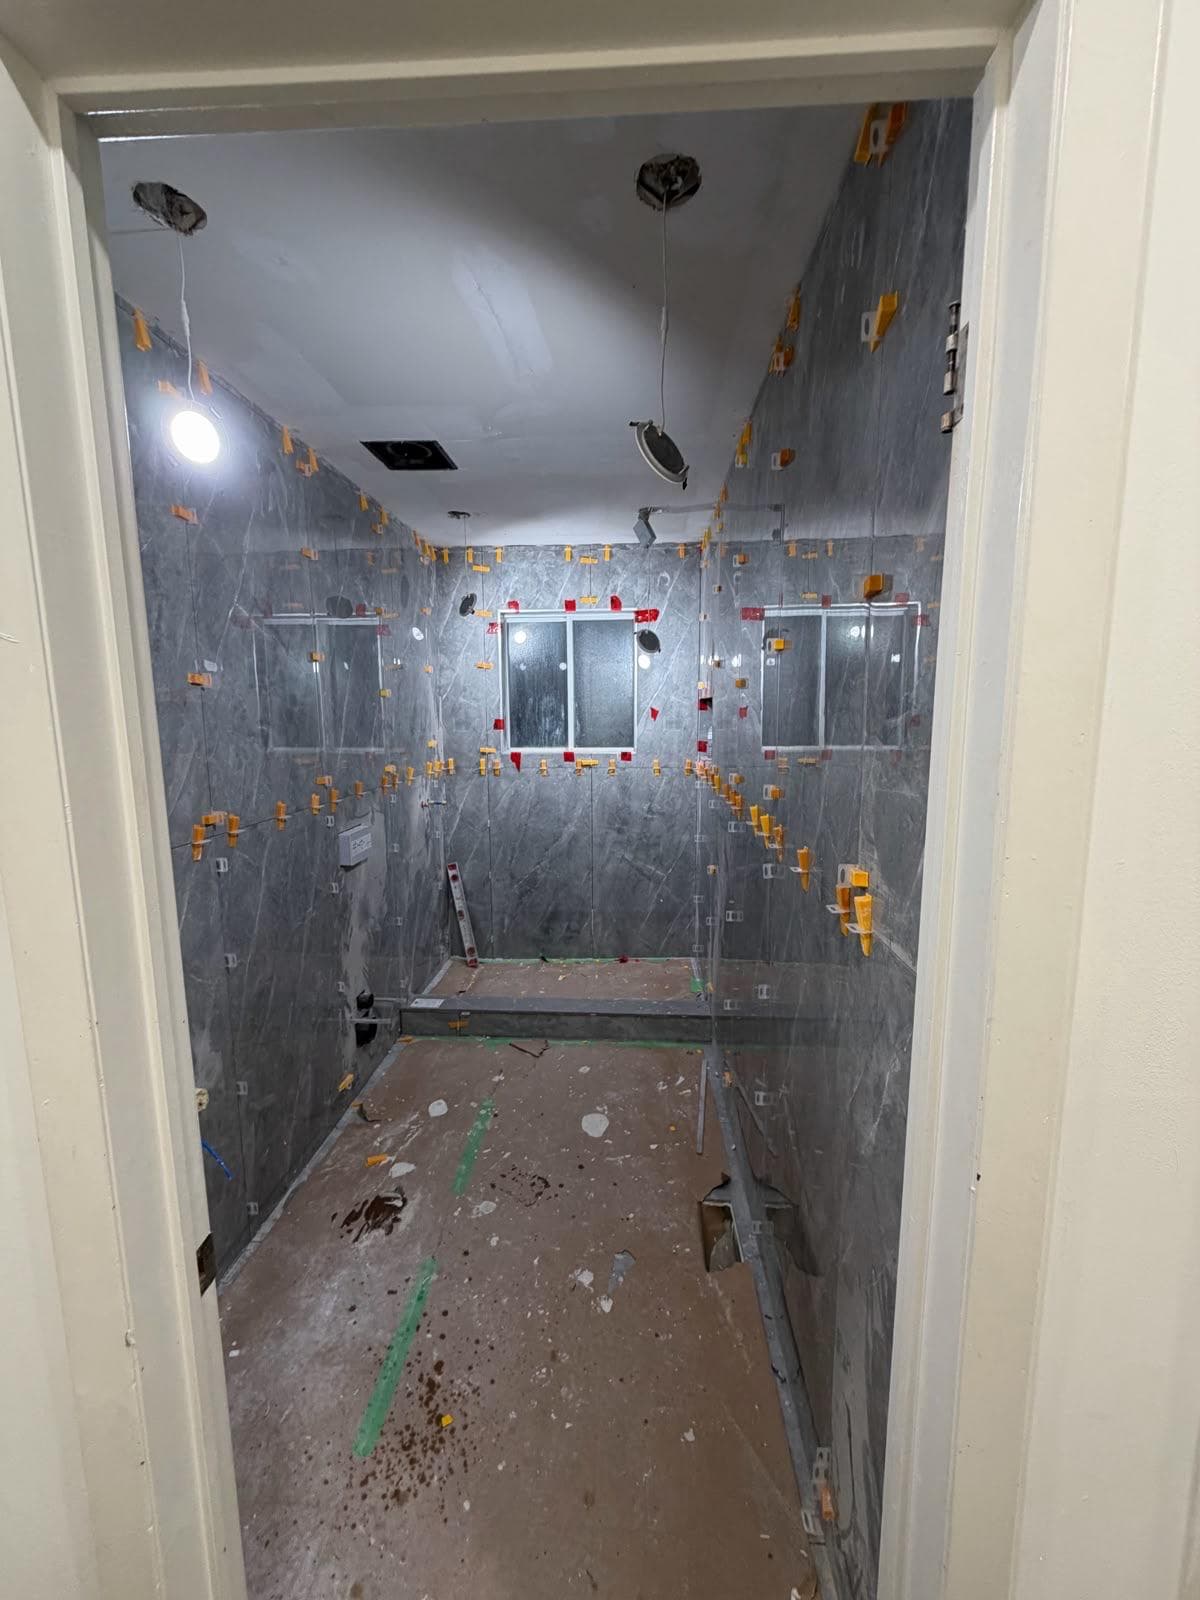
Tile installation
Large-format porcelain set with a levelling system for flat, tight joints on the walls and floor.
 6
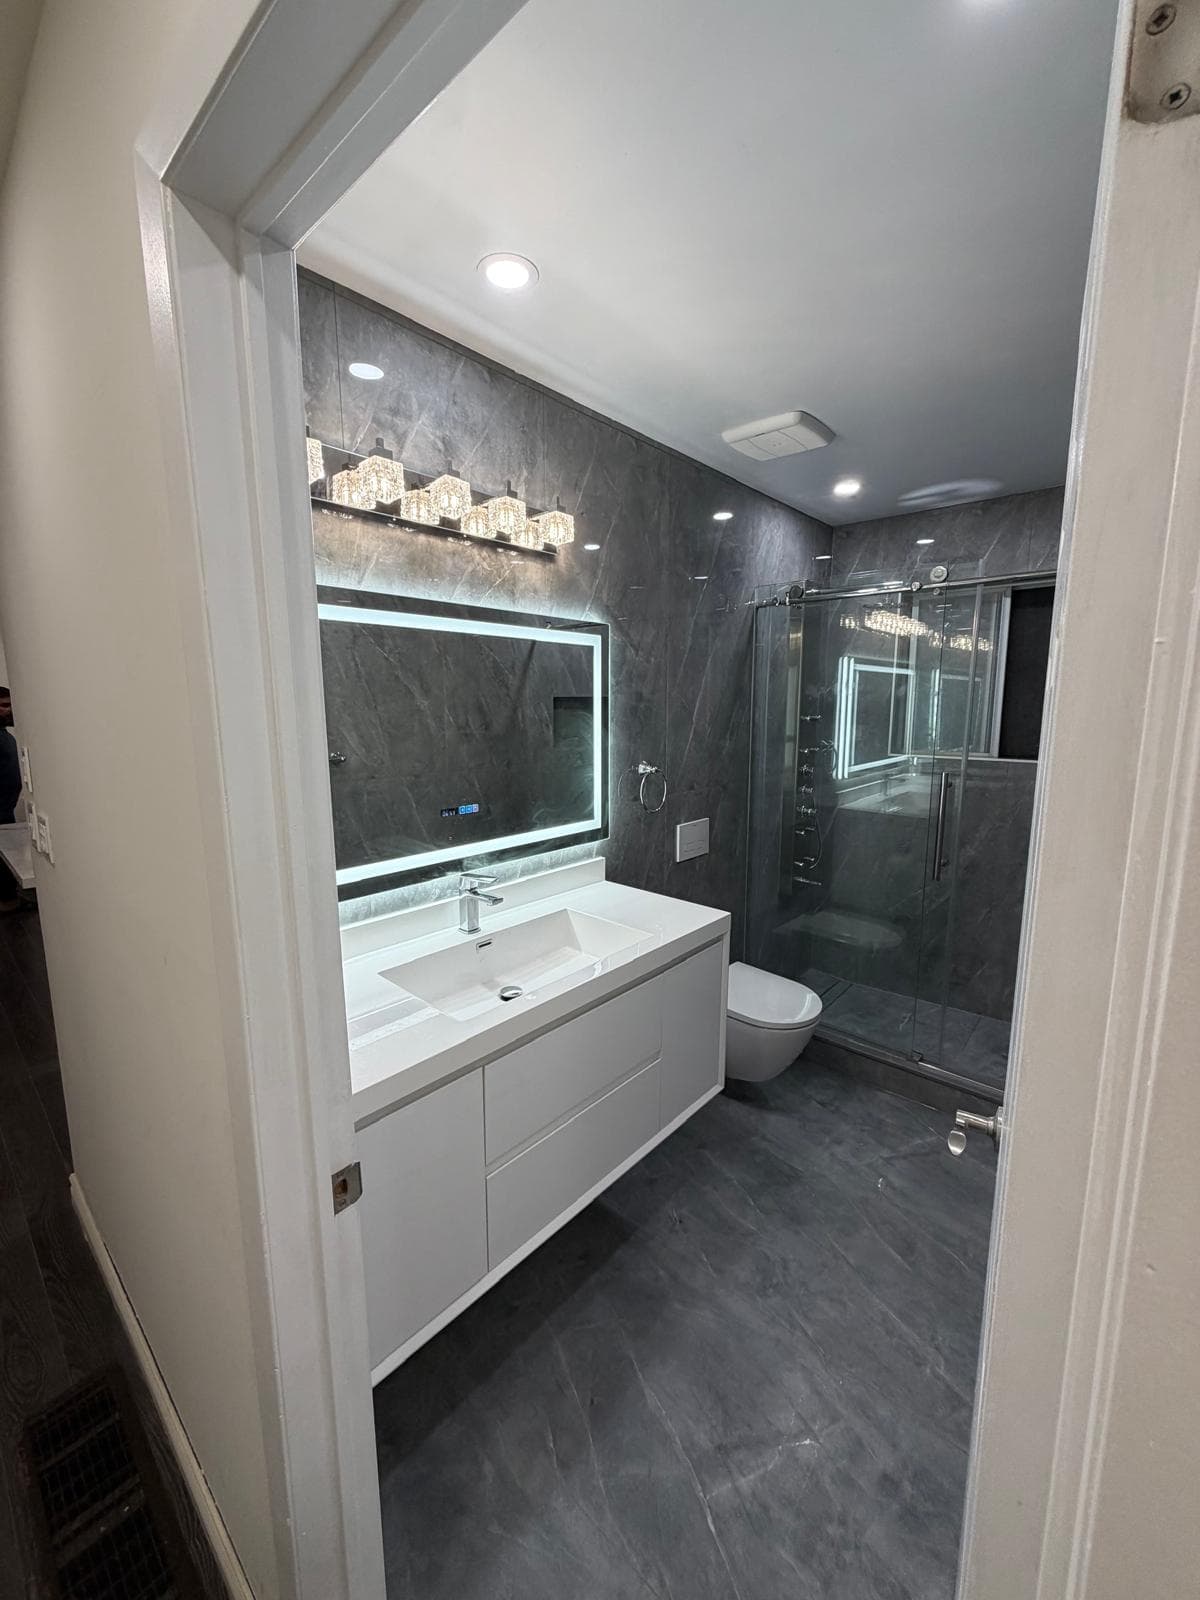
The finished bathroom
Glass walk-in shower, floating vanity with LED mirror, wall-hung toilet and new pot lights.
Before & after
Main Floor & Kitchen Renovation in Mississauga
Mississauga, Ontario
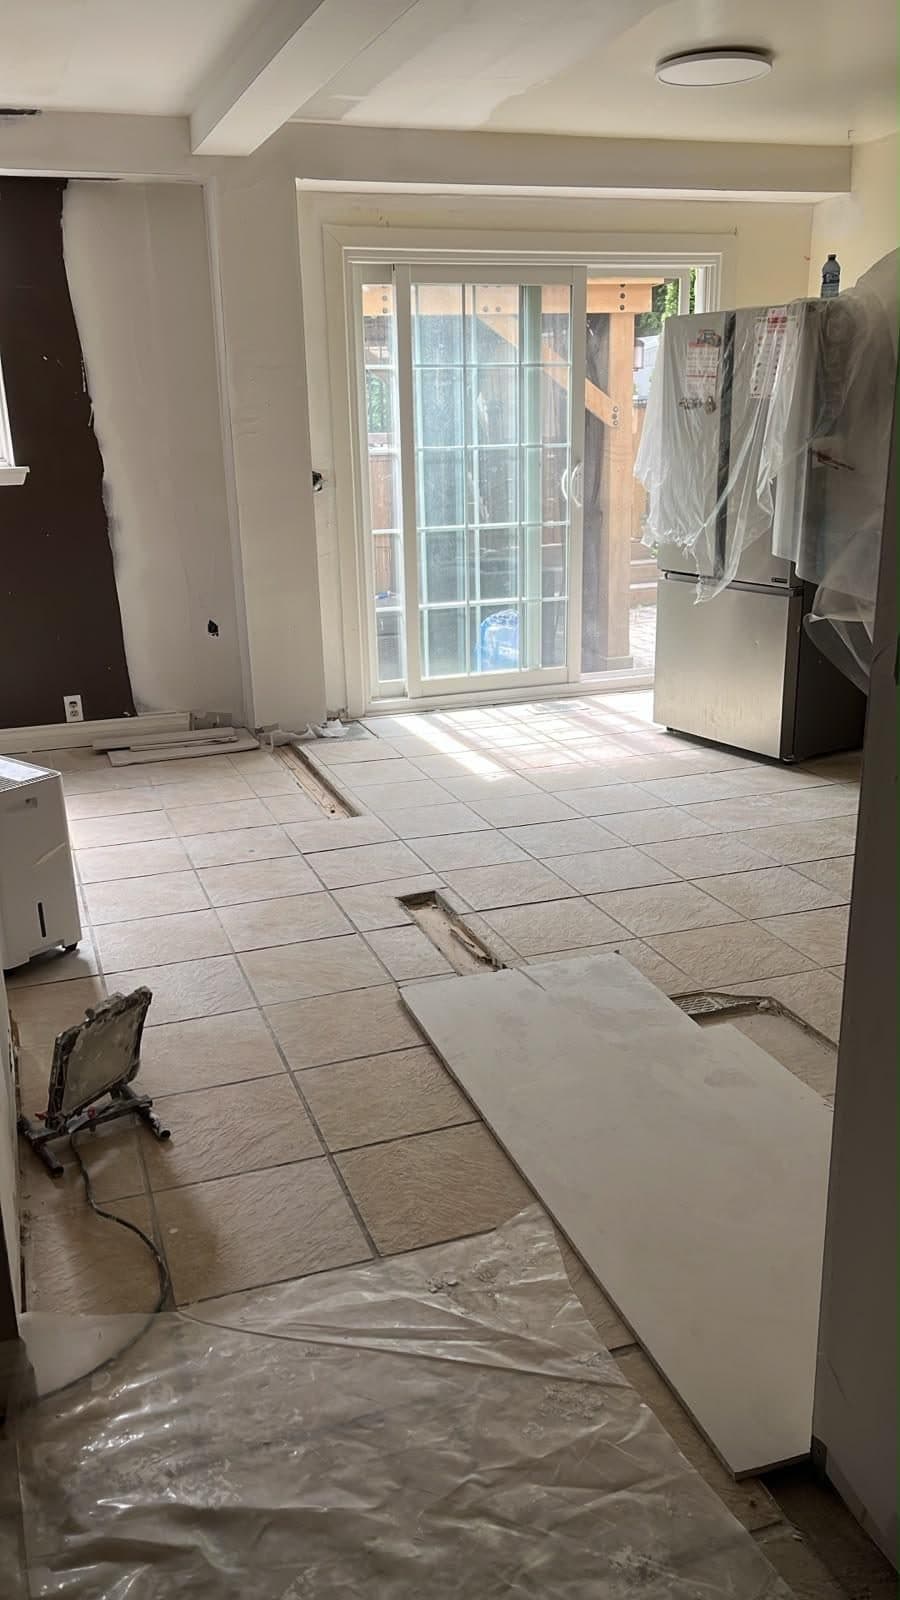
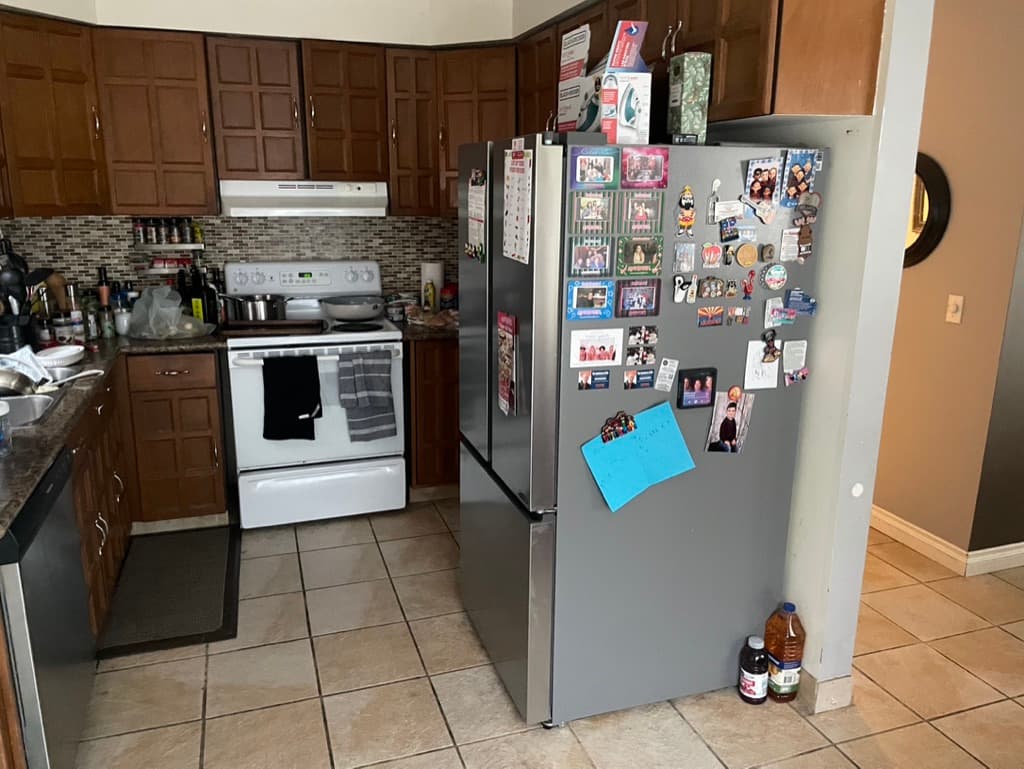
The homeowner loved her neighbourhood but not her kitchen. It was dark, closed-in and cut off from the dining room by a load-bearing wall, with dated cabinets, worn tile and too little storage. She wanted a bright, open space where the family could cook, eat and spend time together.
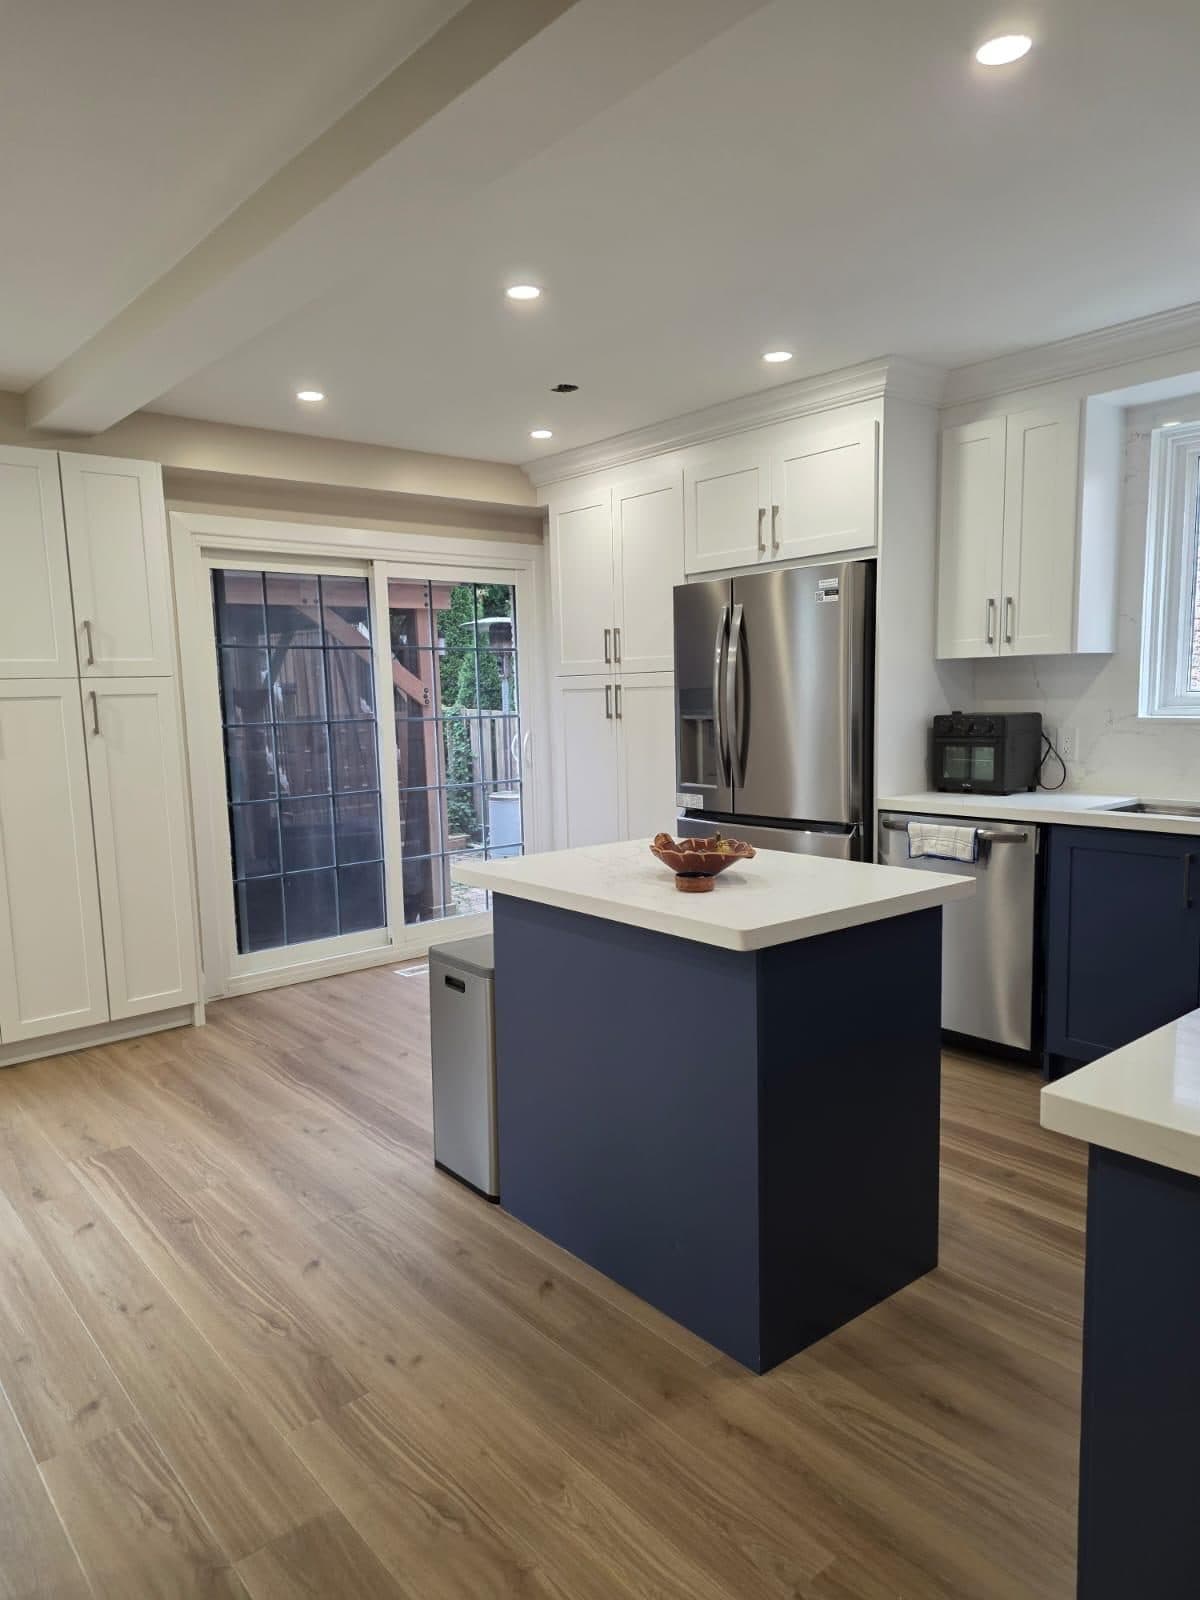
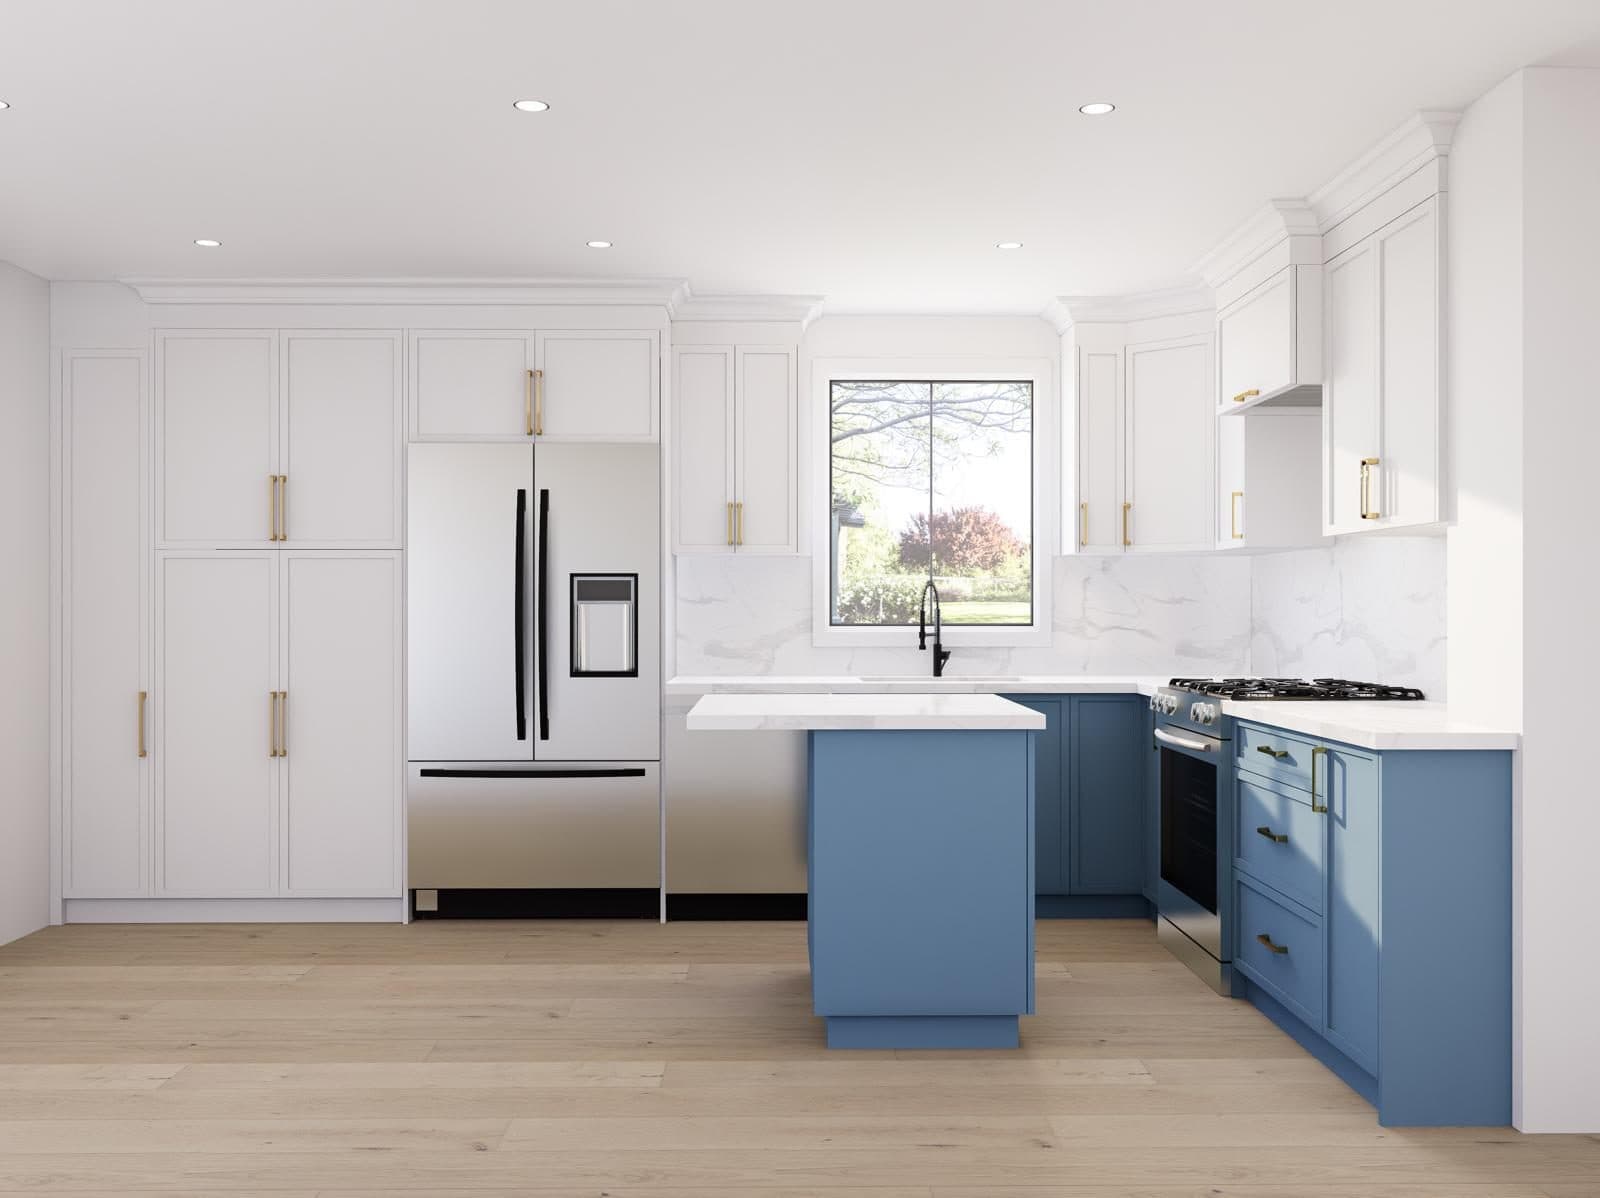
We designed the new kitchen with her in 3D, chose every finish together, then took out the wall and rebuilt the main floor around it. Drag the slider to see the difference, then follow the story step by step.
- 3D design and finish selection before work began
- Load-bearing wall replaced with a new beam
- Navy island, white shaker cabinets and quartz
- Floor-to-ceiling pantry storage
- Waterproof vinyl plank floors and refaced stairs
- Fresh paint and pot lights throughout
The story of this kitchen — from first conversation to final reveal
 1
Where it started
Dark cabinets, worn tile and a load-bearing wall boxing in the kitchen. We sat down with the homeowner on site to hear how she cooks, how the family uses the space and what wasn’t working.
 2
Seeing it before we build it
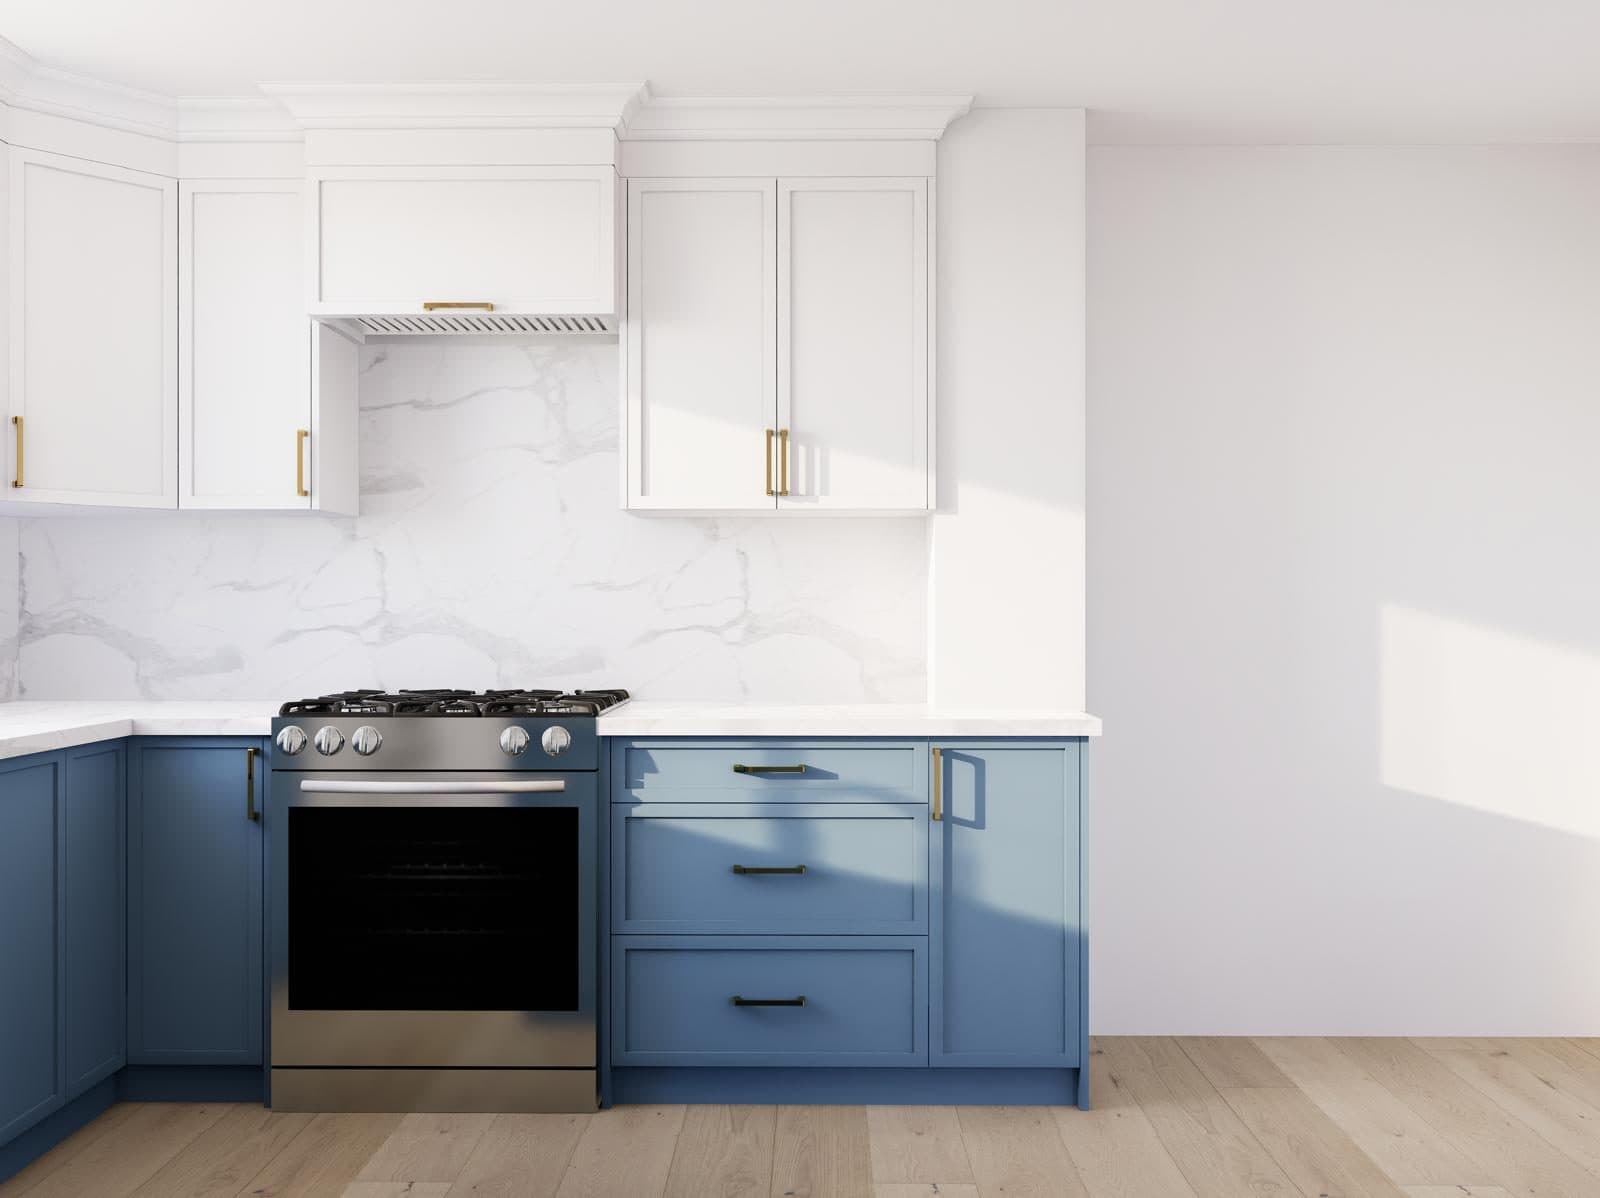
We measured the room and designed a new open layout, then presented it as a 3D rendering. She could see the island, pantry wall and appliance spots, and fine-tune them, before a single wall came down.
 3
Choosing every finish together
Navy lowers or all white? Brass or black handles? We reviewed samples and renderings together to choose cabinets, countertop, backsplash, hardware, flooring, paint colours and even the stair spindles, so there were no surprises later.
 4
Planning the storage
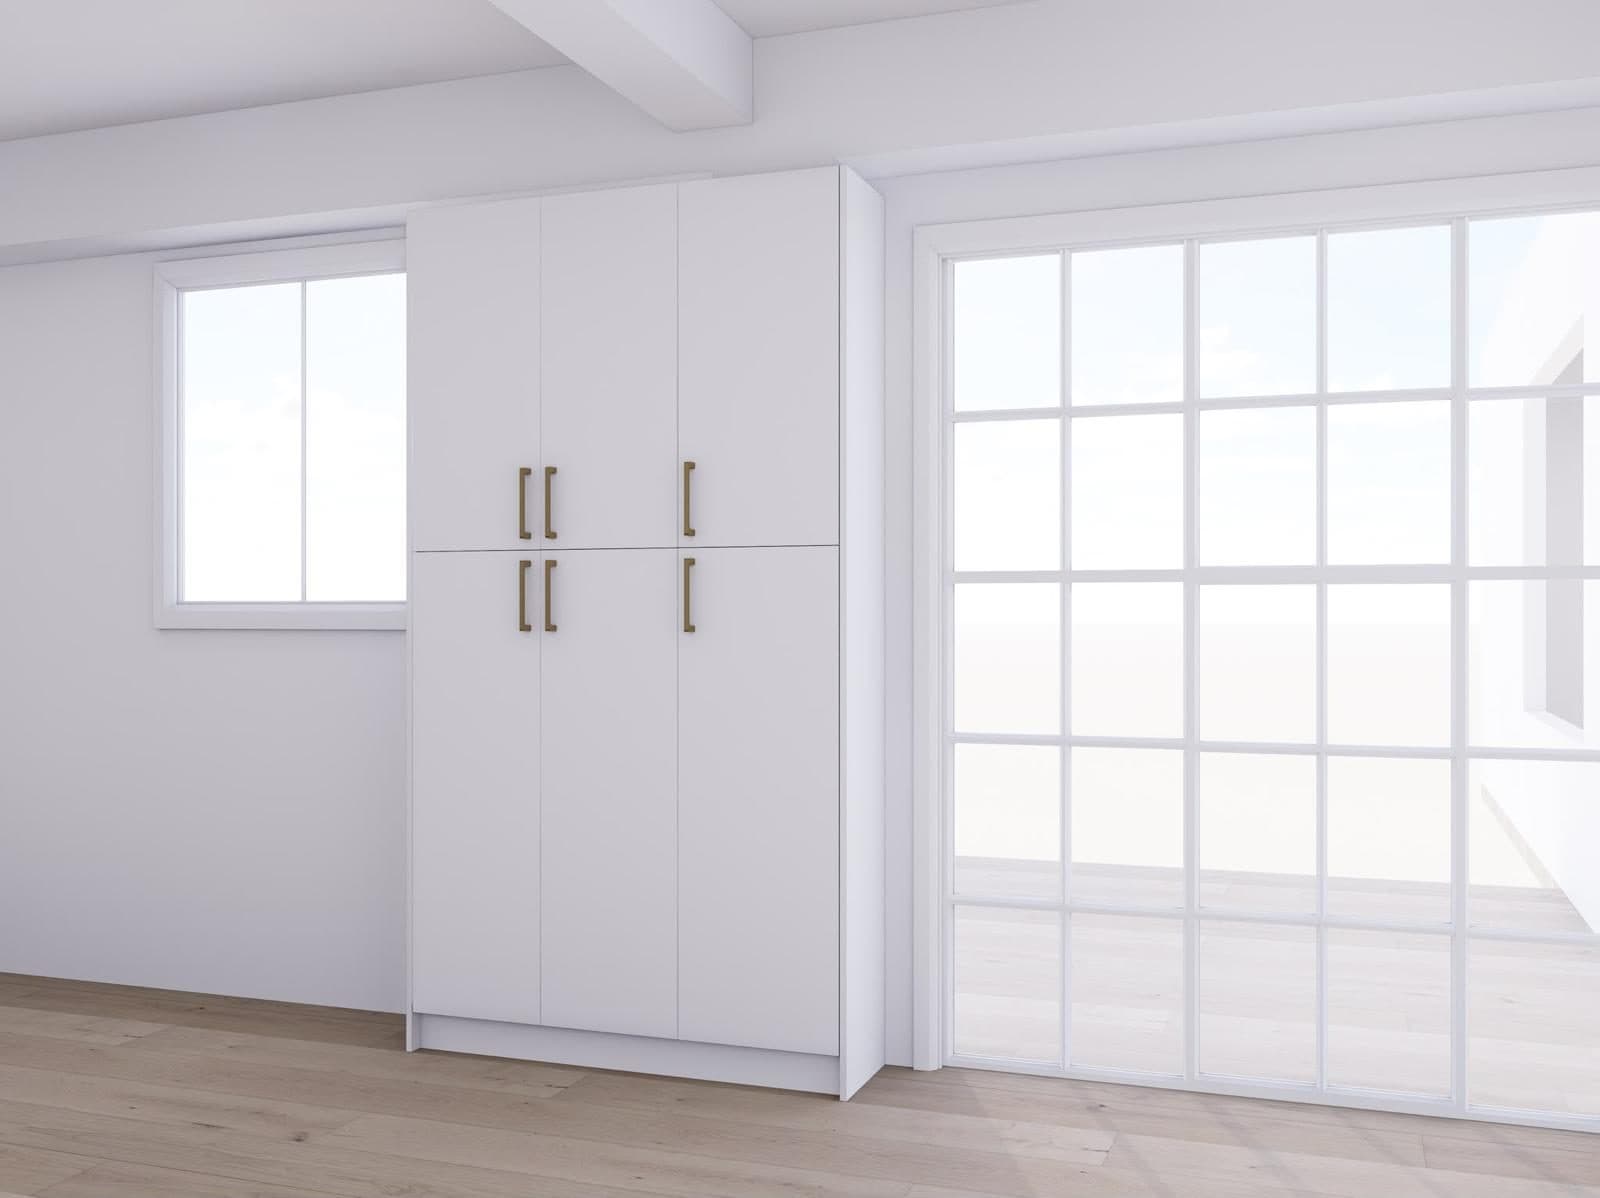
A wall of floor-to-ceiling pantry cabinets beside the patio door solved the storage problem. Planning it in 3D meant it lined up perfectly with the door and window trim.
 5
Taking down the wall
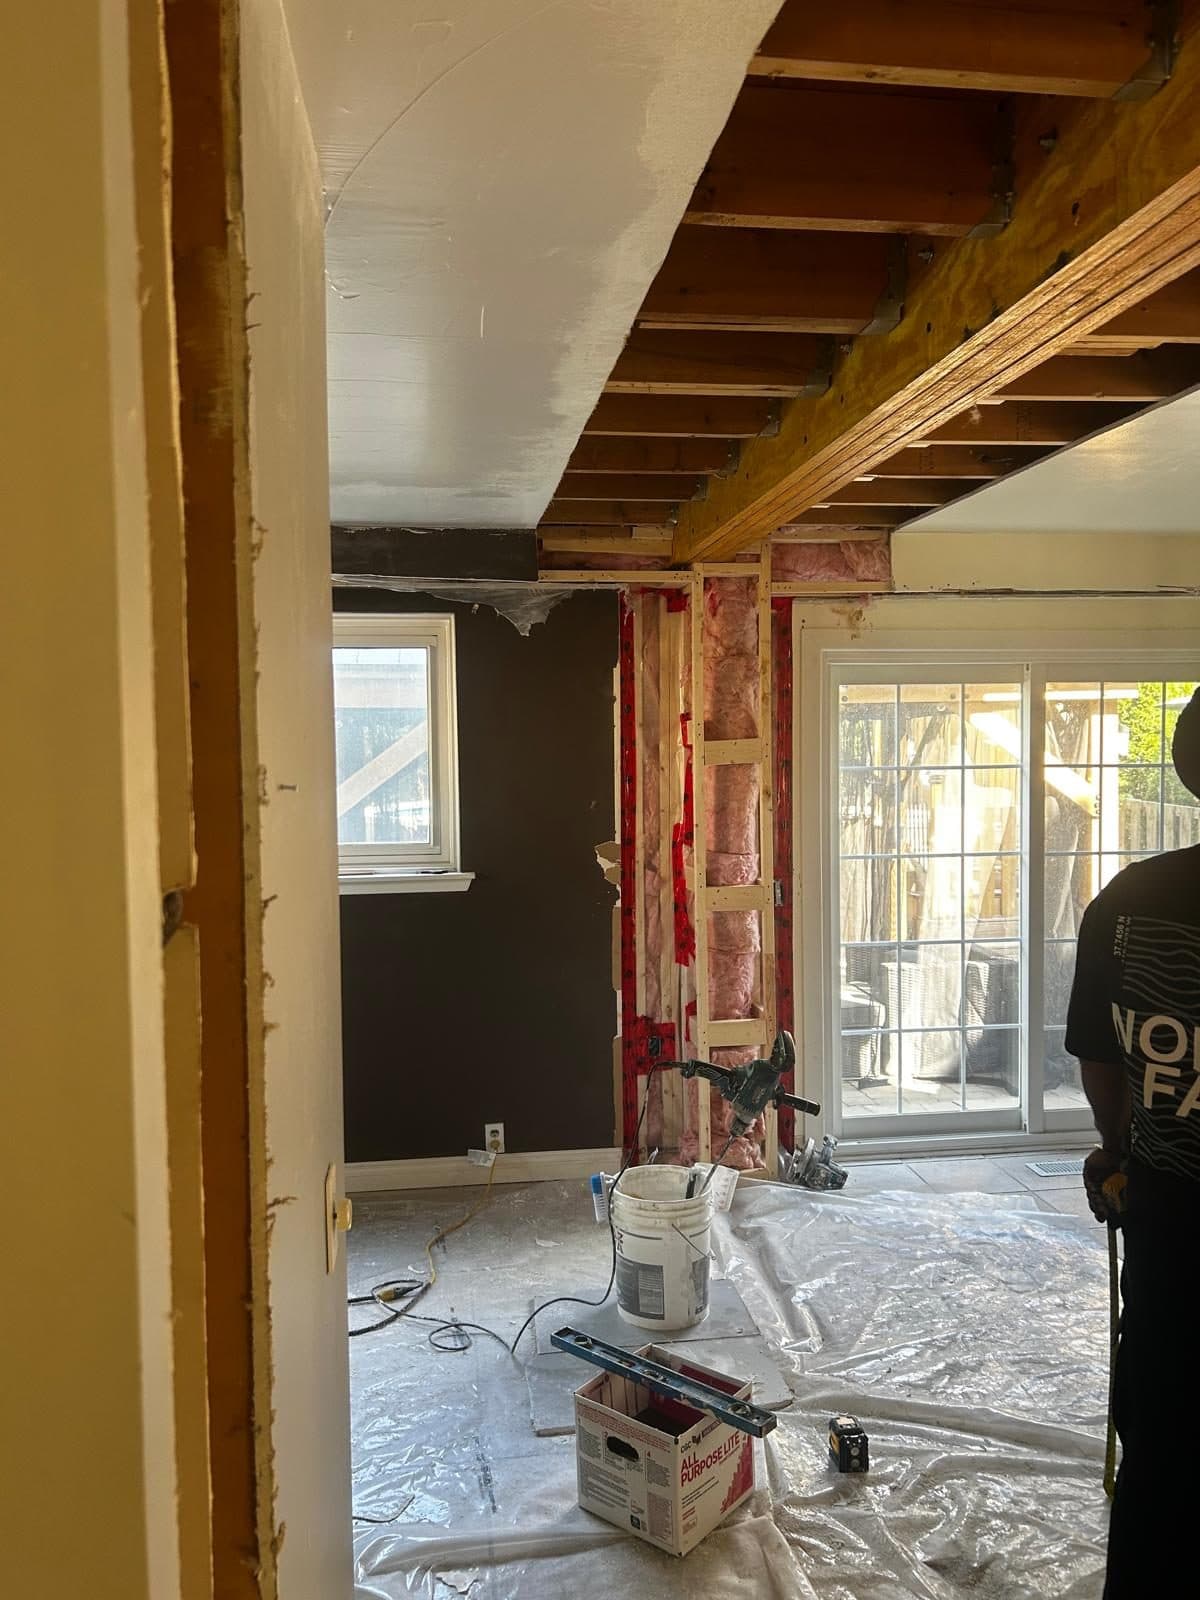
The biggest change of all. With the floor above safely supported, we removed the load-bearing wall and installed a new beam to carry the joists, opening the kitchen to the dining area for good.
 6
Back to a clean slate
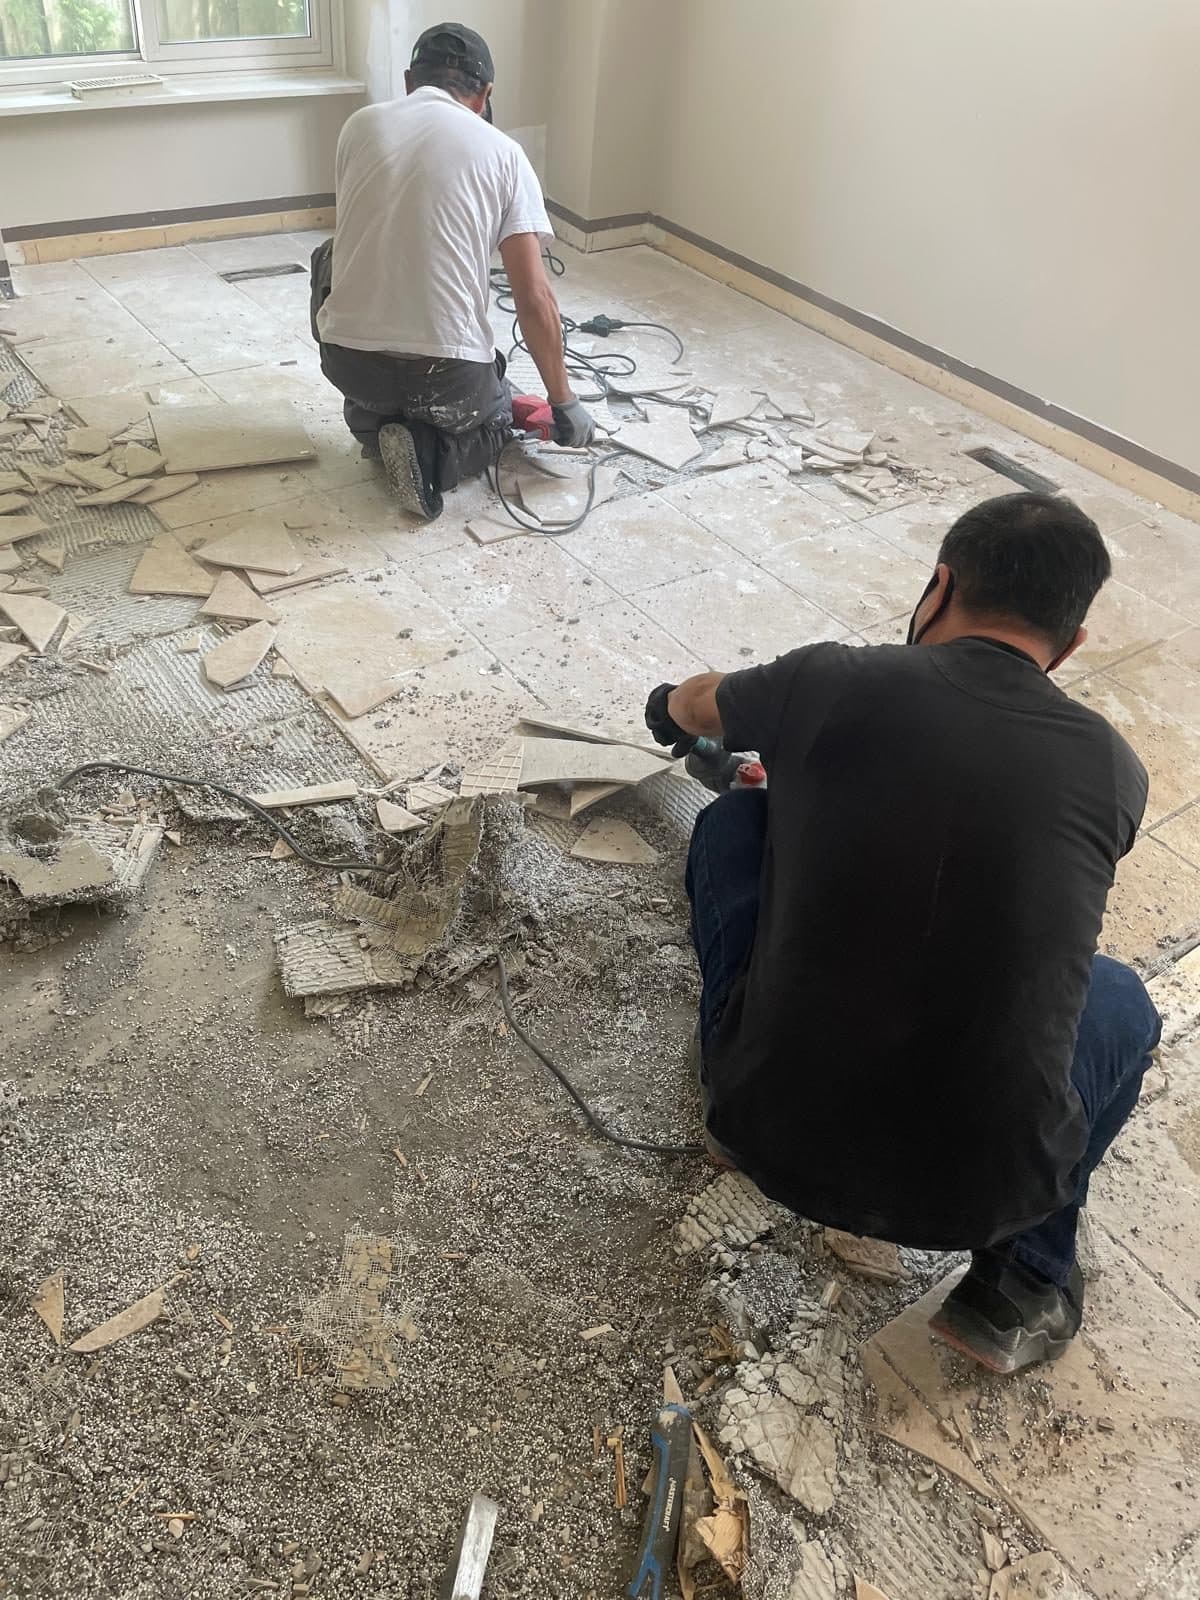
The old ceramic tile and thinset came up across the whole main floor, leaving a clean, flat subfloor ready for one continuous new floor.
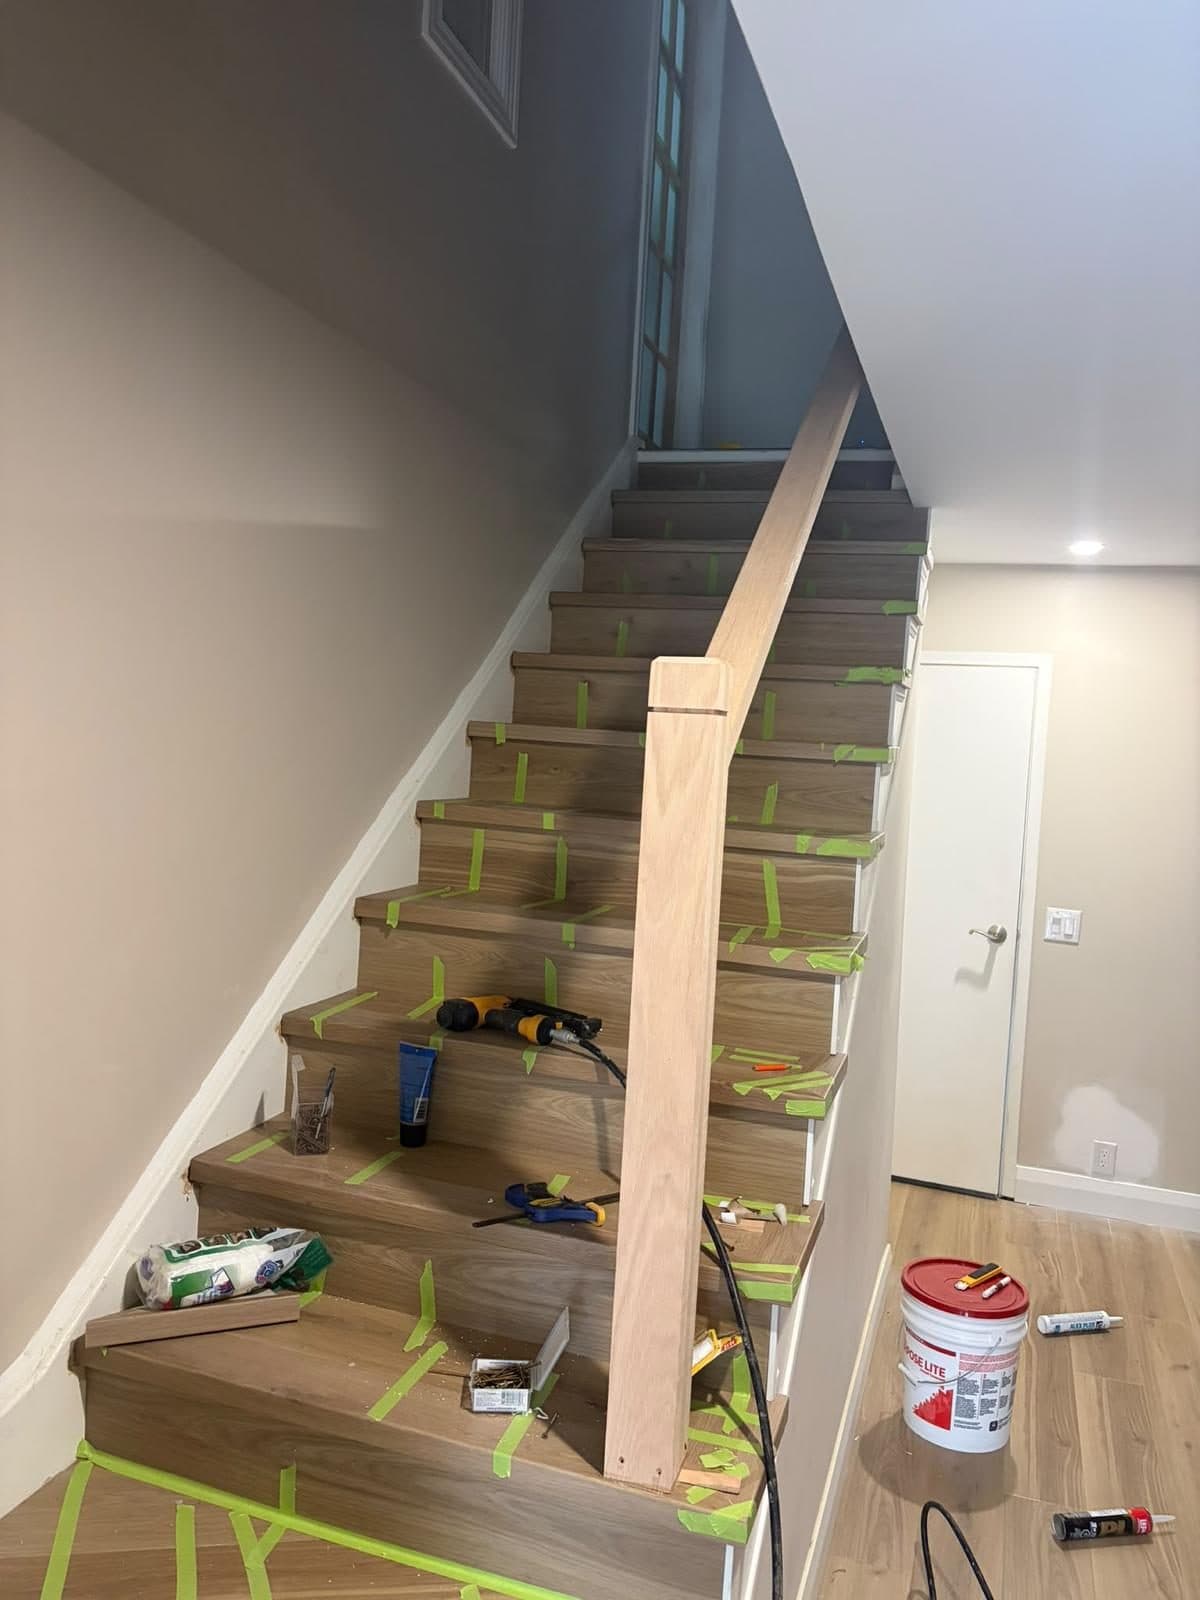 7
One floor, from the kitchen to the stairs
Waterproof vinyl plank now runs through the kitchen, dining and living areas, and the stairs were refaced with matching treads and nosings so everything flows.
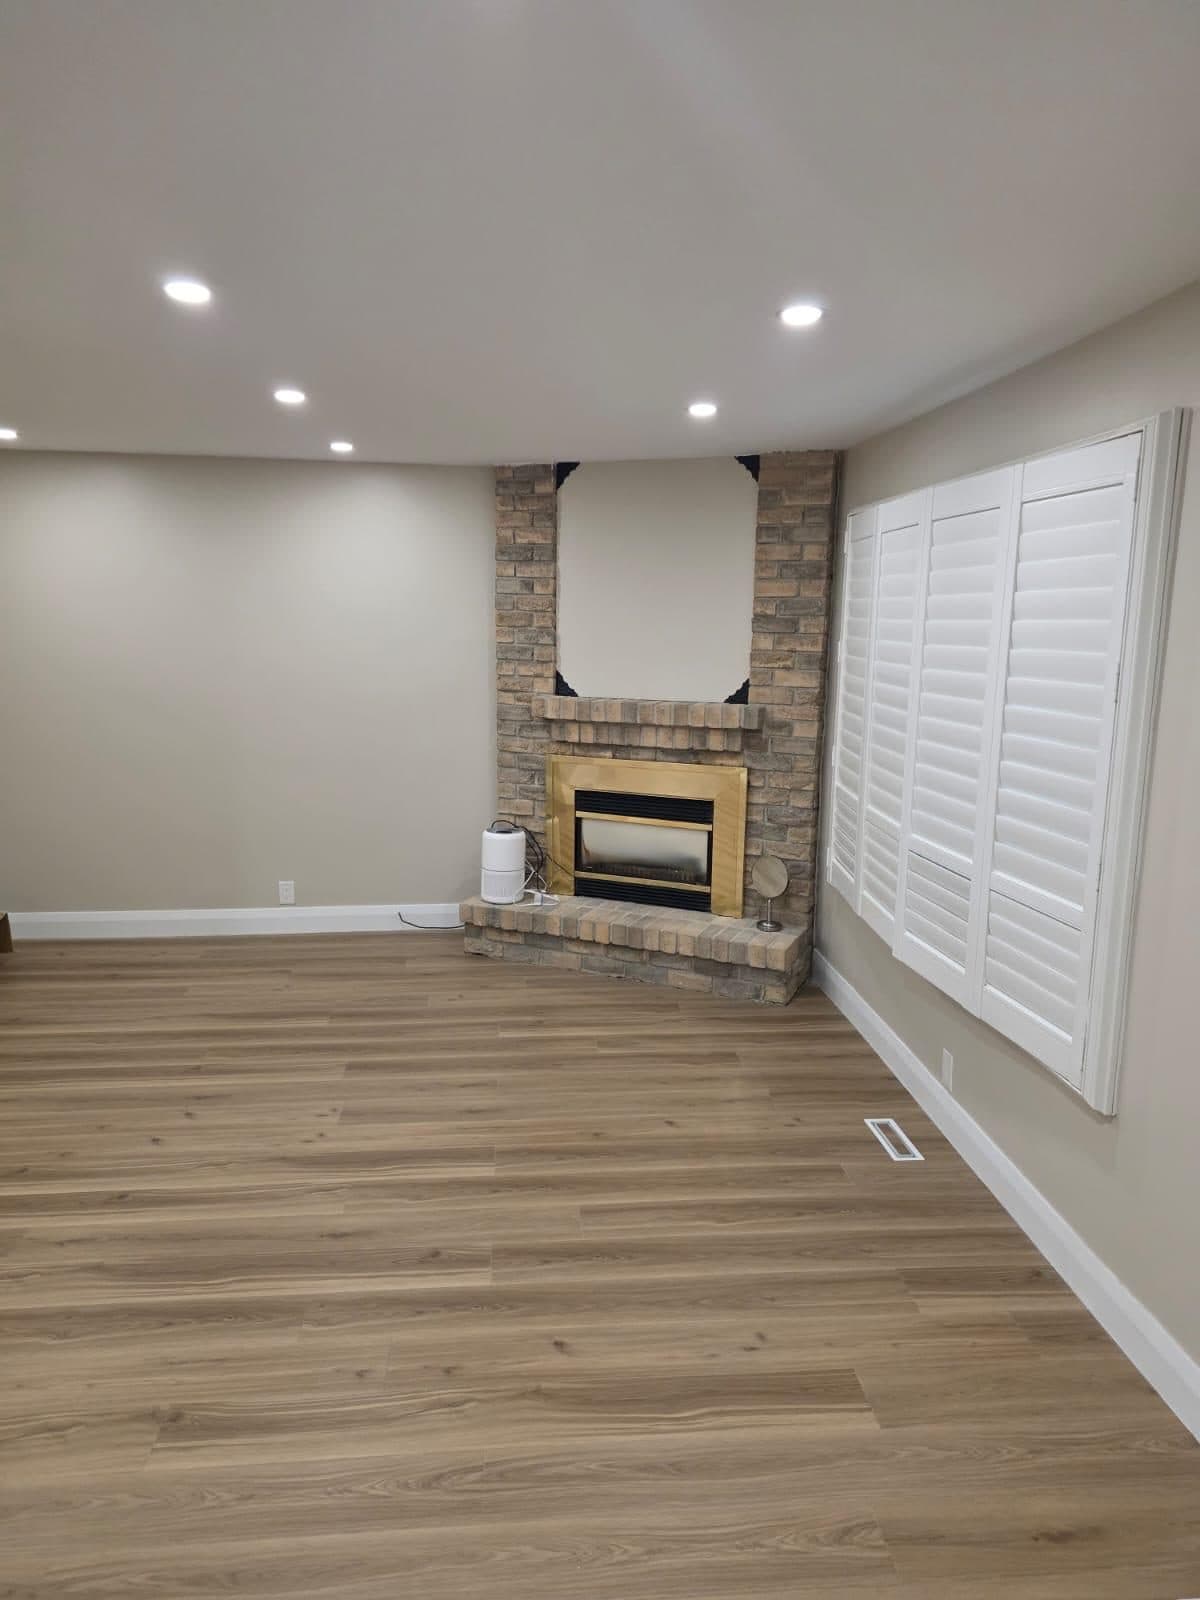 8
Light, bright and repainted
The dark walls are gone. Warm, light paint and new pot lights brighten every room, including the living room around the original fireplace.
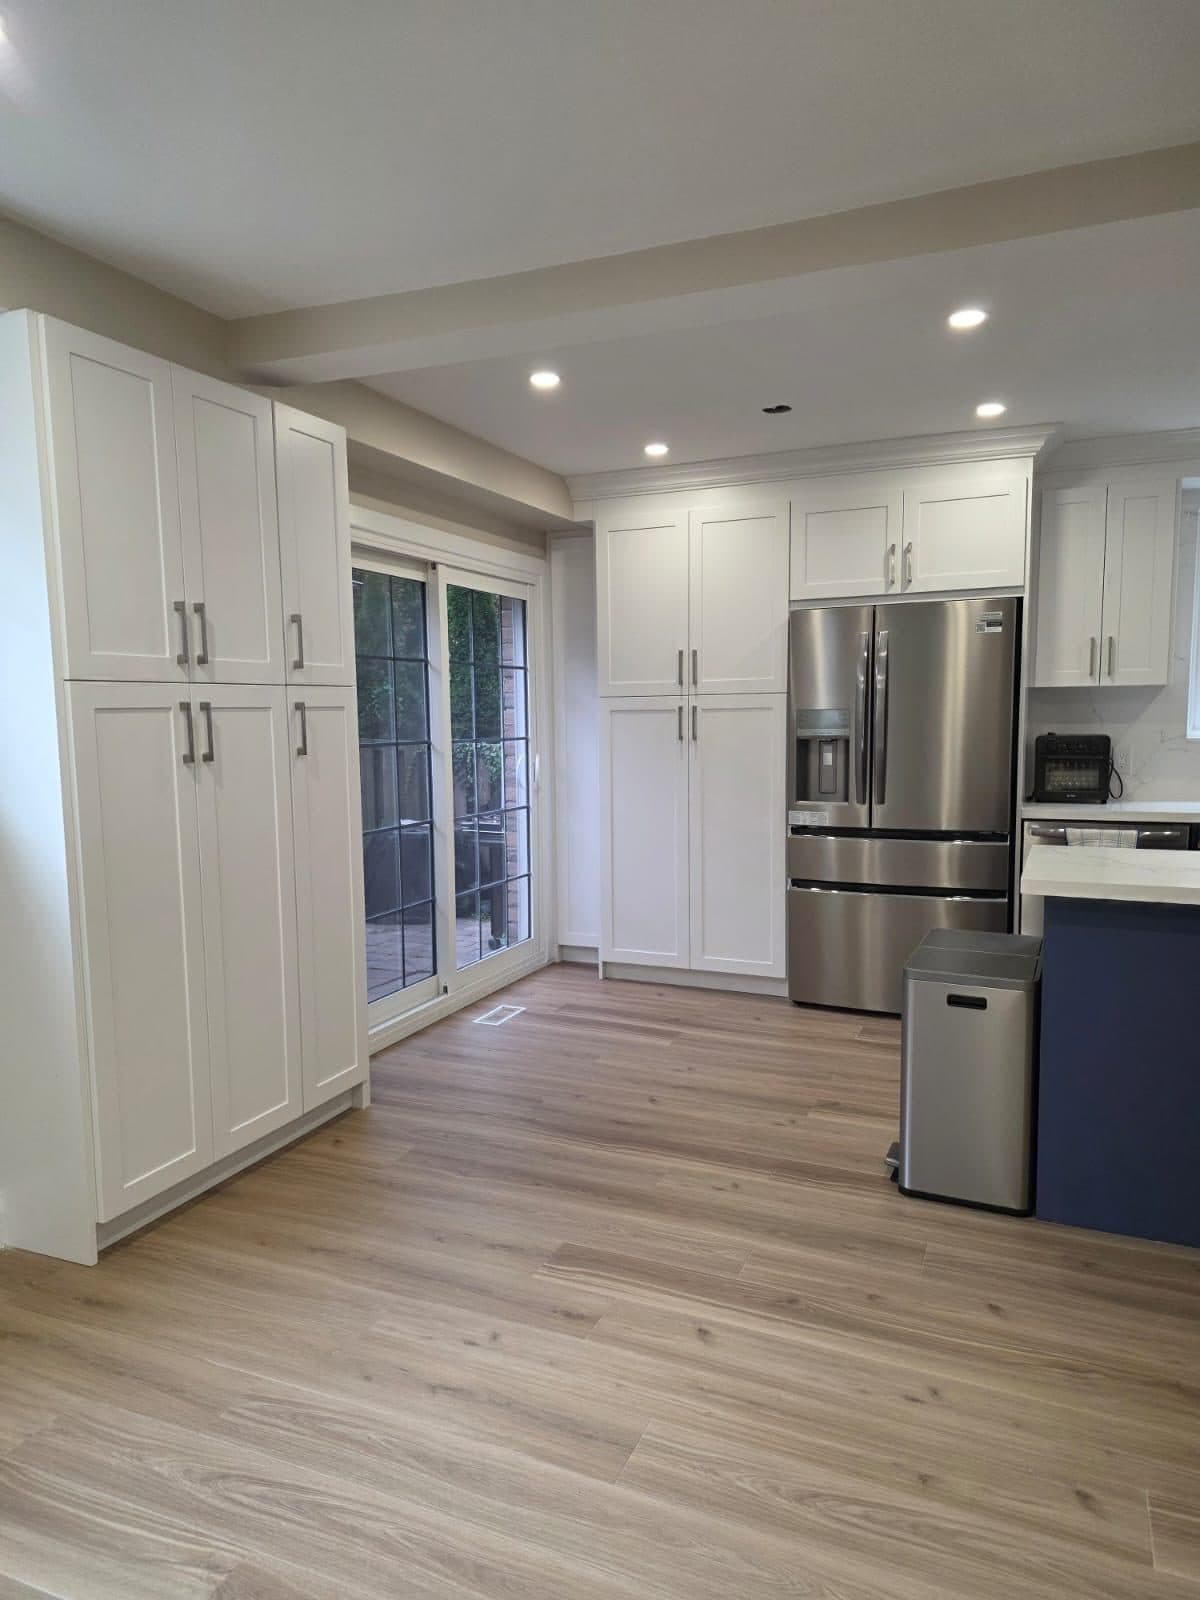 9
The reveal
Exactly what she saw in the 3D design: a wall of white pantry storage, a navy island with quartz counters, brass hardware and stainless appliances.
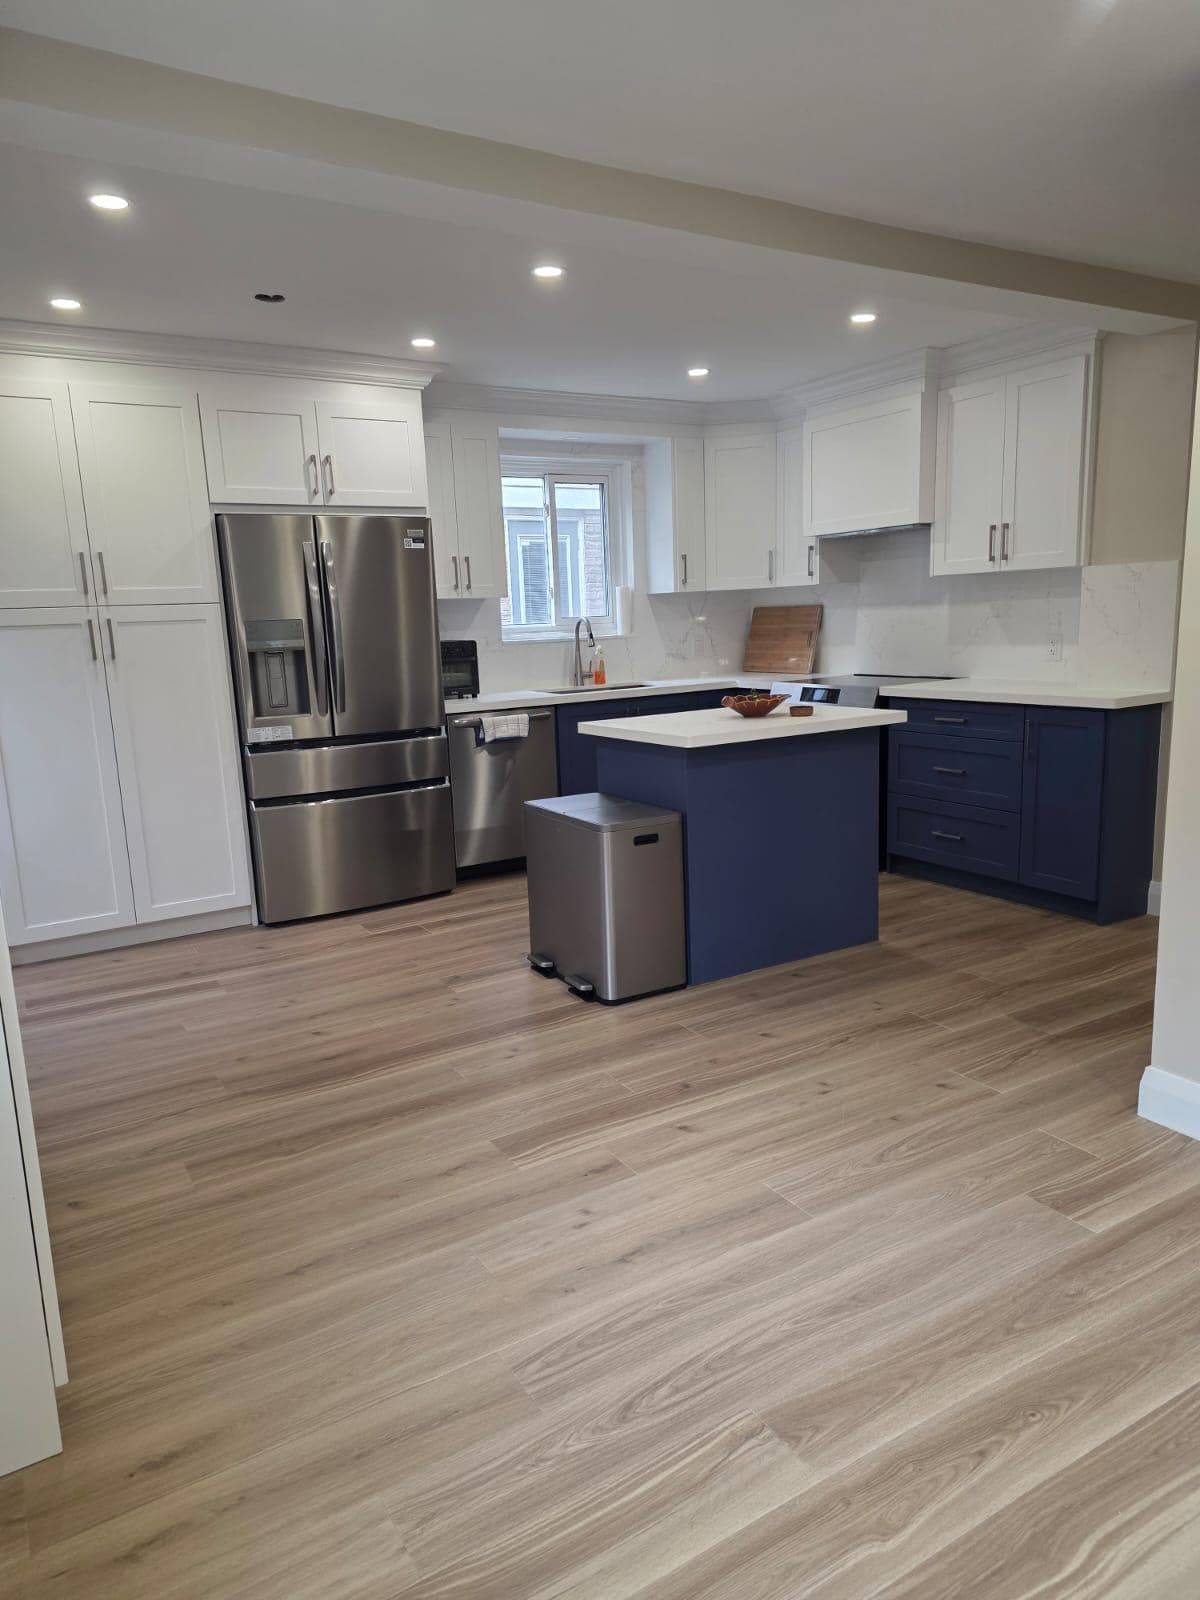 10
Made for gathering
Where a wall used to divide the rooms, the kitchen, island and dining area now flow together, with space to cook, eat and spend time as a family.
Walk through the finished main floor
Before & after
Dining Room Repaint in Mississauga
Mississauga, Ontario
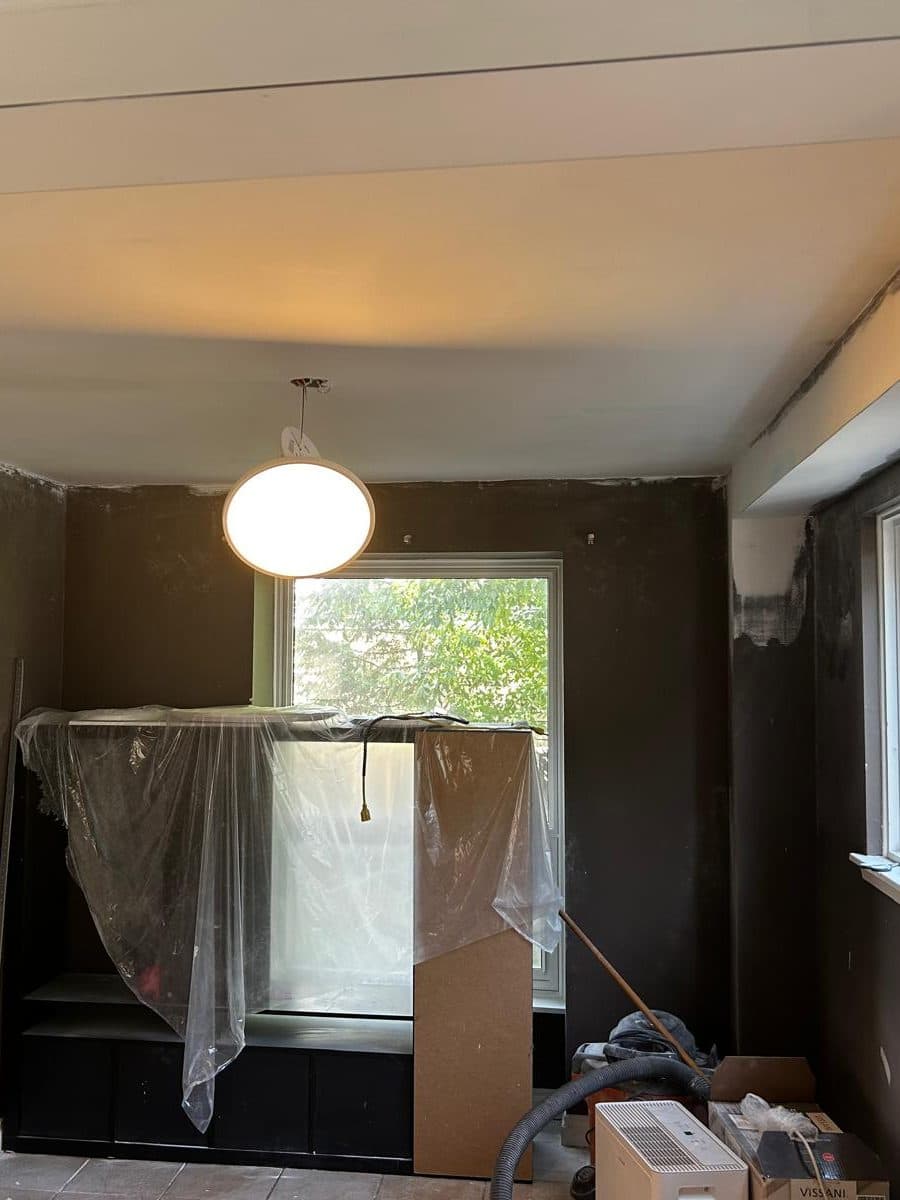
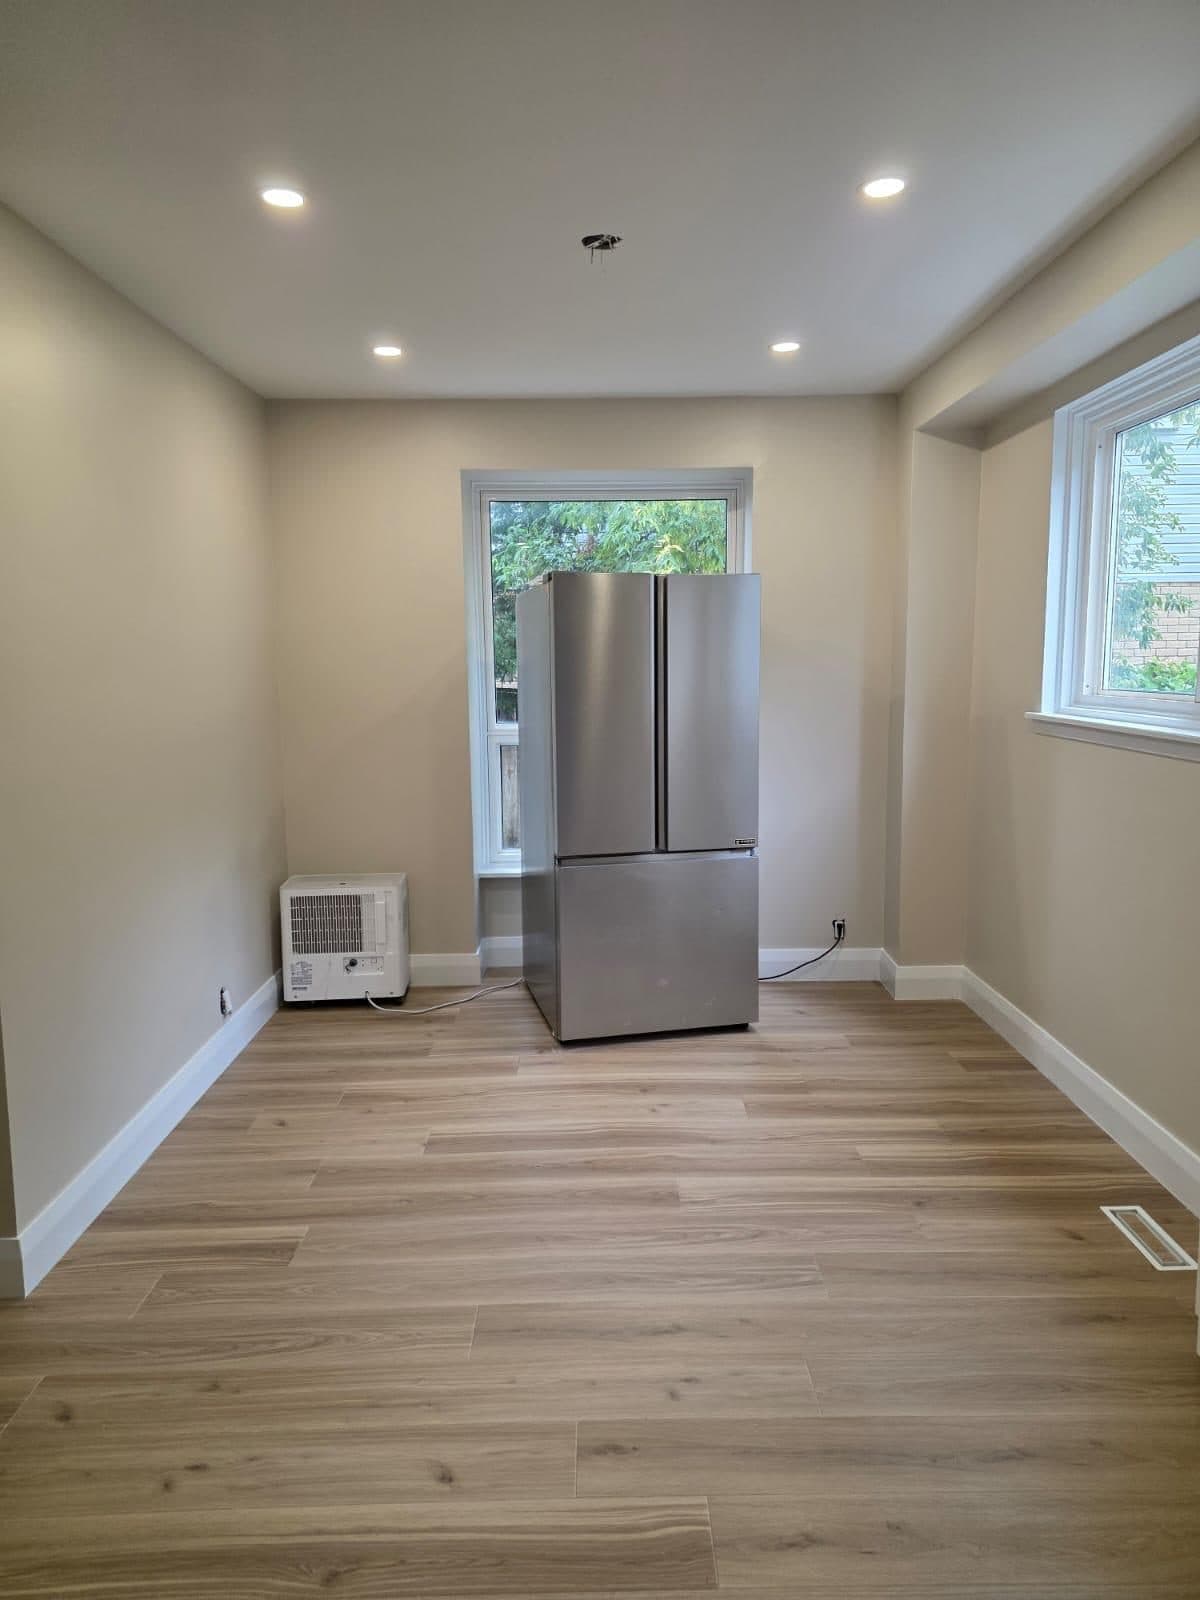
Dark brown walls made this dining area feel small. We repaired the drywall, primed over the dark colour and repainted the walls, ceiling and trim in light, warm neutrals, then added pot lights and new flooring.
- Drywall patching and sanding
- Stain-blocking primer over dark paint
- Walls, ceiling and trim painted
- New pot lights and baseboards
Before & after
Load-Bearing Wall Removal in Mississauga
Mississauga, Ontario
A wall between the kitchen and the dining area made this main floor feel closed in. We supported the floor above, removed the wall and installed a new beam and posts, so the kitchen now opens onto the dining area and the patio doors.
Drag the slider to compare the opened-up structure with the finished open-concept kitchen.
- Temporary shoring while the wall came out
- New beam carrying the floor joists above
- New posts and framing at each end
- Drywall, paint and pot lights to finish
- New kitchen and vinyl plank flooring
Before & after
Custom Media Wall in Kitchener-Waterloo
Kitchener-Waterloo, Ontario
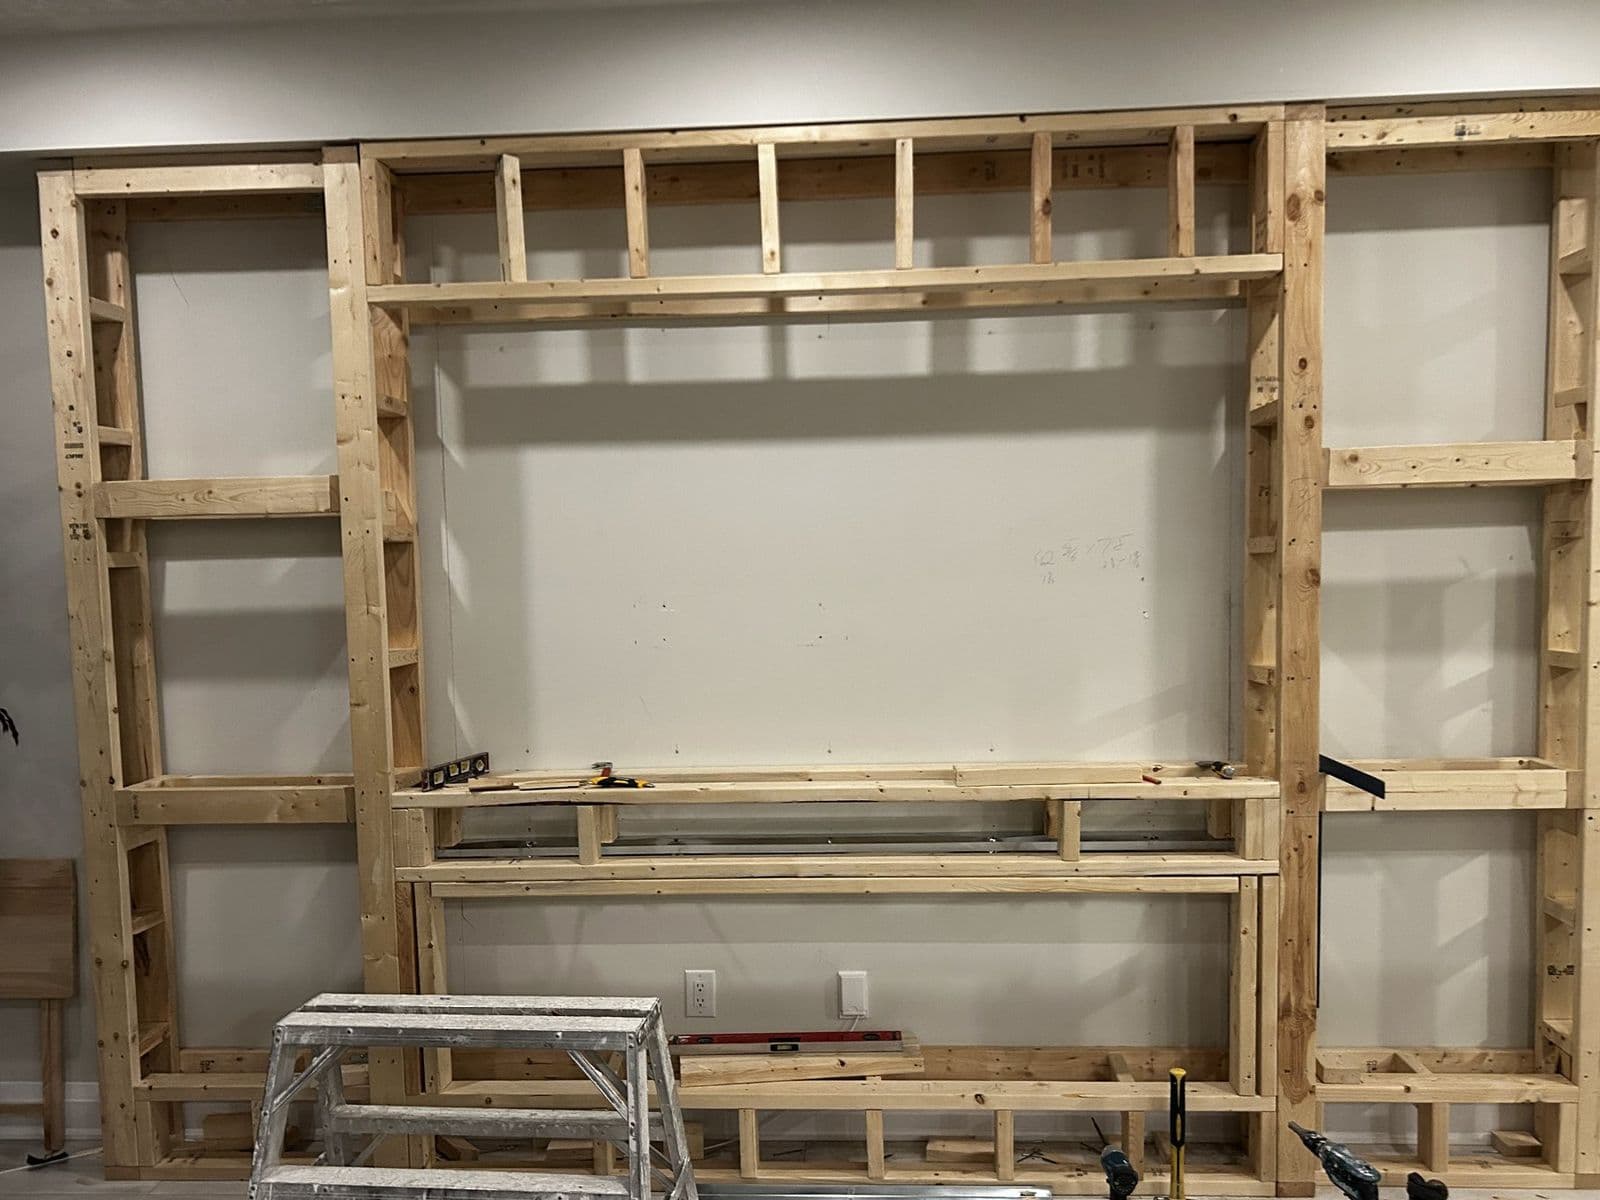
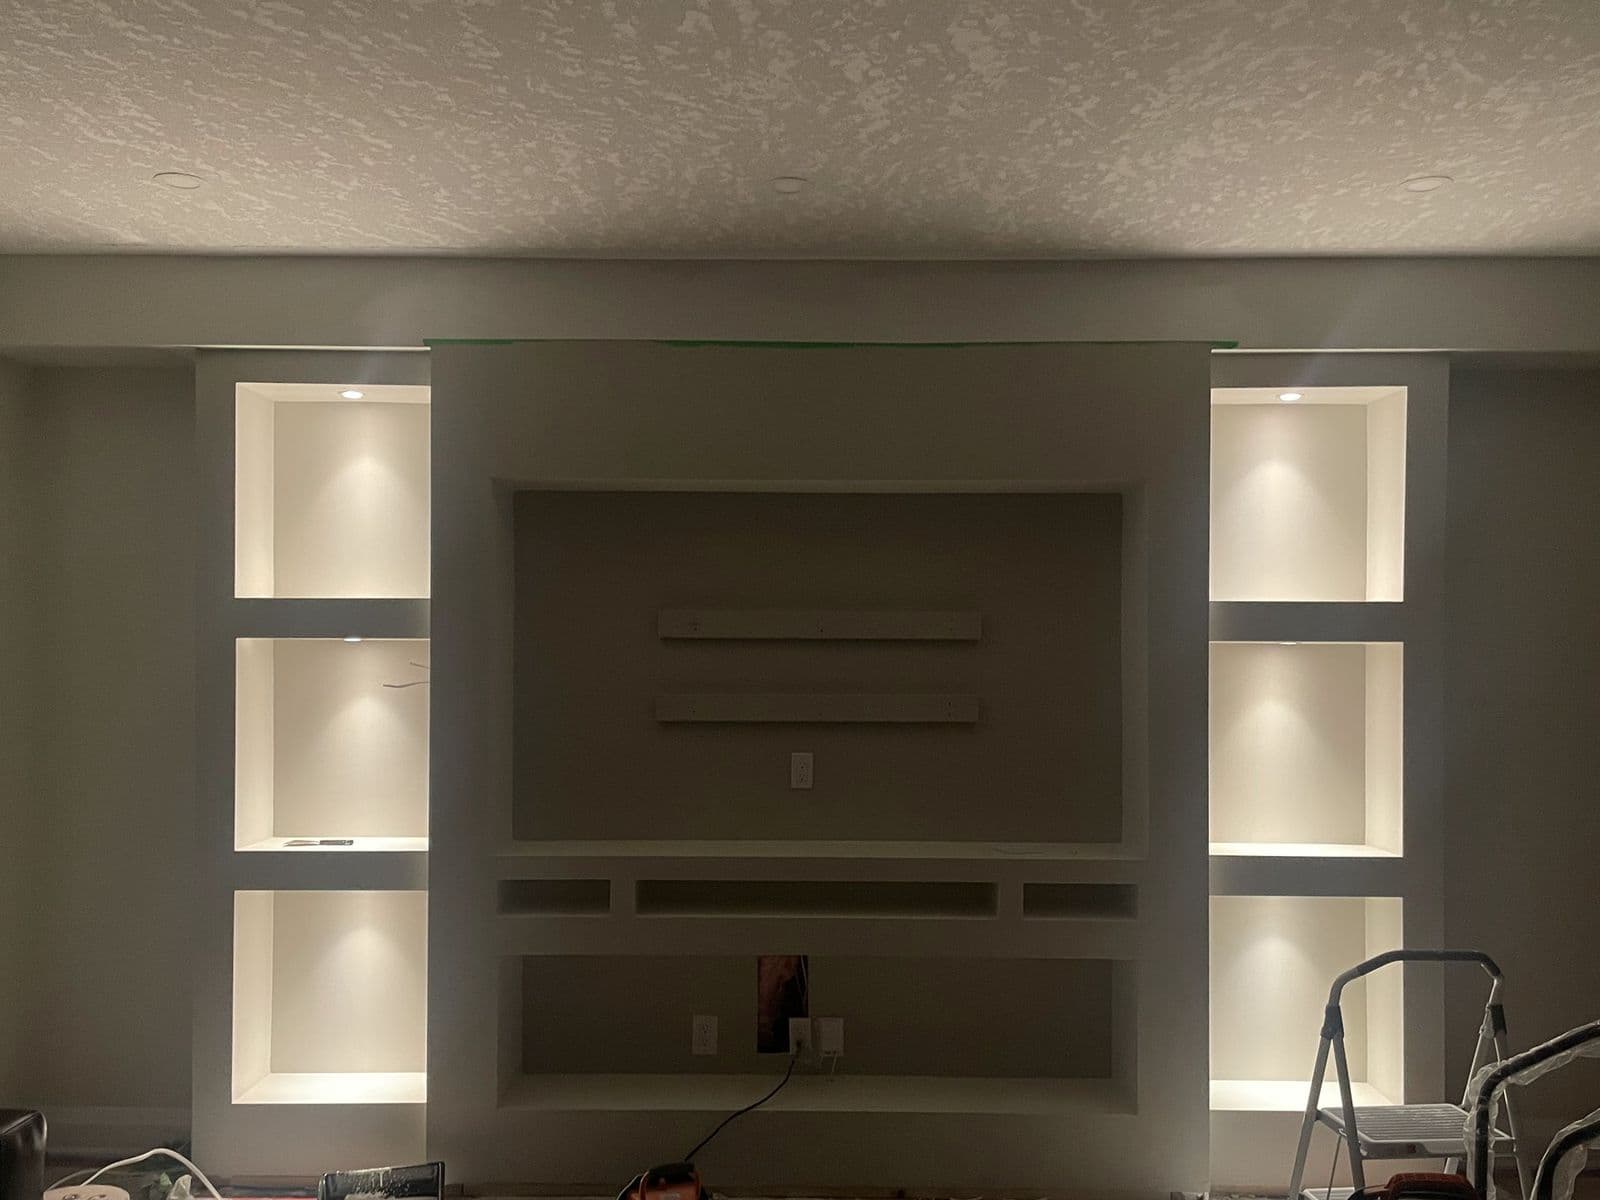
The homeowners wanted a living-room feature wall that hides every cable and gives the TV a proper home. We designed and built a full-width media wall with a recessed TV niche, a low media shelf, display towers on both sides and LED lighting in every niche.
Drag the slider to compare the framed structure with the finished wall, then follow the build step by step.
- Custom 2x4 framing anchored to the wall
- Recessed TV niche with solid mounting backing
- Hidden power and low-voltage wiring
- Display towers with lit niches
- Drywall, corner bead and three-coat finish
- Primed and painted in a two-tone finish
How we built it — from studs to lighting
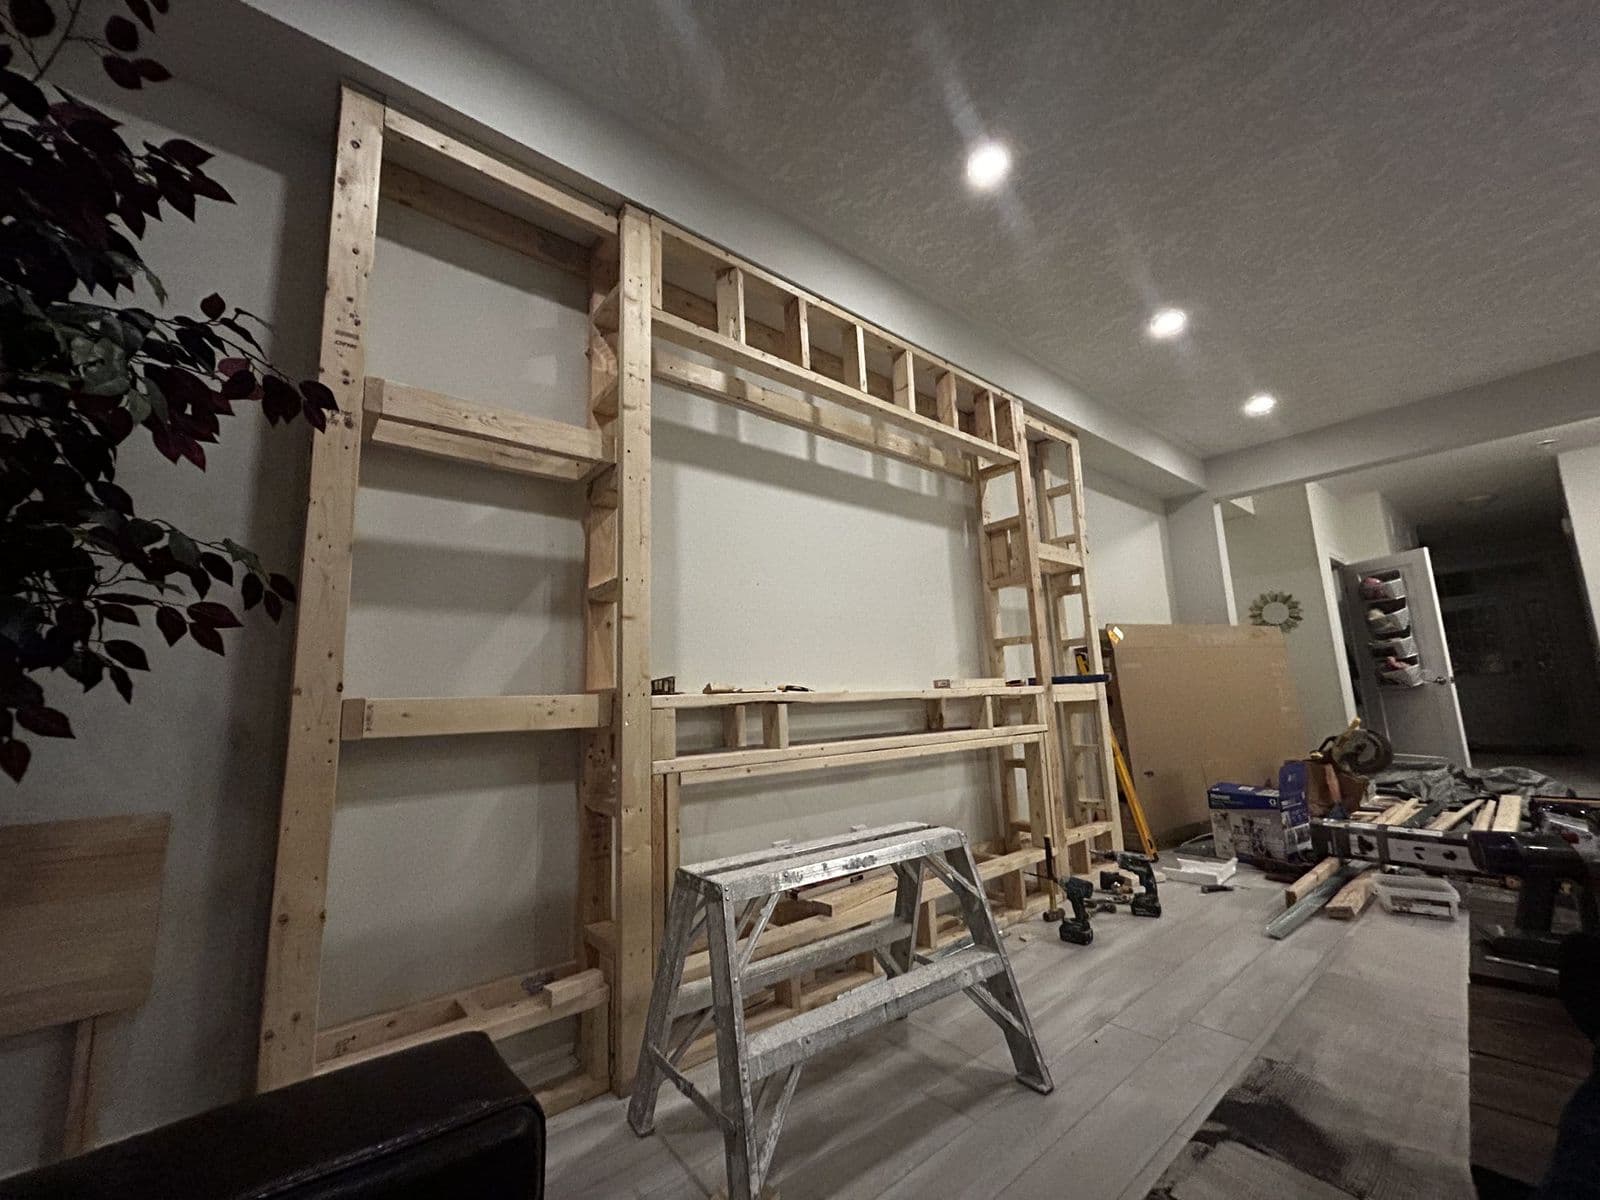 1
Design and framing
We laid out the TV opening, shelves and towers to suit the room, then framed the whole wall square and level.
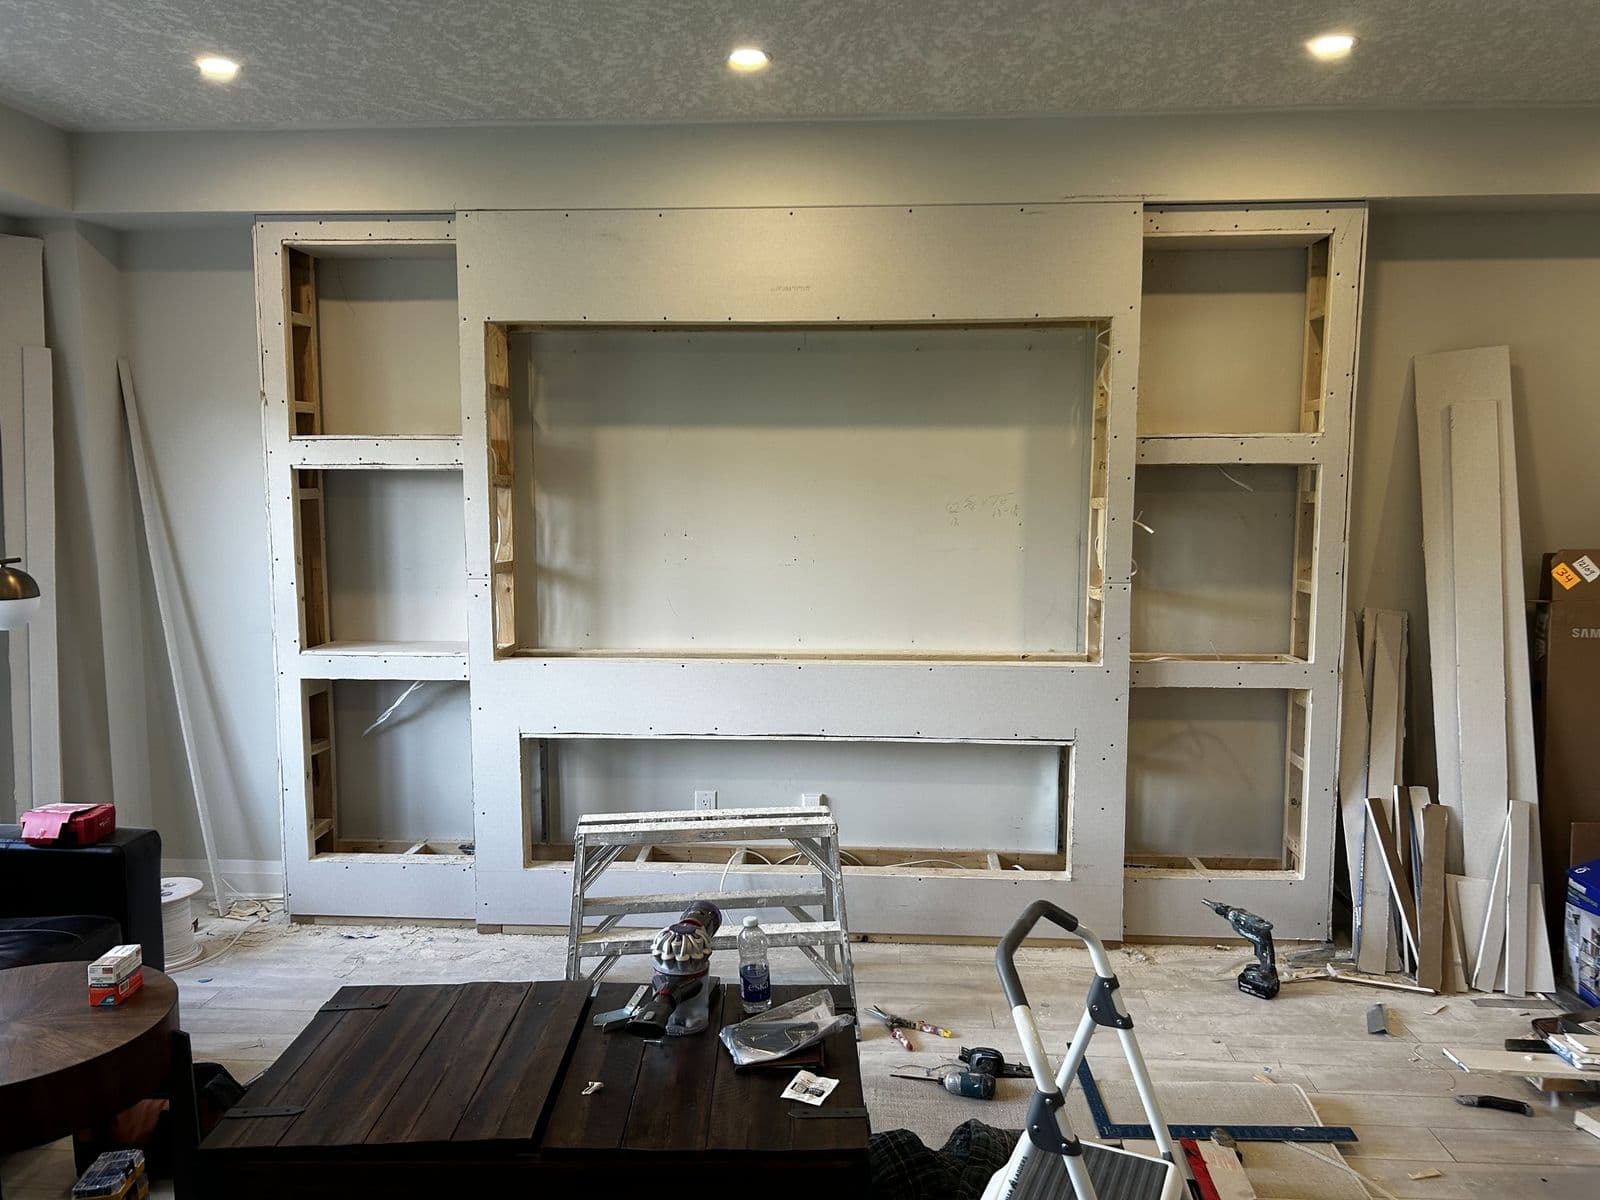 2
Wiring and drywall
Power and cable runs went in before boarding, with blocking behind the TV niche for a secure mount.
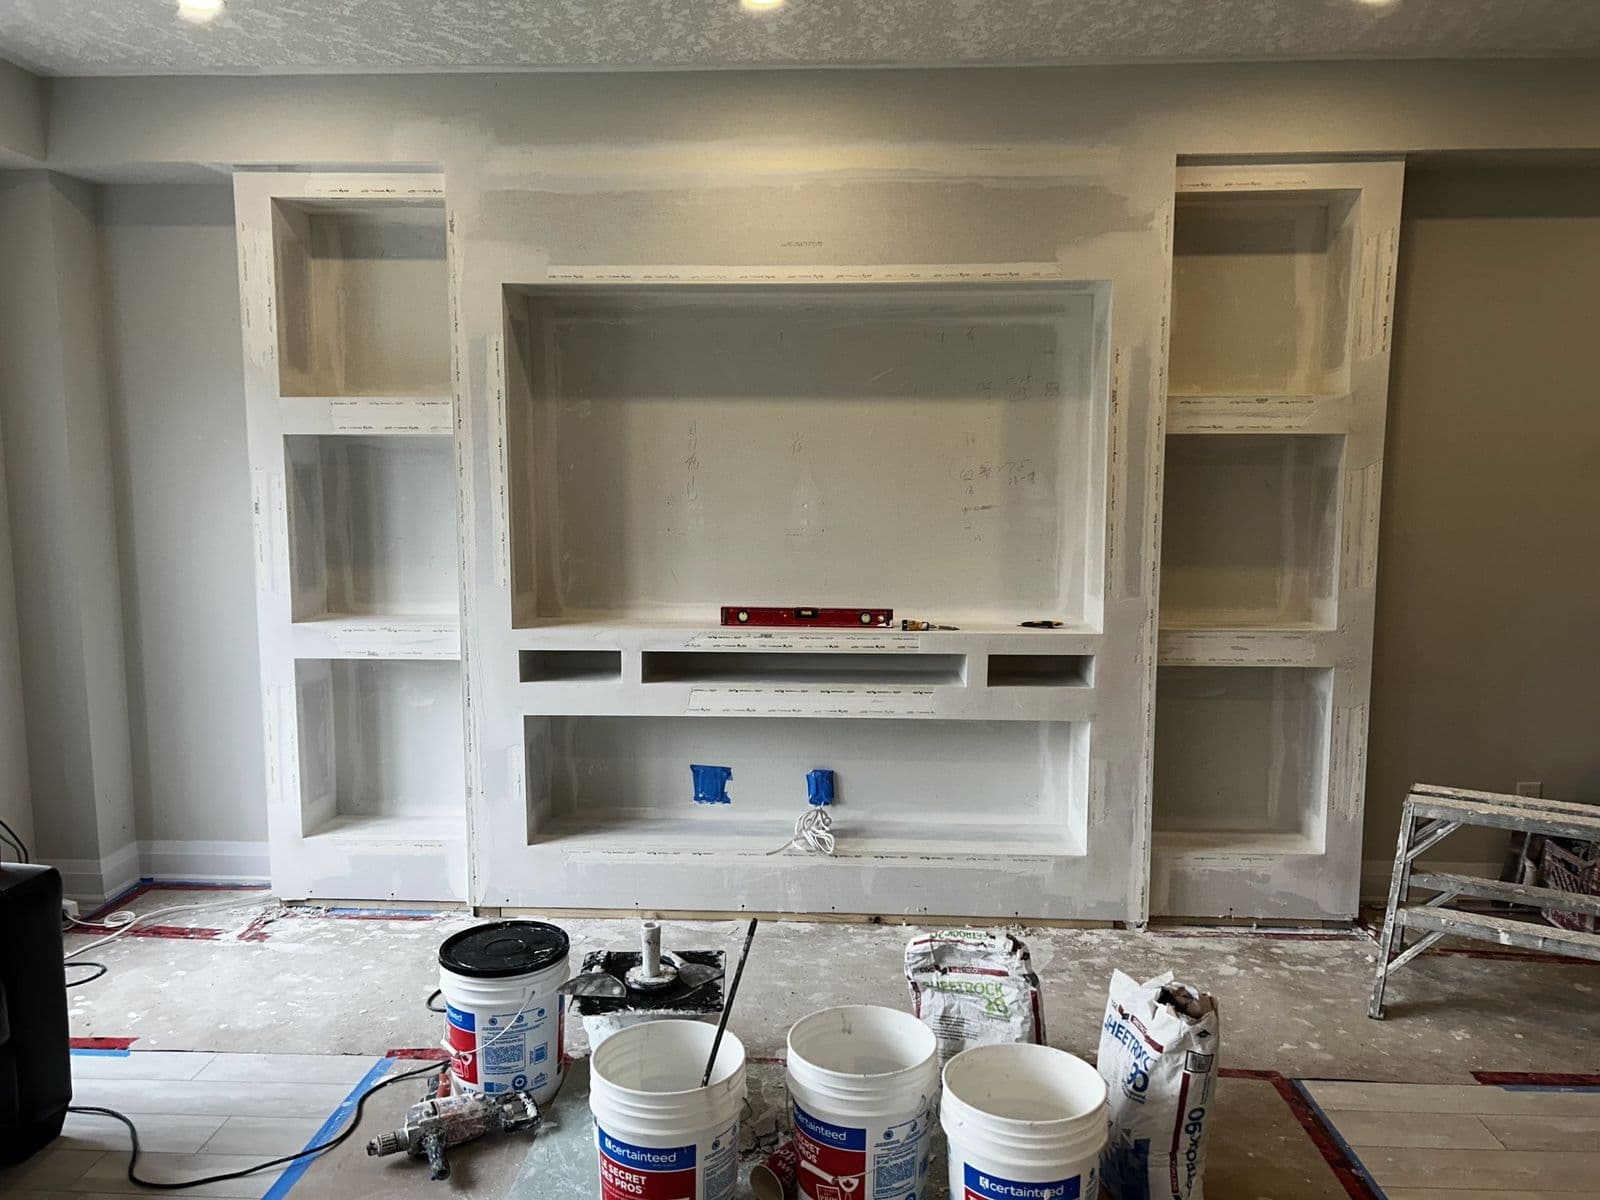 3
Taping and mudding
Corner bead on every edge and three coats of compound give the niches crisp, straight lines.
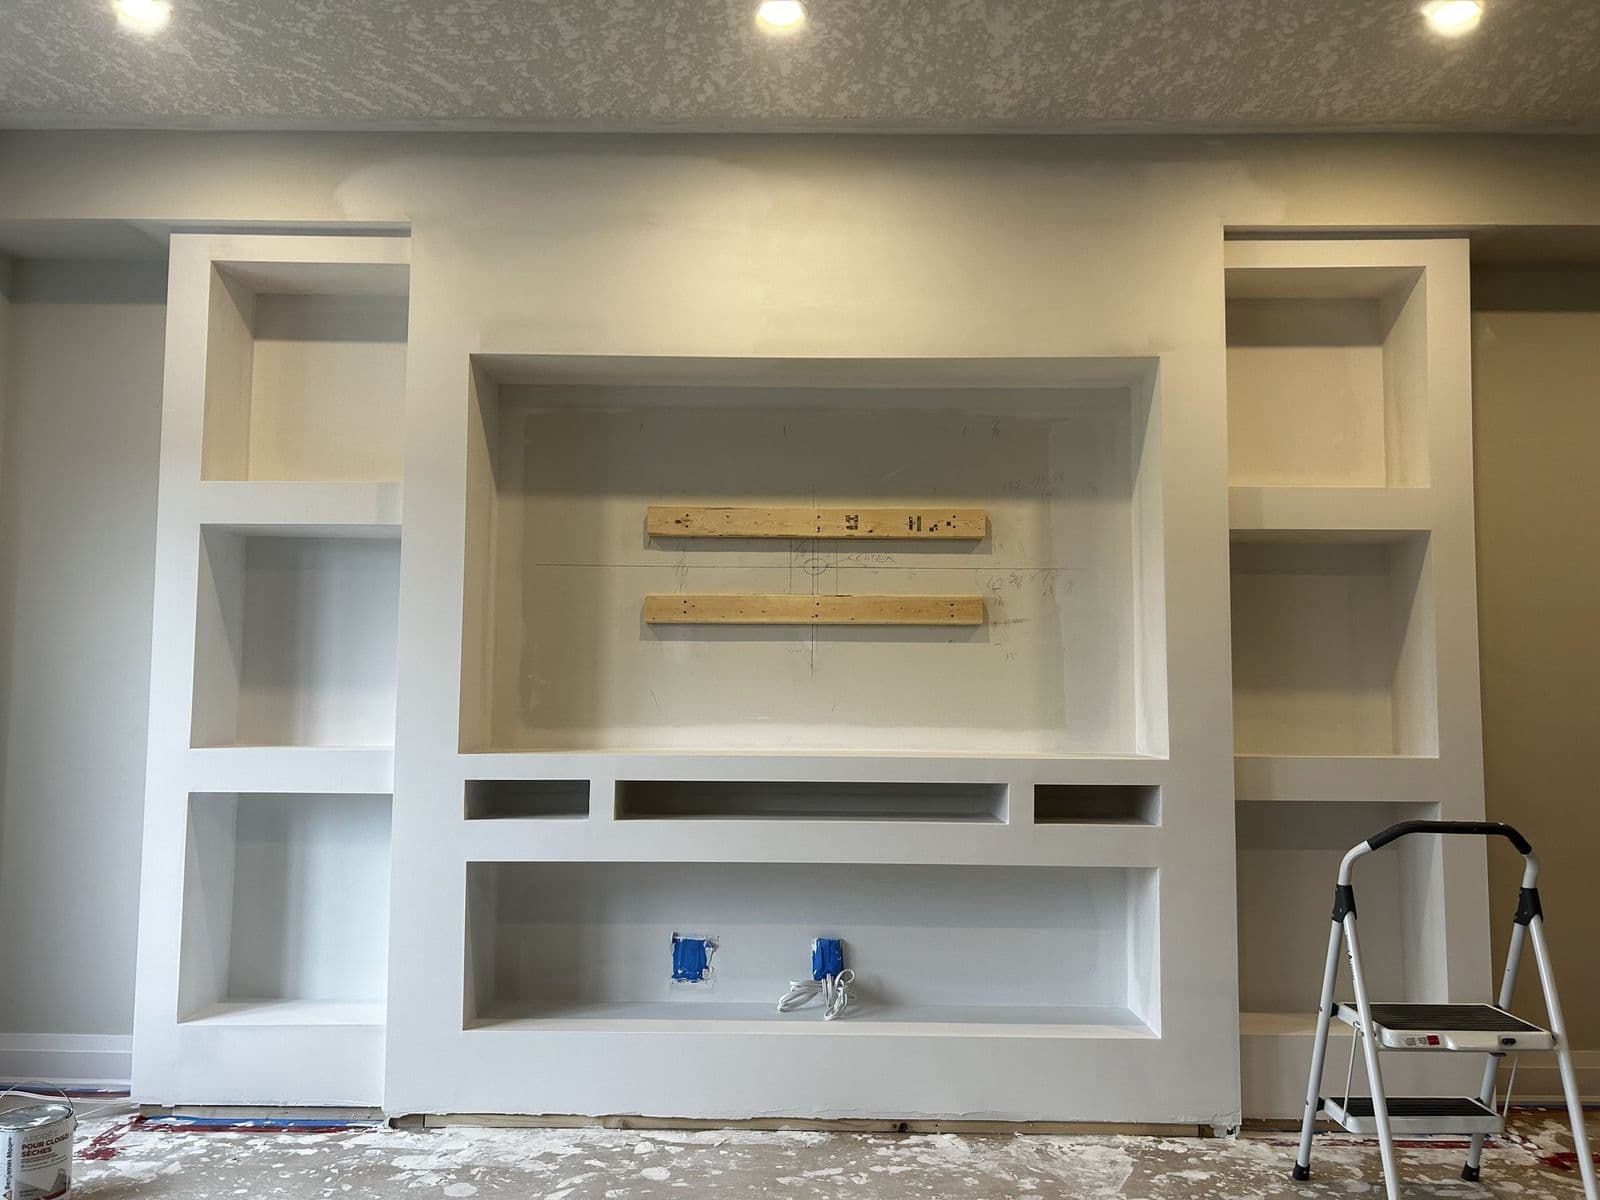 4
Sanding and primer
Everything was sanded smooth and primed, ready for paint and the TV mount.
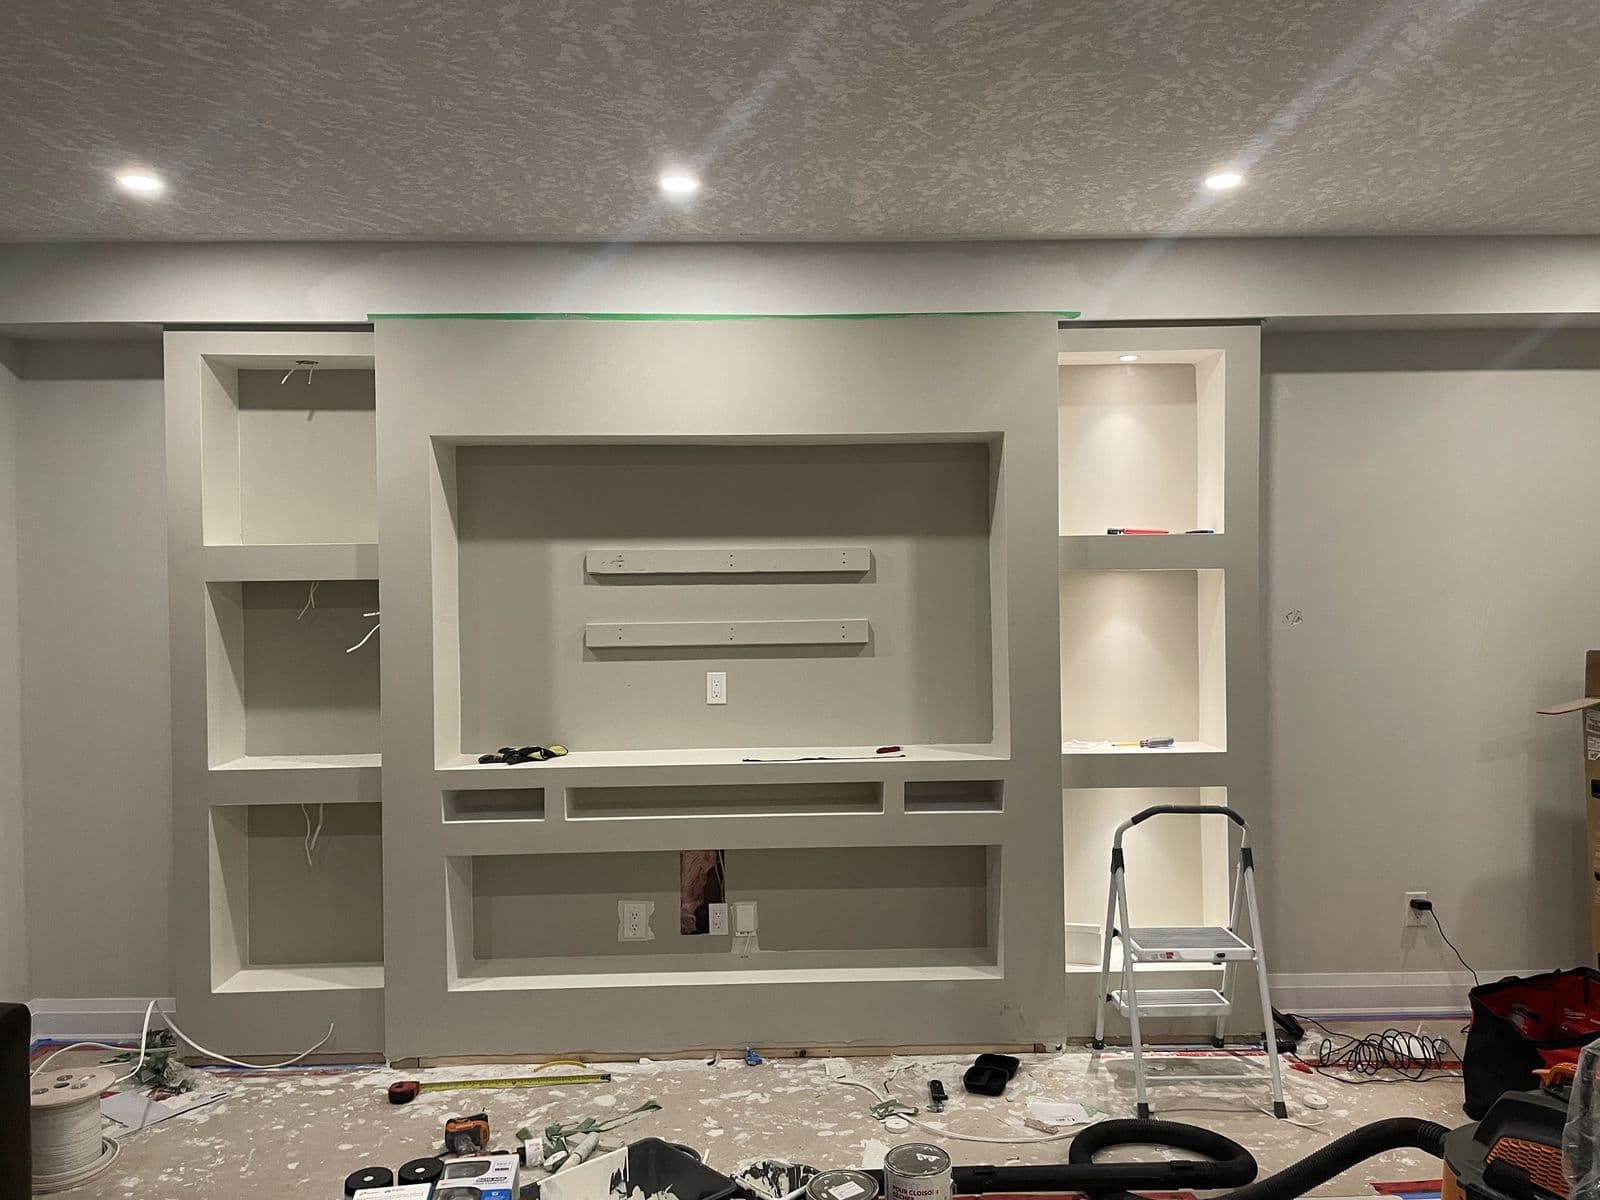 5
Paint and niche lighting
A two-tone paint finish, with LED puck lights recessed into each display niche.
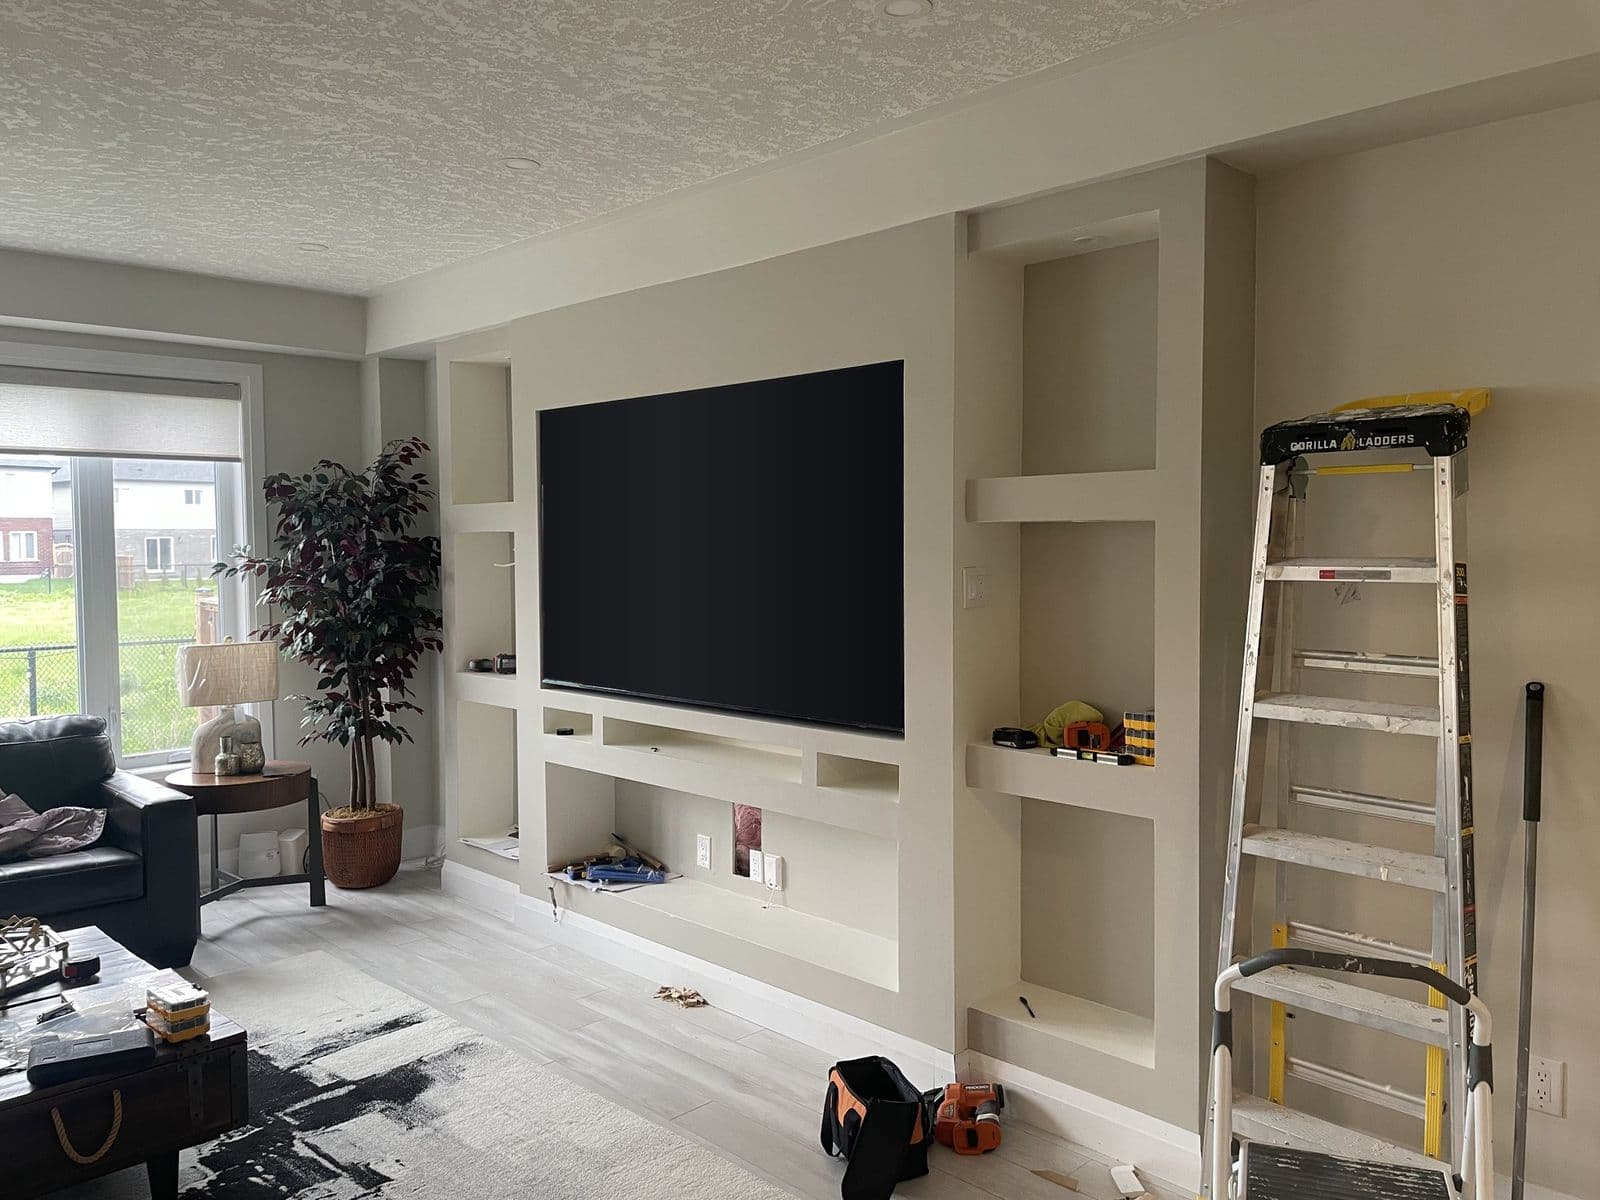 6
TV mounted, wall finished
The TV sits flush in its niche with every wire hidden, and the side towers are ready for decor.
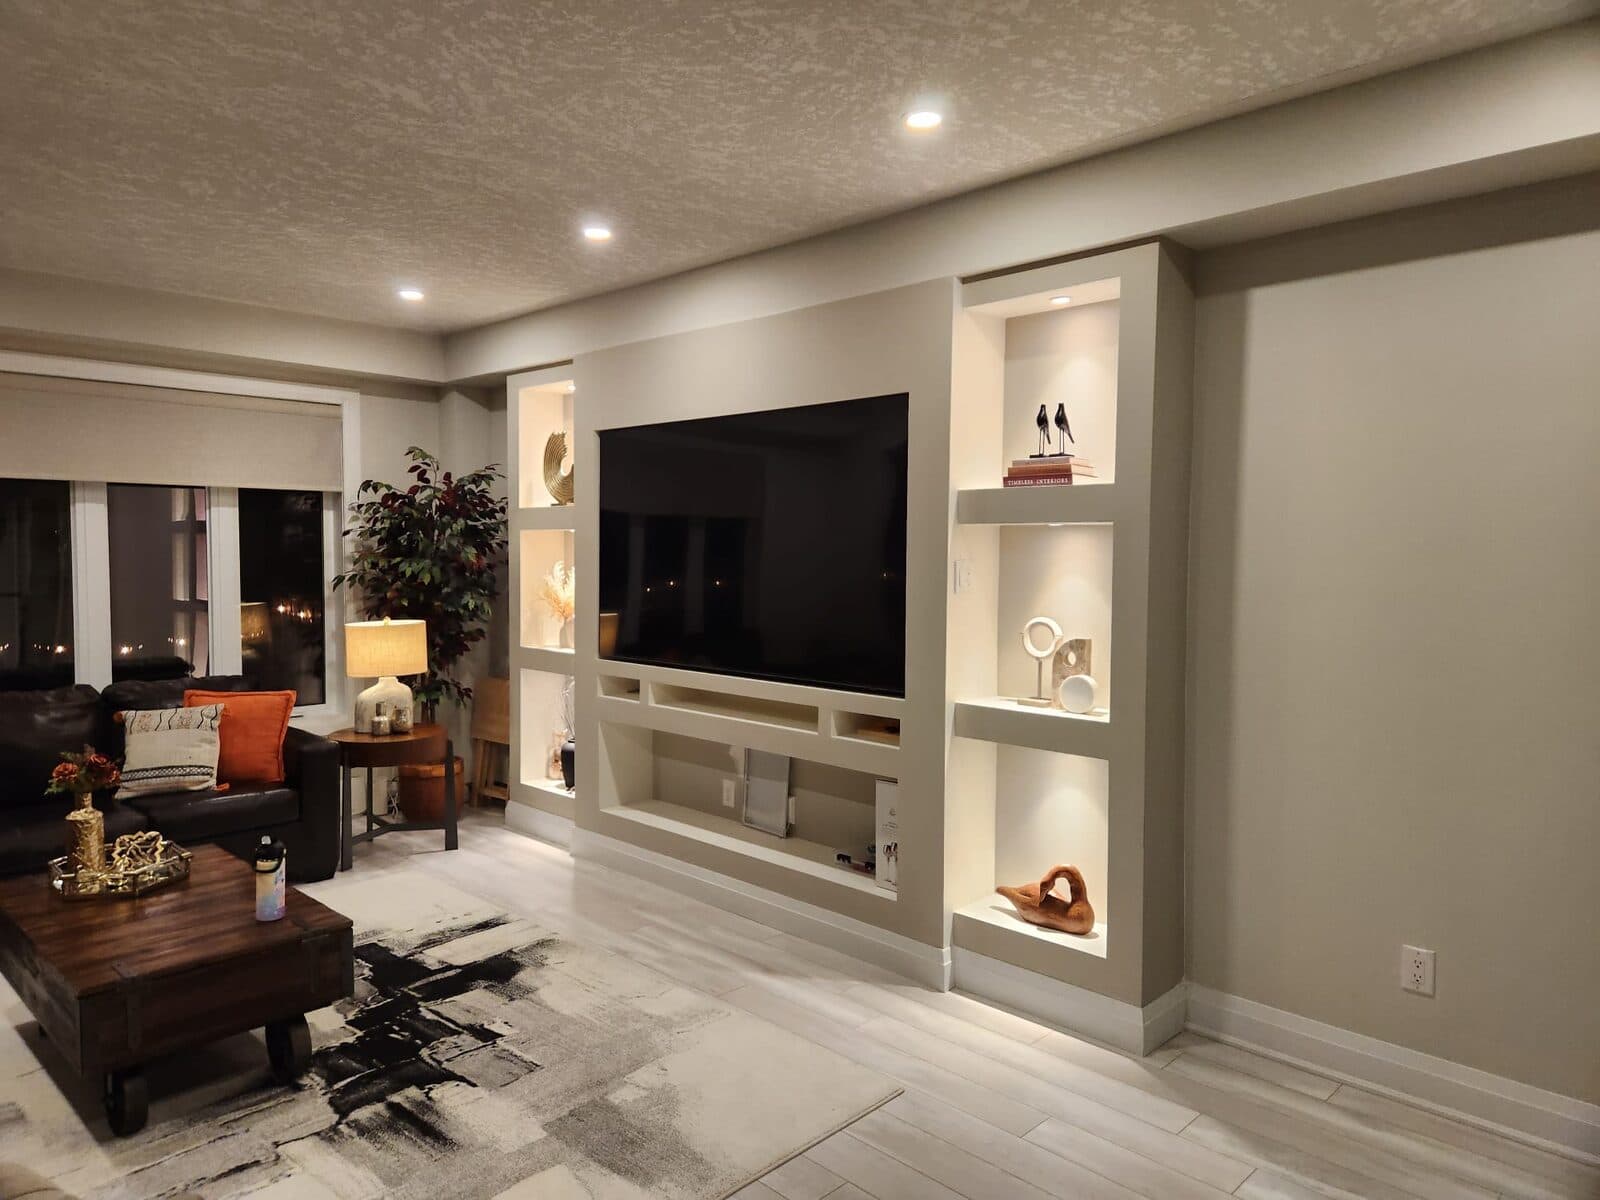 7
Finished and styled
At night: the TV recessed in its niche, warm lit shelves on both sides, an open media ledge below and soft toe-kick lighting along the floor.
Walk through the framing
Before & after
Beige to Board-and-Batten: A Bathroom Refresh in Kitchener-Waterloo
Kitchener-Waterloo, Ontario
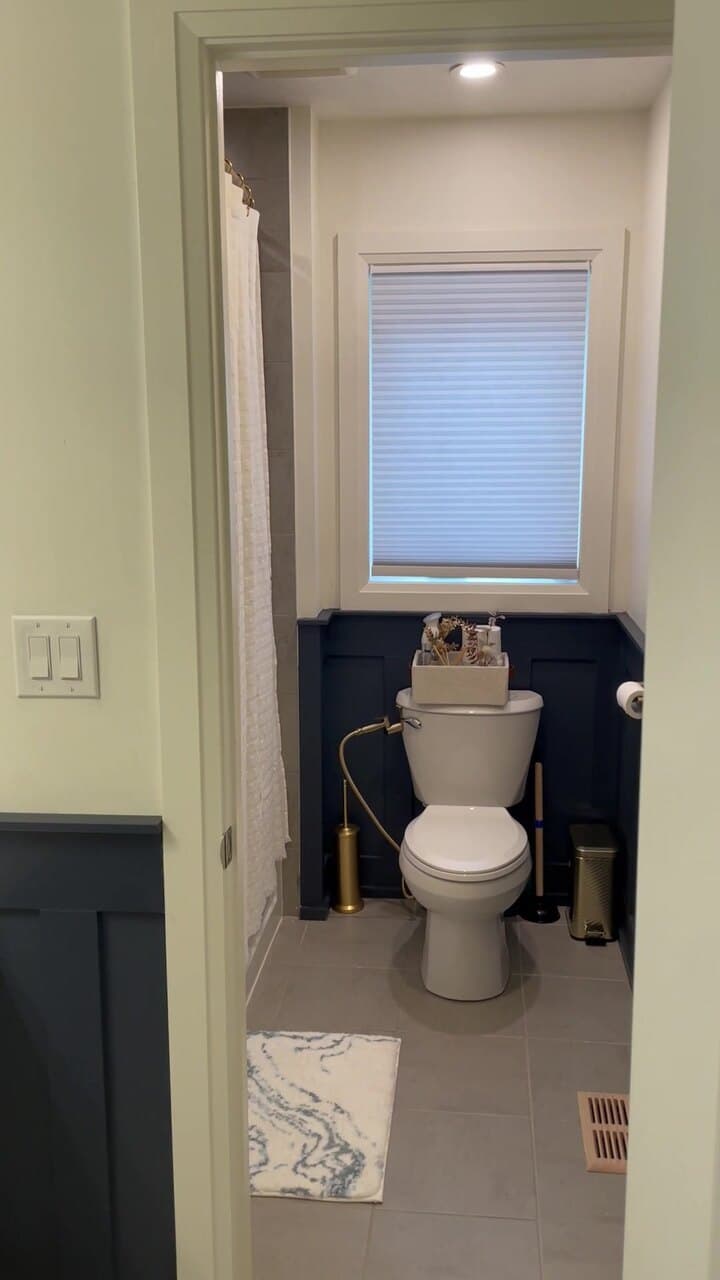
This bathroom worked, but it felt plain: light beige walls, builder baseboards, dated chrome fixtures and a bare window. The owners wanted a custom, designer look without the cost, dust and downtime of tearing it out.
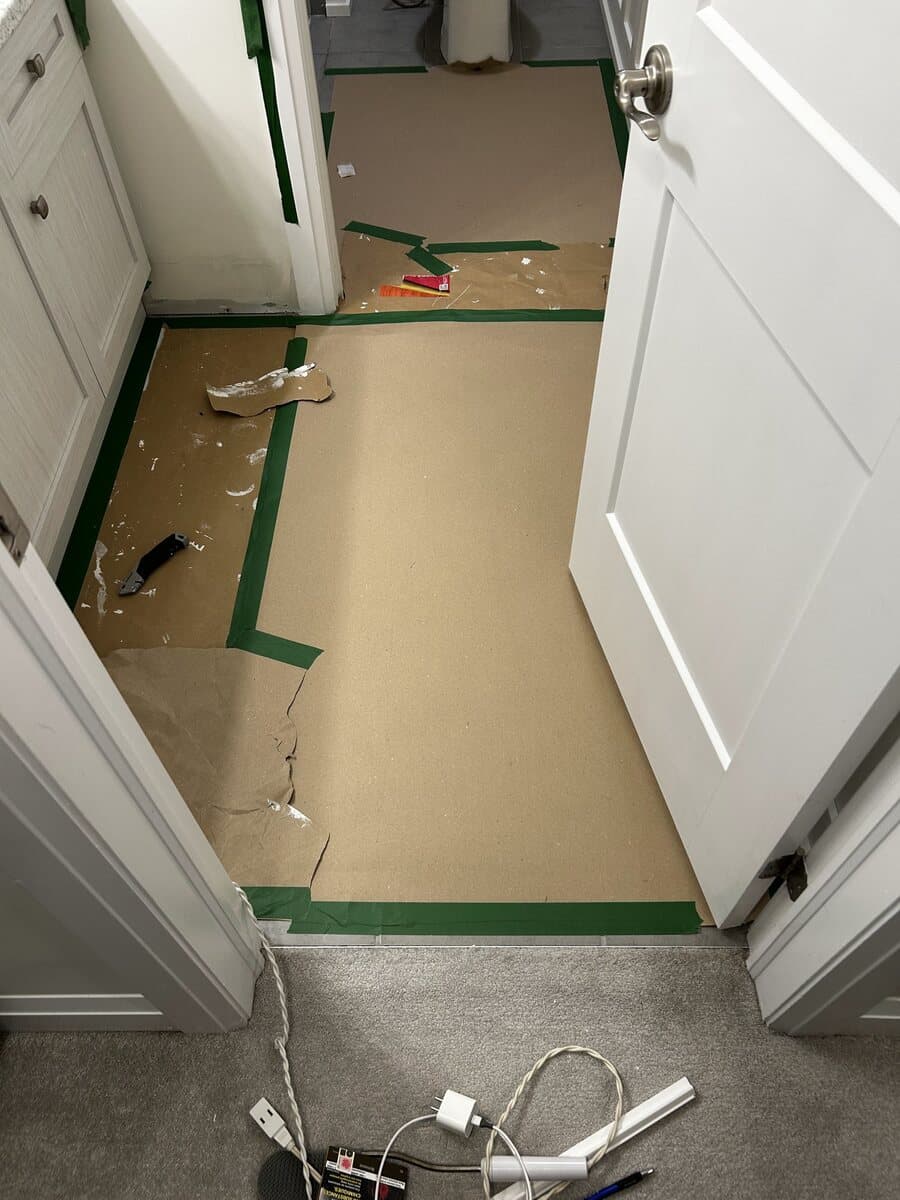
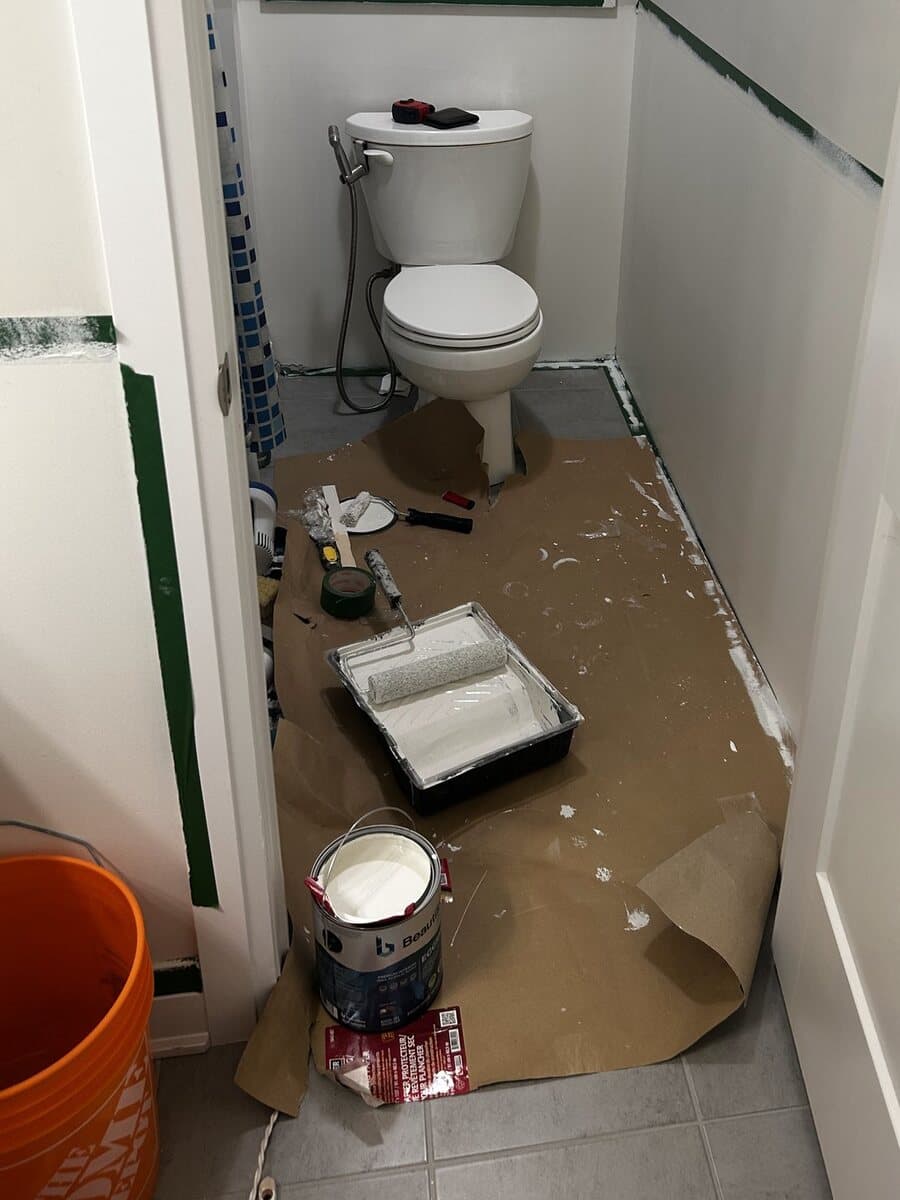
We started by protecting the floor and fixtures, then repainted the whole room. Walls and ceiling went from beige to Benjamin Moore White Dove in a satin finish. The door and window casing got White Dove in a pearl finish, a touch shinier, so the trim reads crisp and stands up to handling and steam.
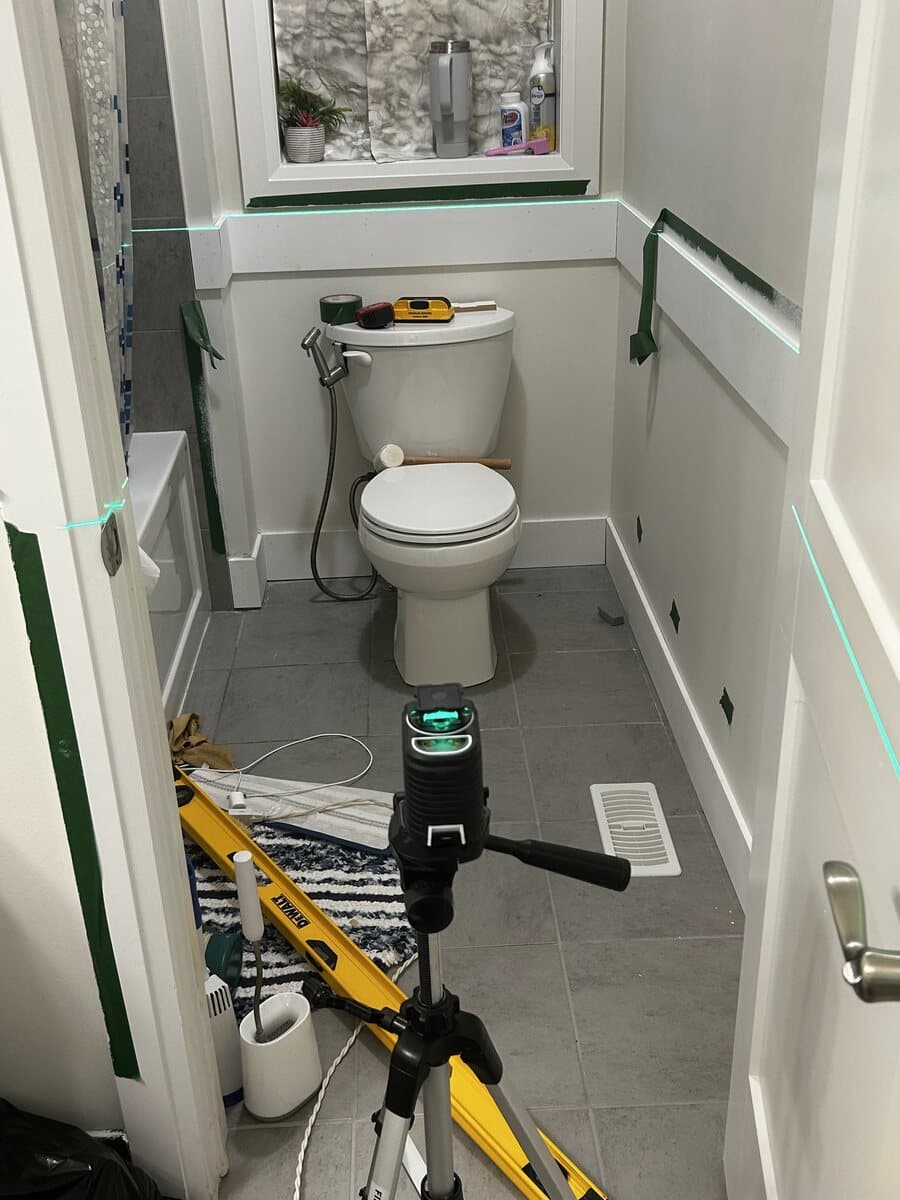
Next came board-and-batten wainscoting on every wall. A laser level set one level height around the room, and every batten was spaced equally from wall to wall. The top rail is taller than the bottom boards for a heavier cap. We replaced the old baseboards, added a small moulding at the floor, filled and sanded every joint, and painted it all Benjamin Moore Hale Navy in satin.
To finish, everything was switched to brushed gold: the faucet, door handles and privacy lock, the shower system, curved curtain rod, bidet sprayer, towel bar, toilet paper holder, garbage bin, toilet brush and hanging shower caddy. A new toilet, new pot light, new window blinds and a new exhaust fan complete the room.
- Floors and fixtures fully protected
- White Dove satin on walls and ceiling
- White Dove pearl on door and window casing
- Board-and-batten on every wall, laser-level layout
- Taller top rail, new baseboards and moulding
- Wainscoting in Hale Navy satin
- Brushed gold fixtures and accessories throughout
- New toilet, pot light, window blinds and exhaust fan
Paint and finishes
- Walls and ceiling
- Benjamin Moore White Dove, satin
- Door and window casing
- Benjamin Moore White Dove, pearl
- Wainscoting, baseboards and moulding
- Benjamin Moore Hale Navy, satin
- Fixtures and accessories
- Brushed gold throughout
How we did it, step by step
 1
Protect everything first
Before any paint is opened, the floor is covered wall to wall and taped at every edge, and the toilet, tub and vanity are masked off.
 2
White Dove, top to bottom
The beige is gone. Walls and ceiling are rolled in Benjamin Moore White Dove satin, which wipes clean in a bathroom. The door and window casing get White Dove in pearl, a slightly shinier finish that keeps the trim crisp.
 3
Laser-level layout
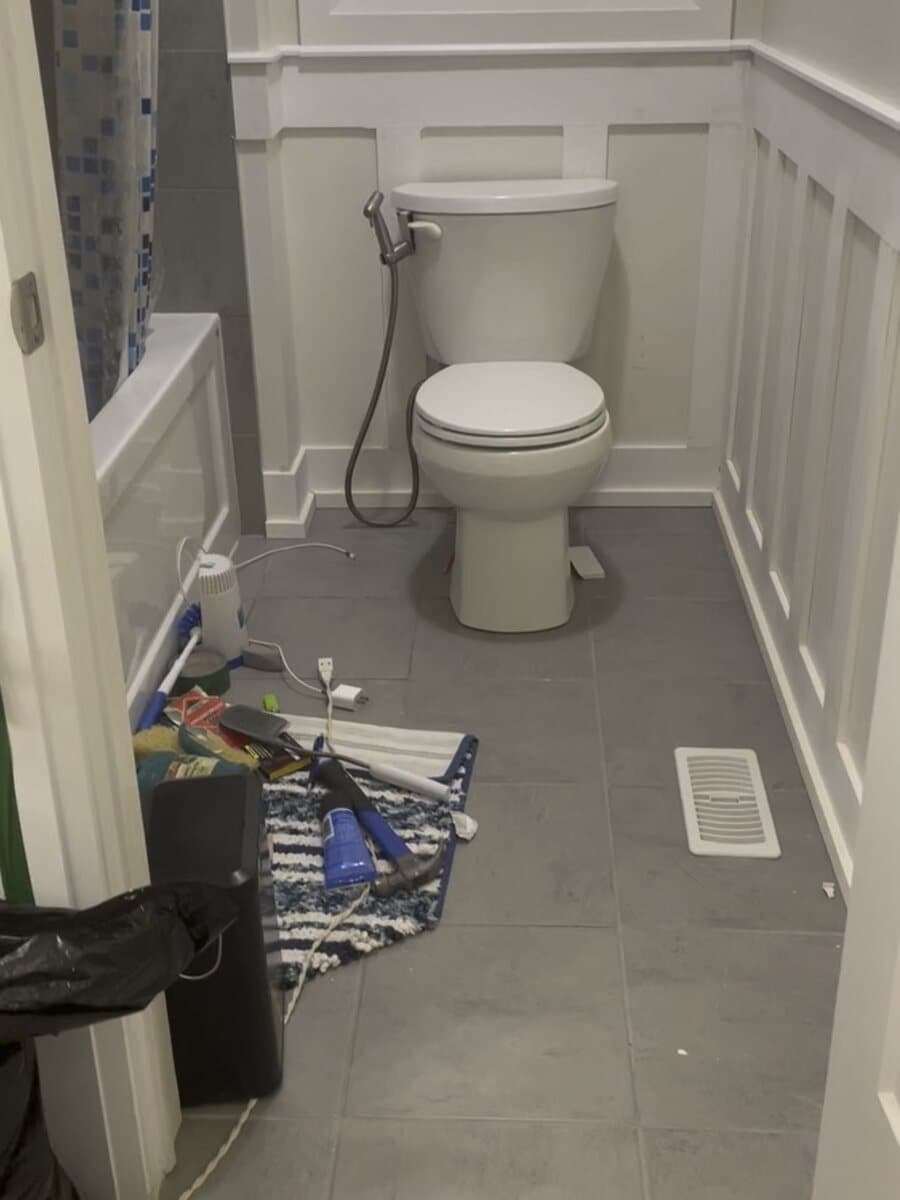
A laser level sets one dead-level height around the whole room, then every batten is marked out at equal spacing so the panels line up wall to wall.
 4
Board-and-batten installed
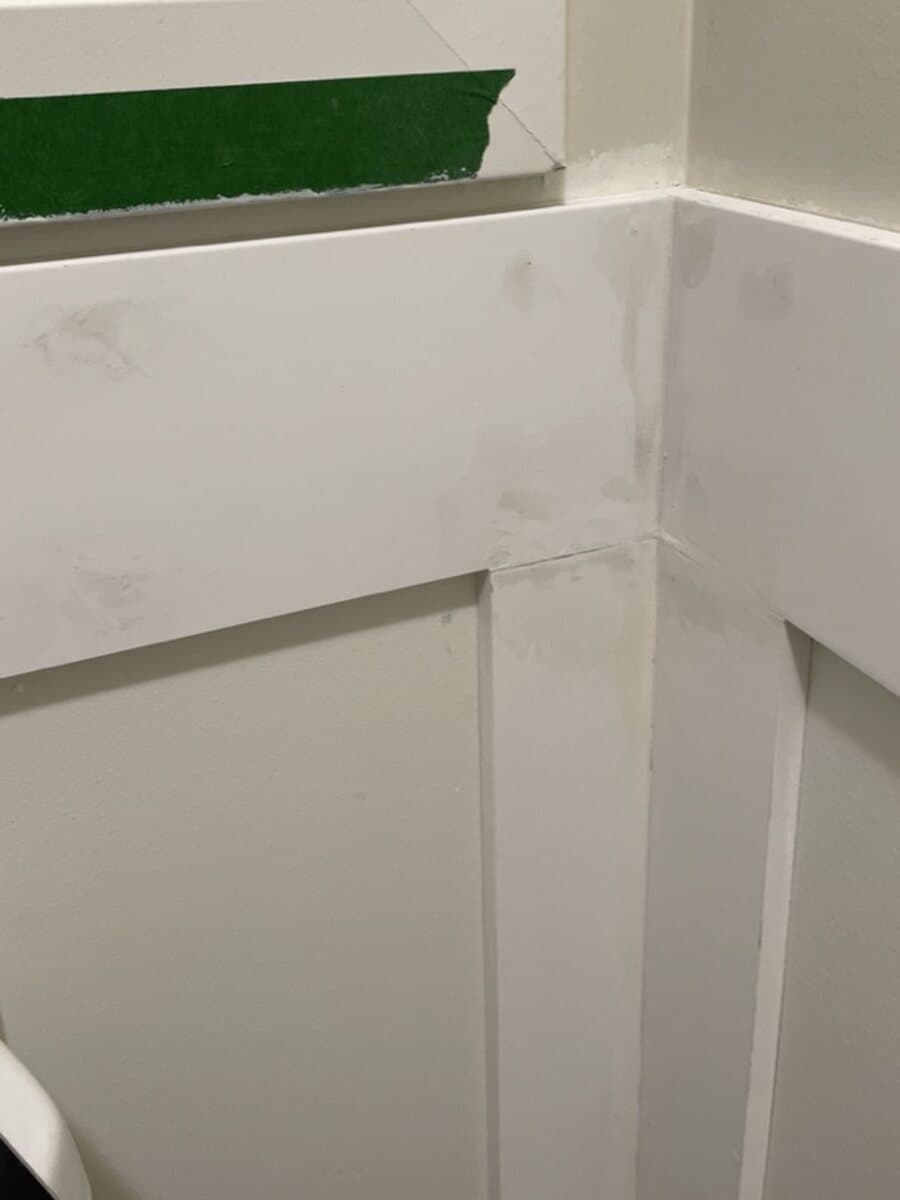
The wainscoting goes up on every wall: a top rail, then evenly spaced vertical battens between the rail and the base.
 5
A taller top rail, filled and sanded
The top board is deliberately taller than the bottom boards for a heavier, more finished cap. Every joint and nail hole is filled with wood filler and sanded smooth, so no gaps or seams show once it is painted.
 6
New baseboards and moulding
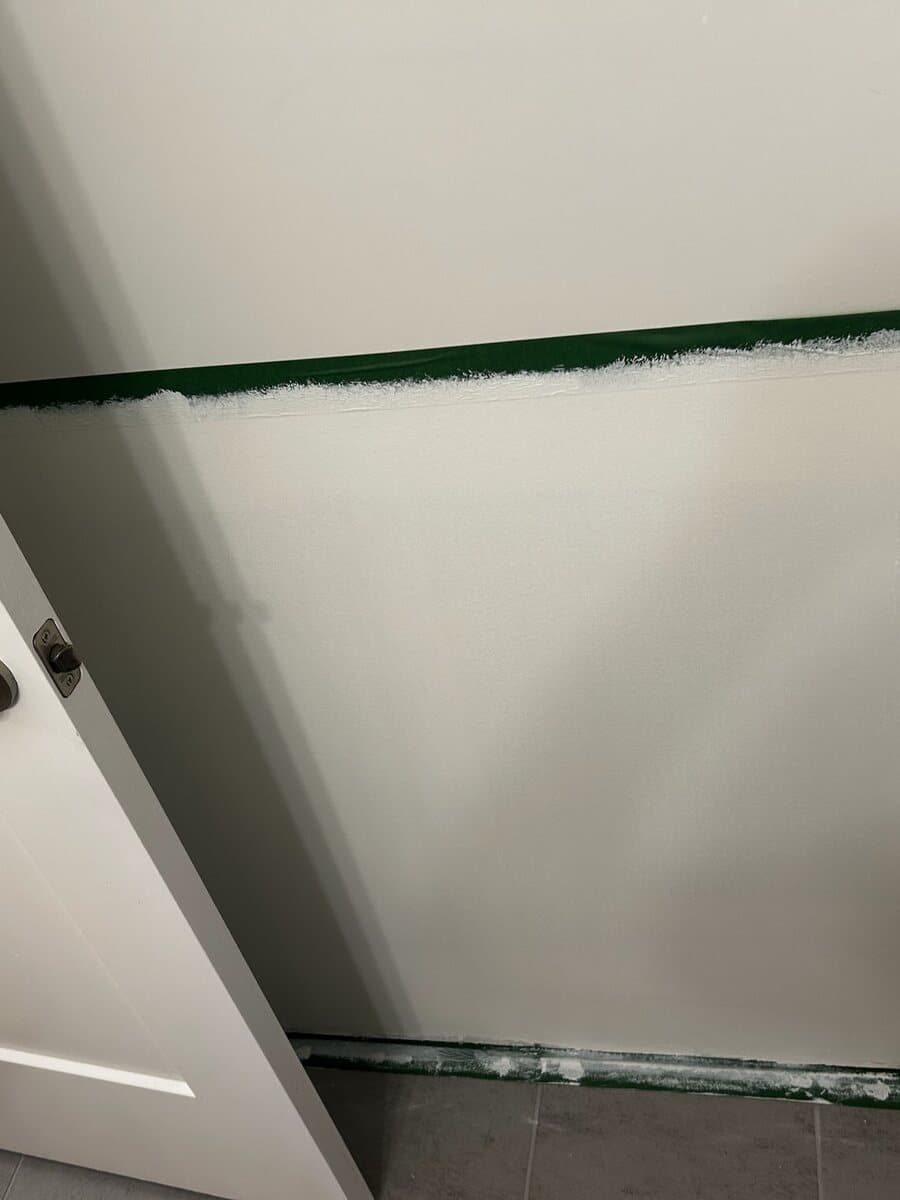
The old baseboards came off. New baseboards and a small moulding along the bottom finish the panels cleanly at the floor.
 7
Crisp tape lines
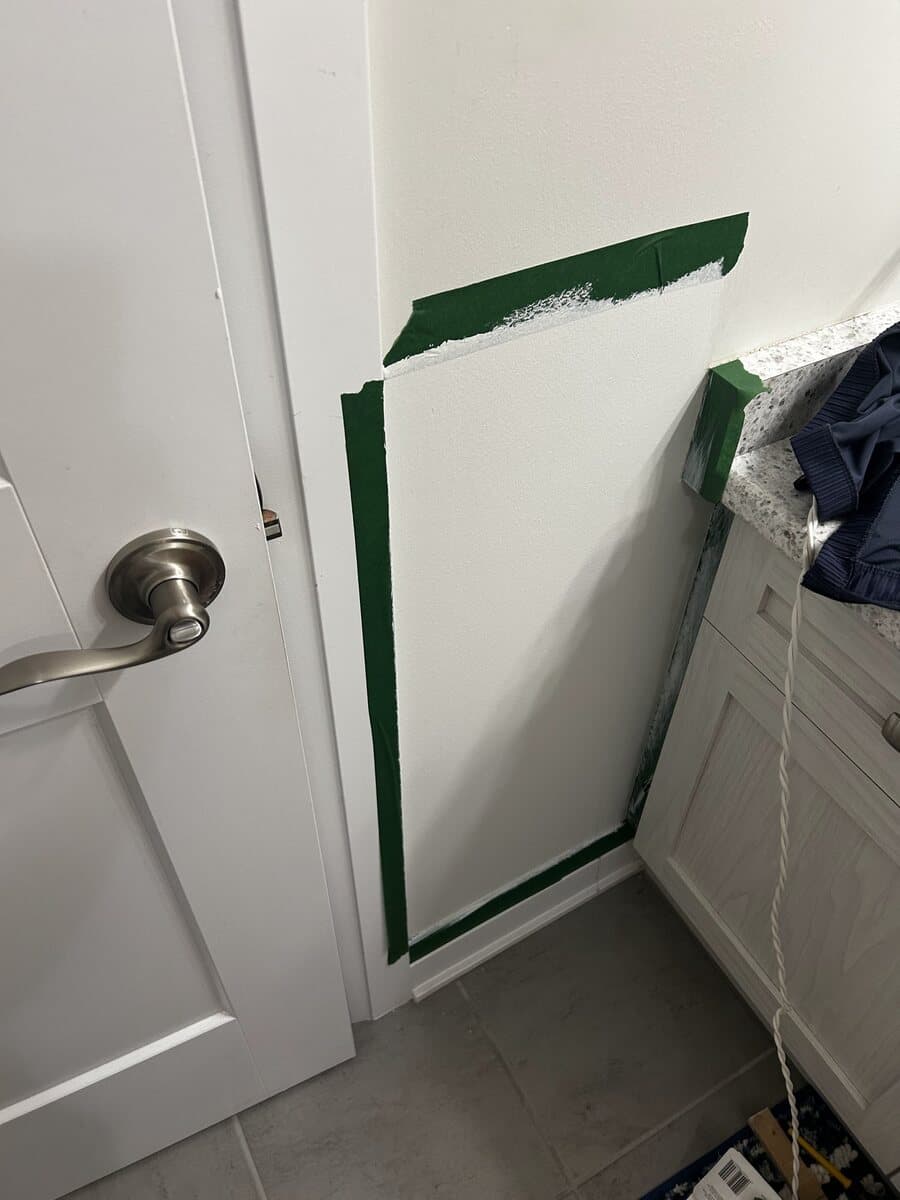
Tape goes along the top rail and the casings so the Hale Navy and White Dove meet in a sharp, straight line.
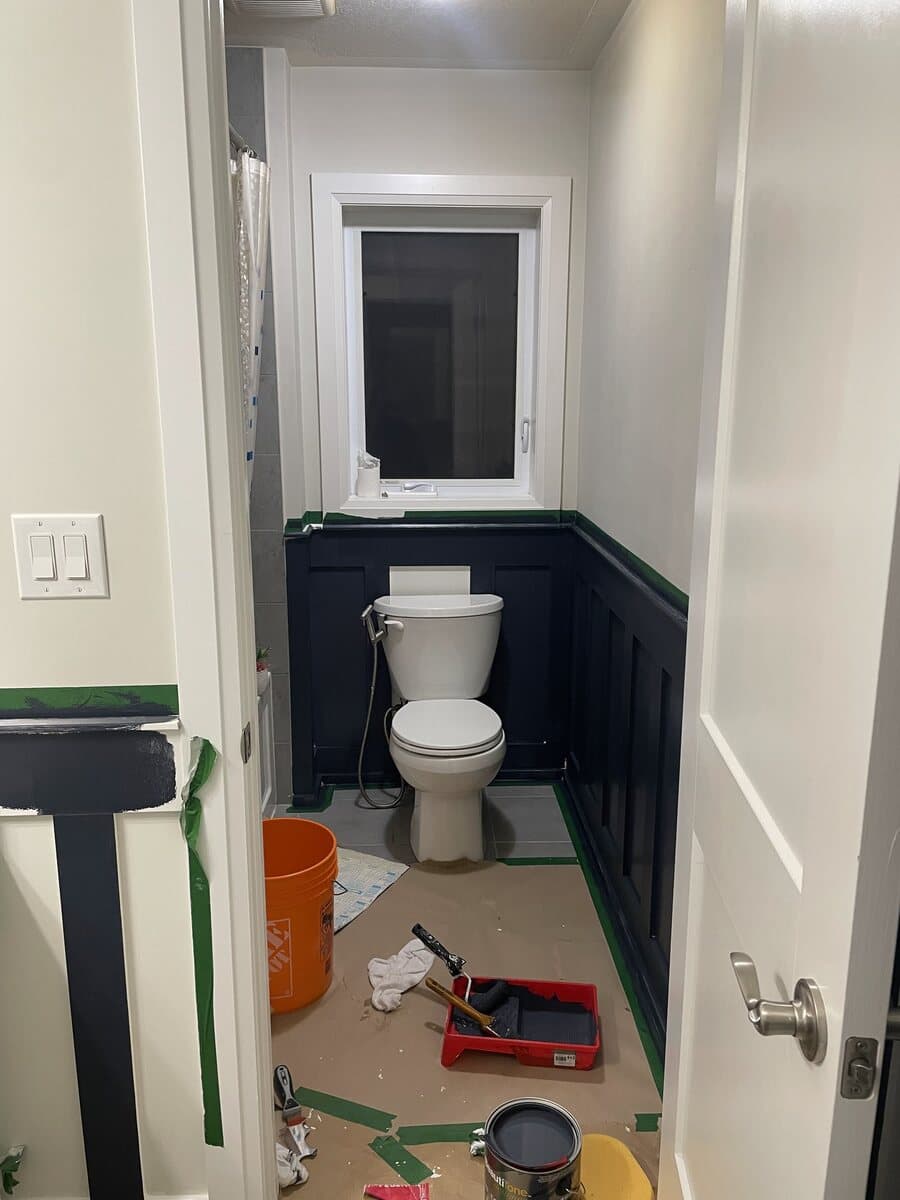 8
Hale Navy wainscoting
The wainscoting, baseboards and moulding are painted Benjamin Moore Hale Navy in satin, a deep blue that grounds the room against the White Dove walls.
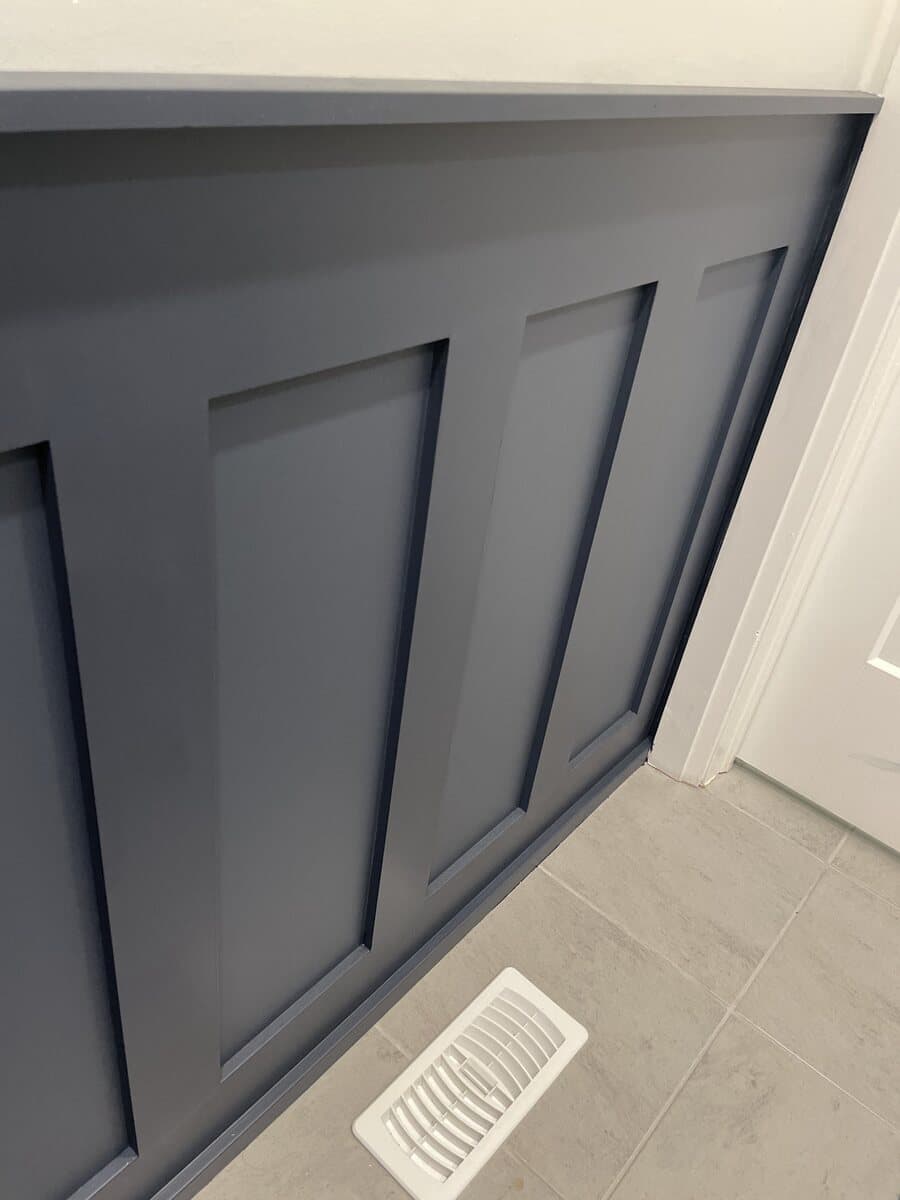 9
Finish detail
Smooth, even coats into every panel edge, along the top rail and down to the new baseboard.
Tour the finished bathroom
A closer look at each part of the room once the paint was dry and the new fixtures, lighting and accessories were in. Every metal finish is brushed gold, so the whole room matches.
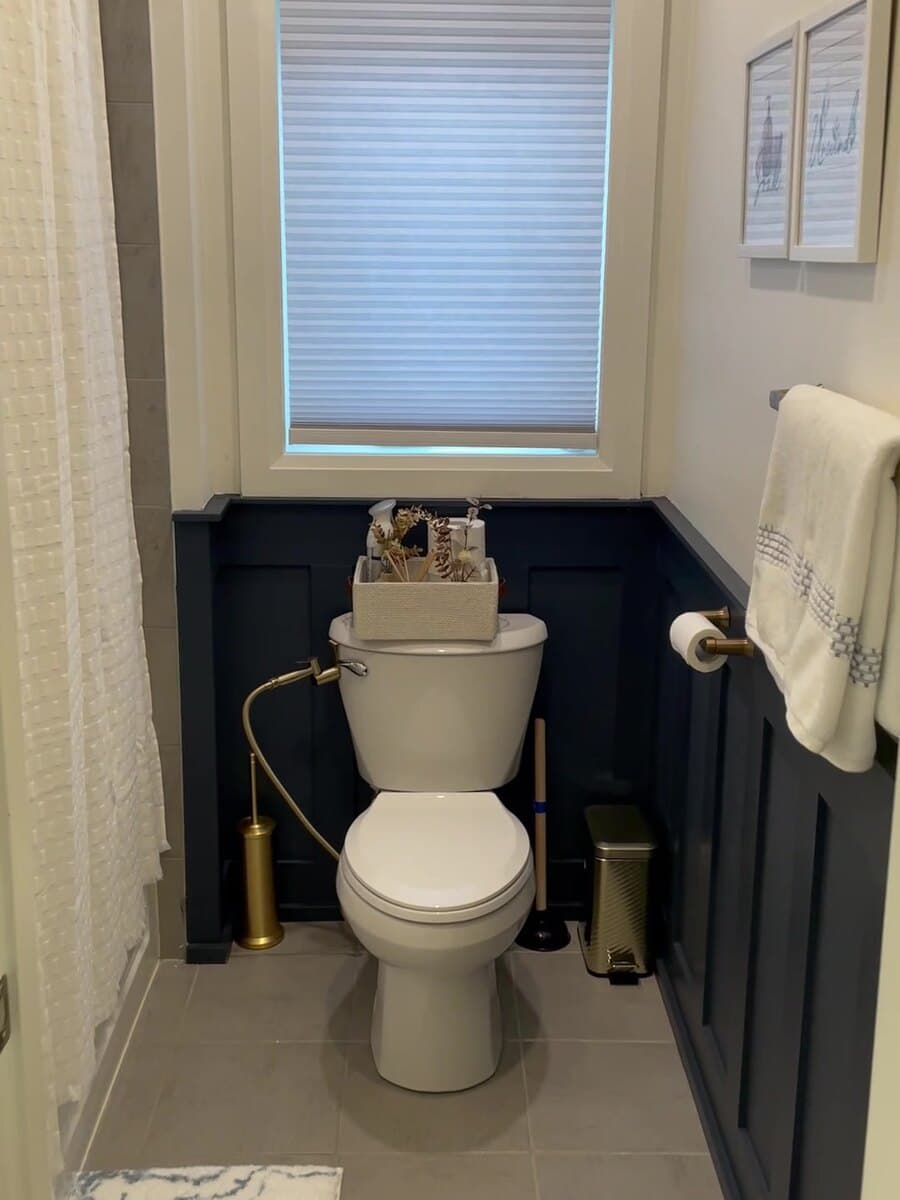
New toilet, bidet and gold accessories
A new toilet with a brushed gold bidet sprayer, toilet paper holder, towel bar, garbage bin and toilet brush, all set against the navy panels.
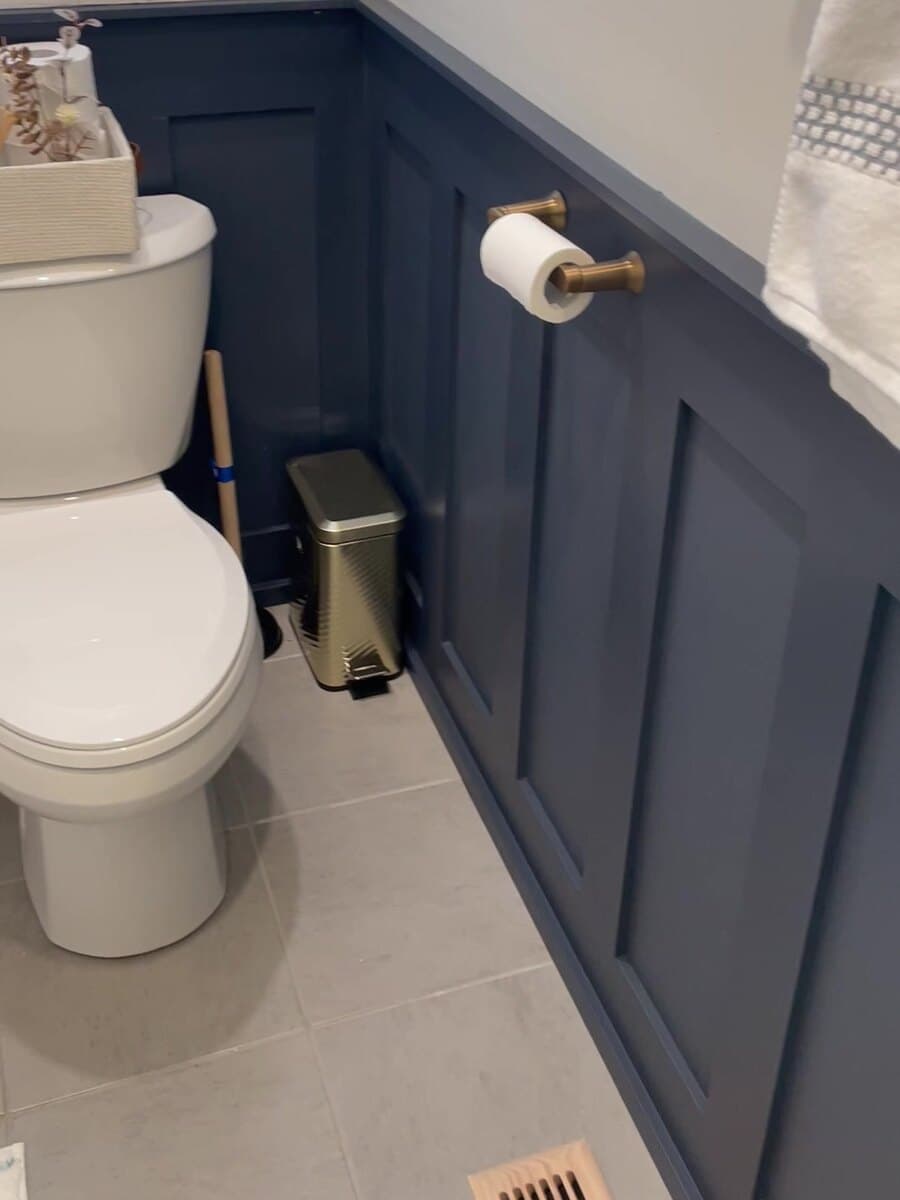
Even spacing, wall to wall
Every batten is equally spaced, the top rail is taller than the base, and the new baseboard ties it into the floor.
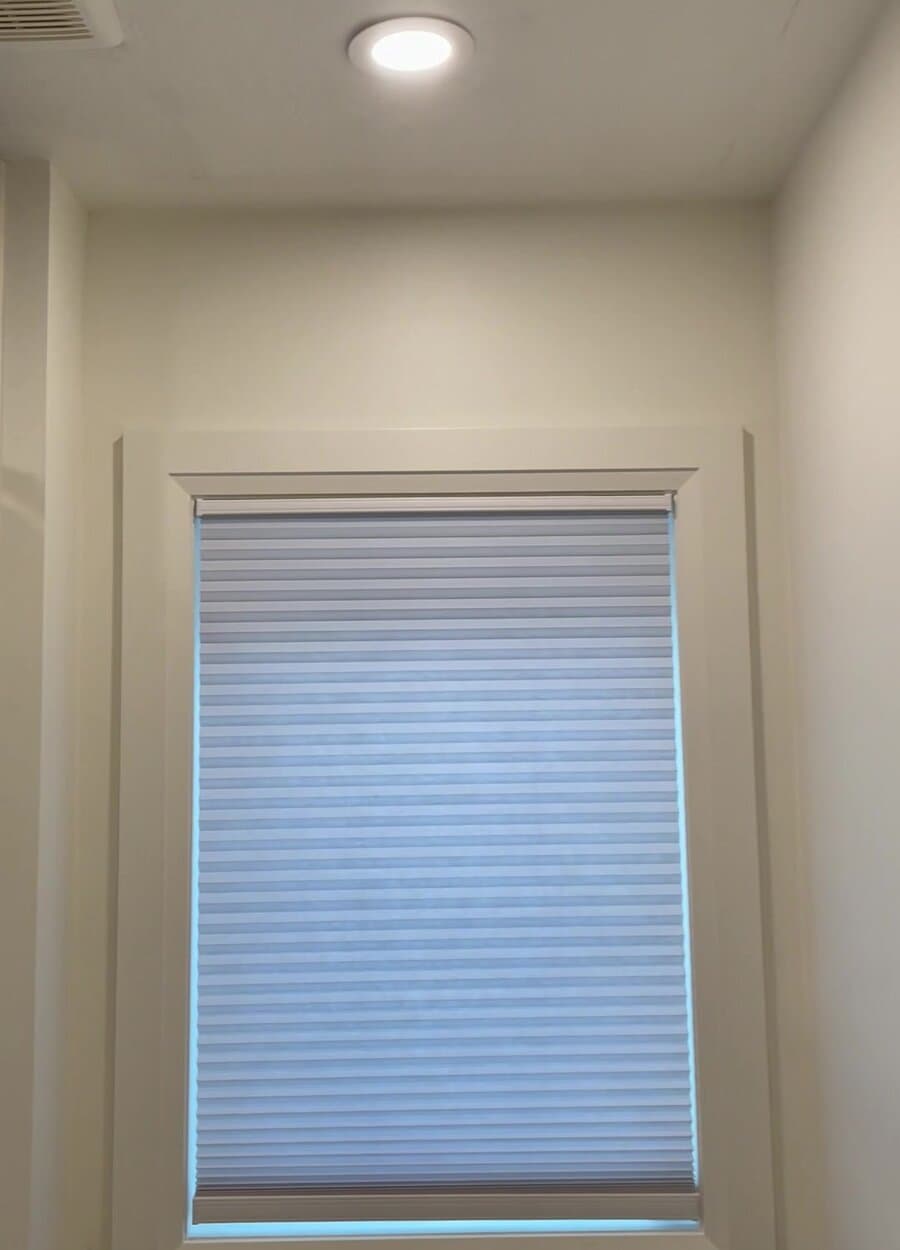
New pot light and window blinds
A new pot light brightens the toilet end of the room, and new blinds give privacy while still letting daylight through. The casing is White Dove in pearl.
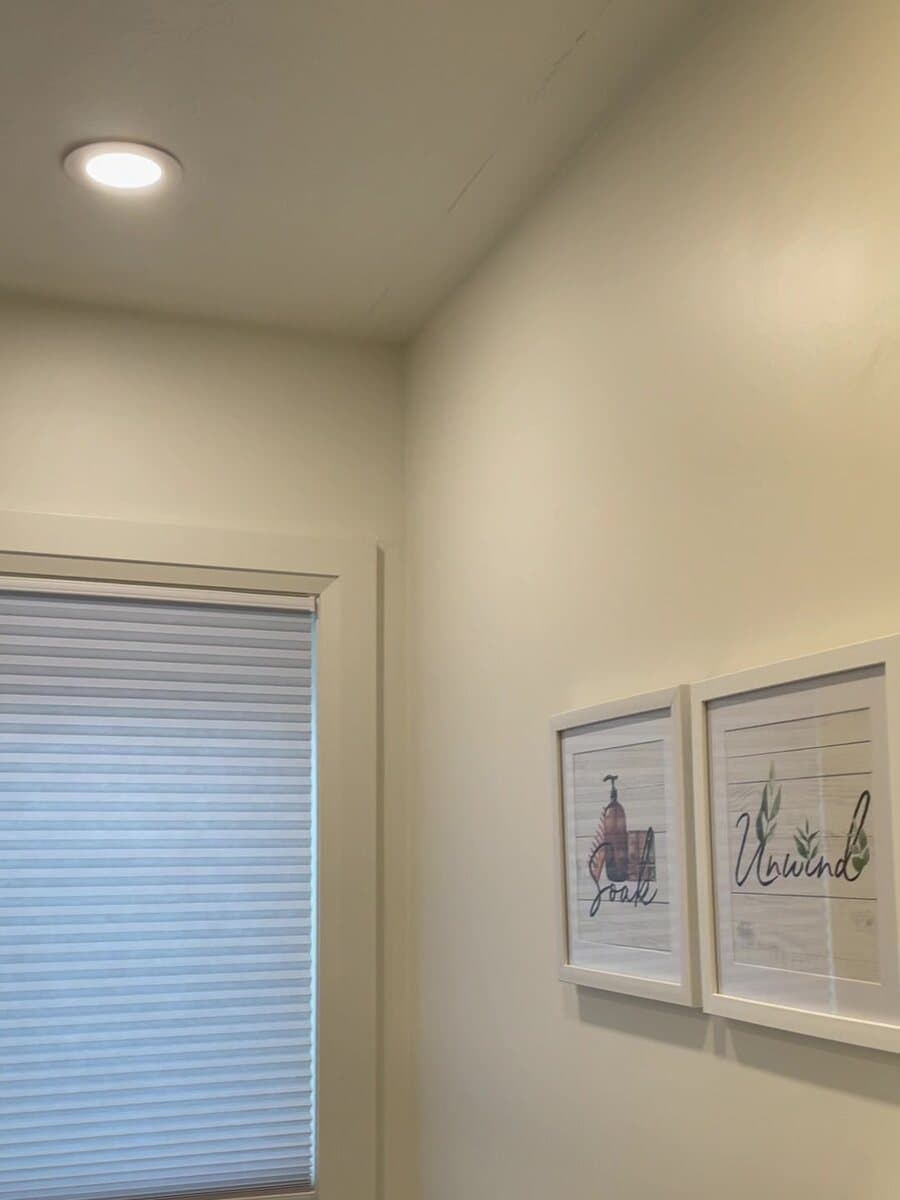
White Dove walls and ceiling
White Dove satin on the walls and ceiling keeps the room bright above the dark wainscoting.
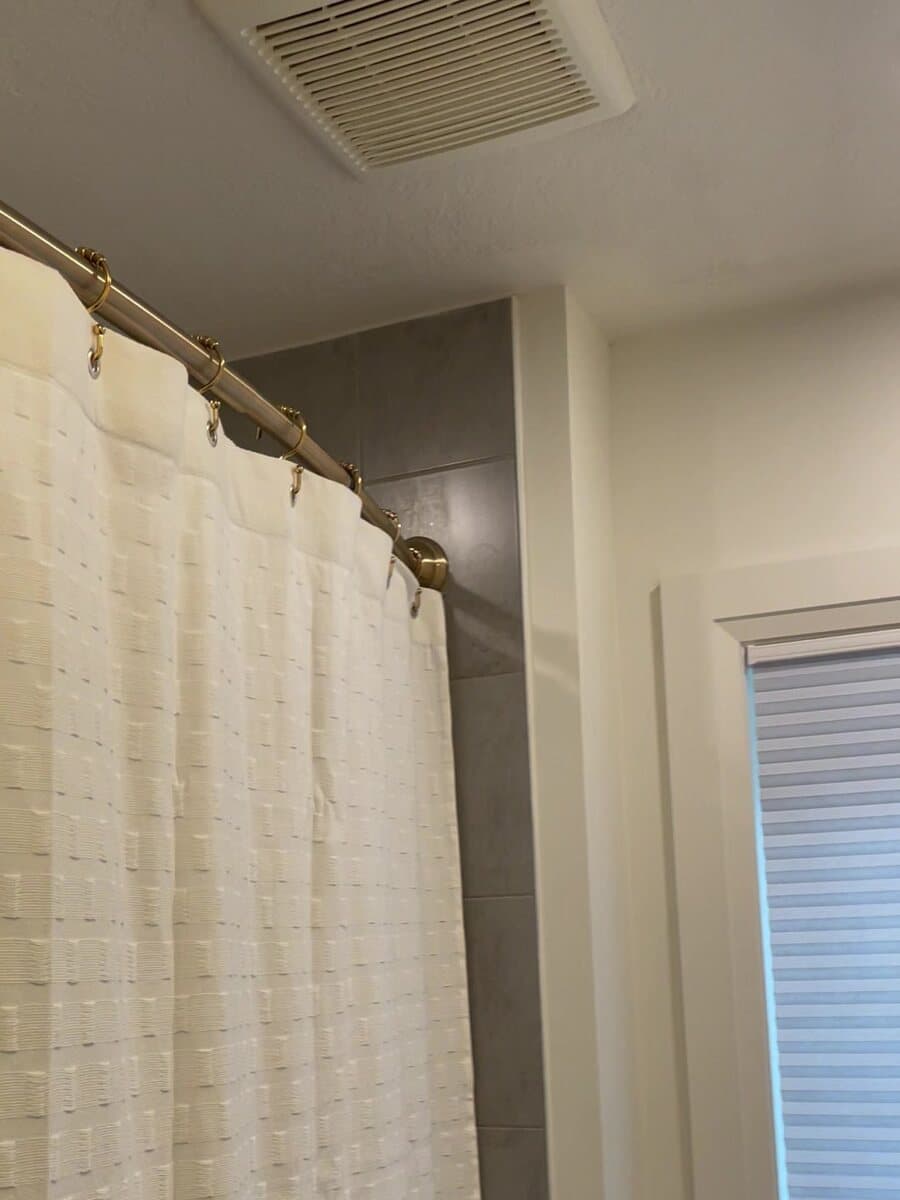
New exhaust fan and curtain rod
A new exhaust fan clears steam quickly to protect the fresh paint. The curved shower curtain rod is brushed gold to match.
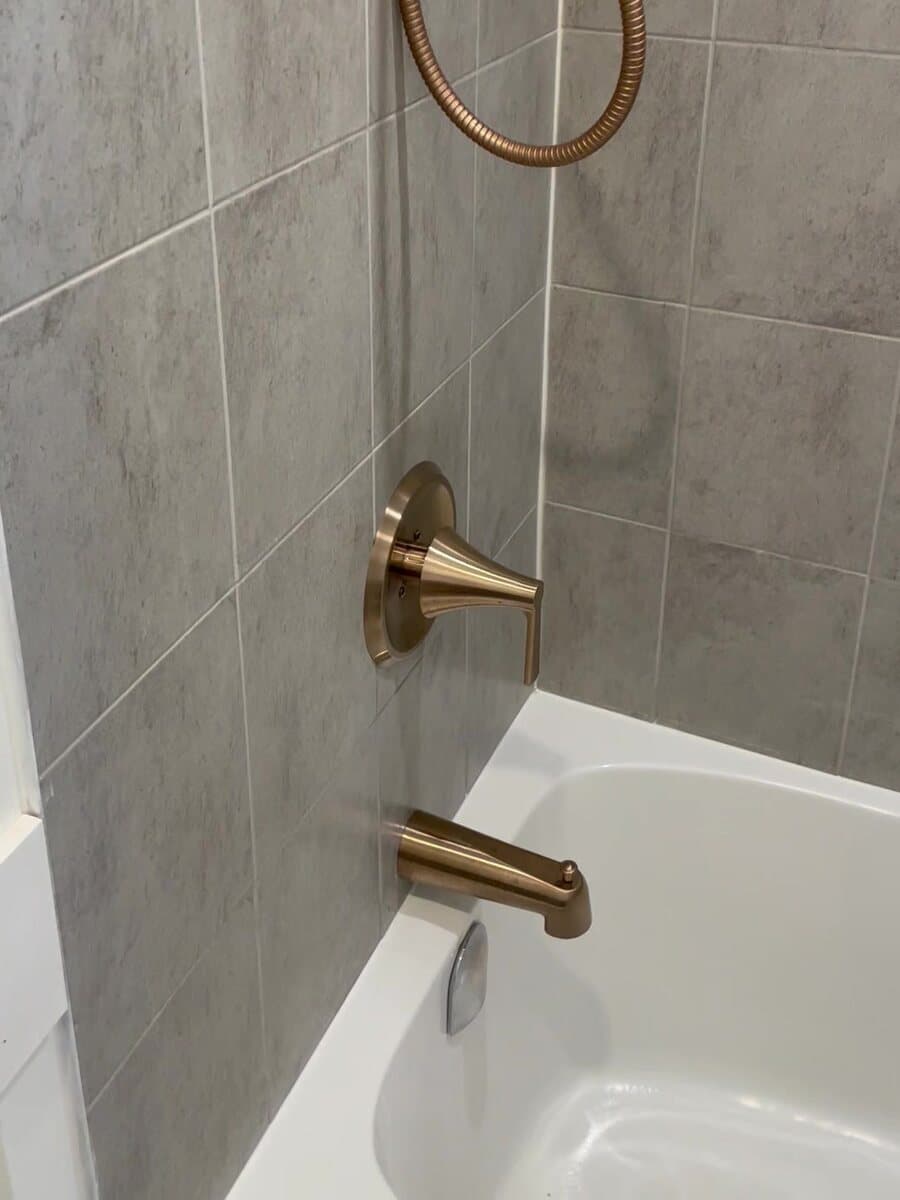
Brushed gold shower system
The old chrome is replaced with a brushed gold shower system: shower head with handheld, valve trim and tub spout.
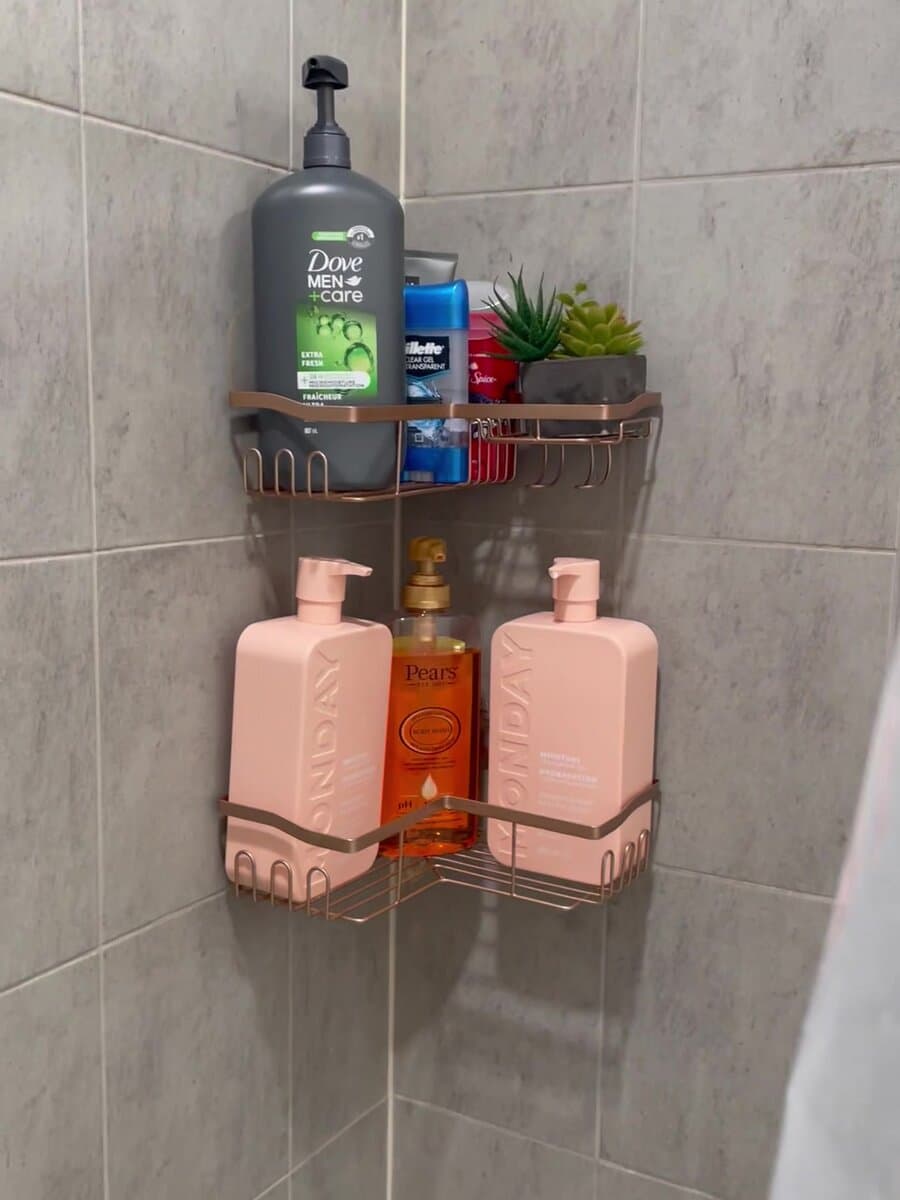
Matching shower accessories
Hanging shower caddies in the same brushed gold keep bottles off the tub ledge and match the fixtures.
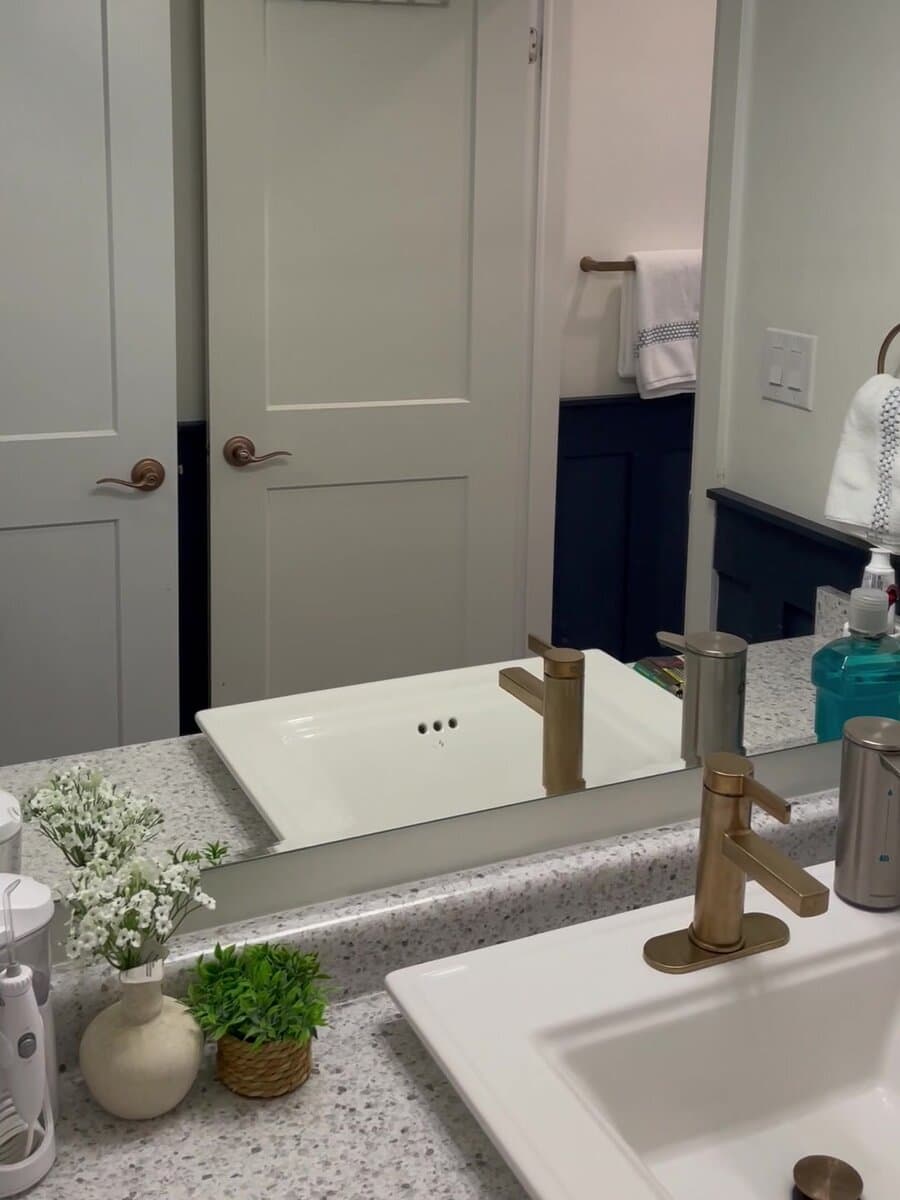
Faucet, door handles and lock
A brushed gold faucet at the vanity, with brushed gold door handles and a matching privacy lock, seen here in the mirror.
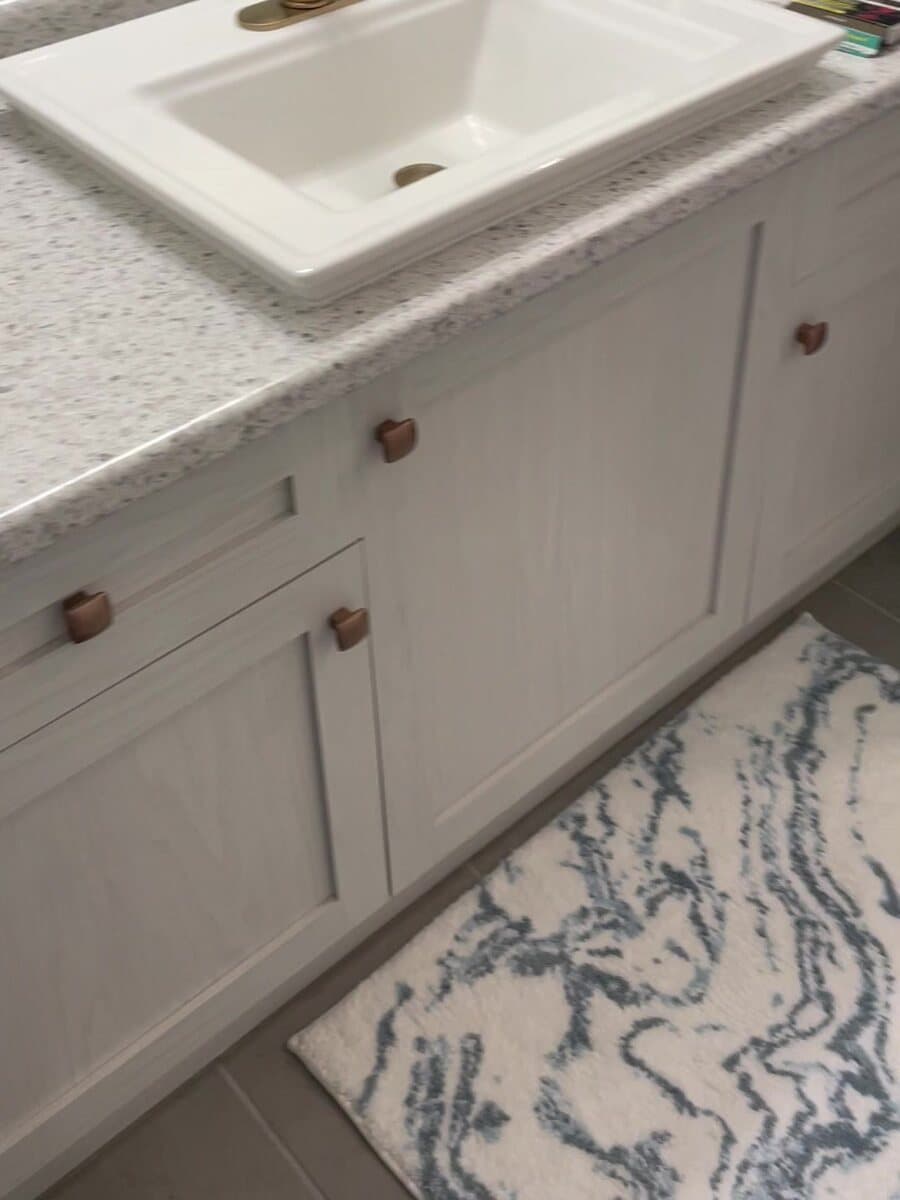
Vanity hardware to match
New brushed gold knobs carry the same finish across the vanity.
Watch the project
Before & after
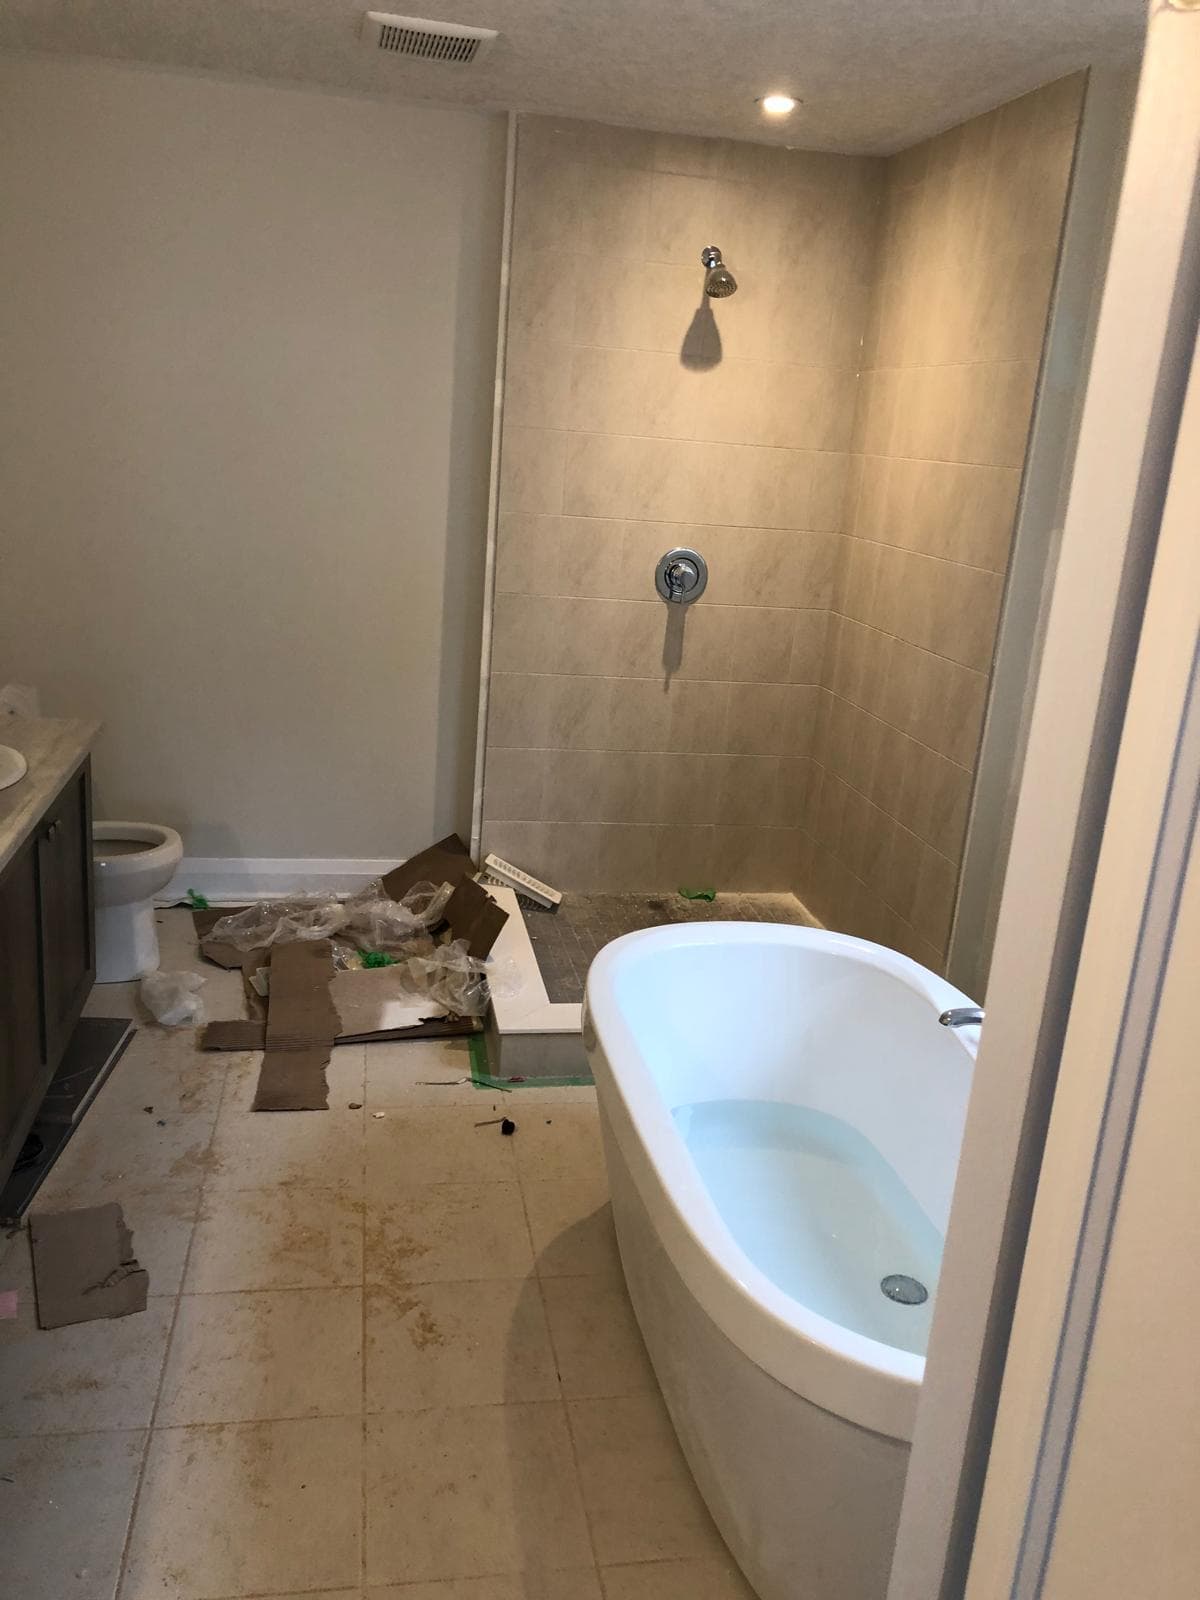
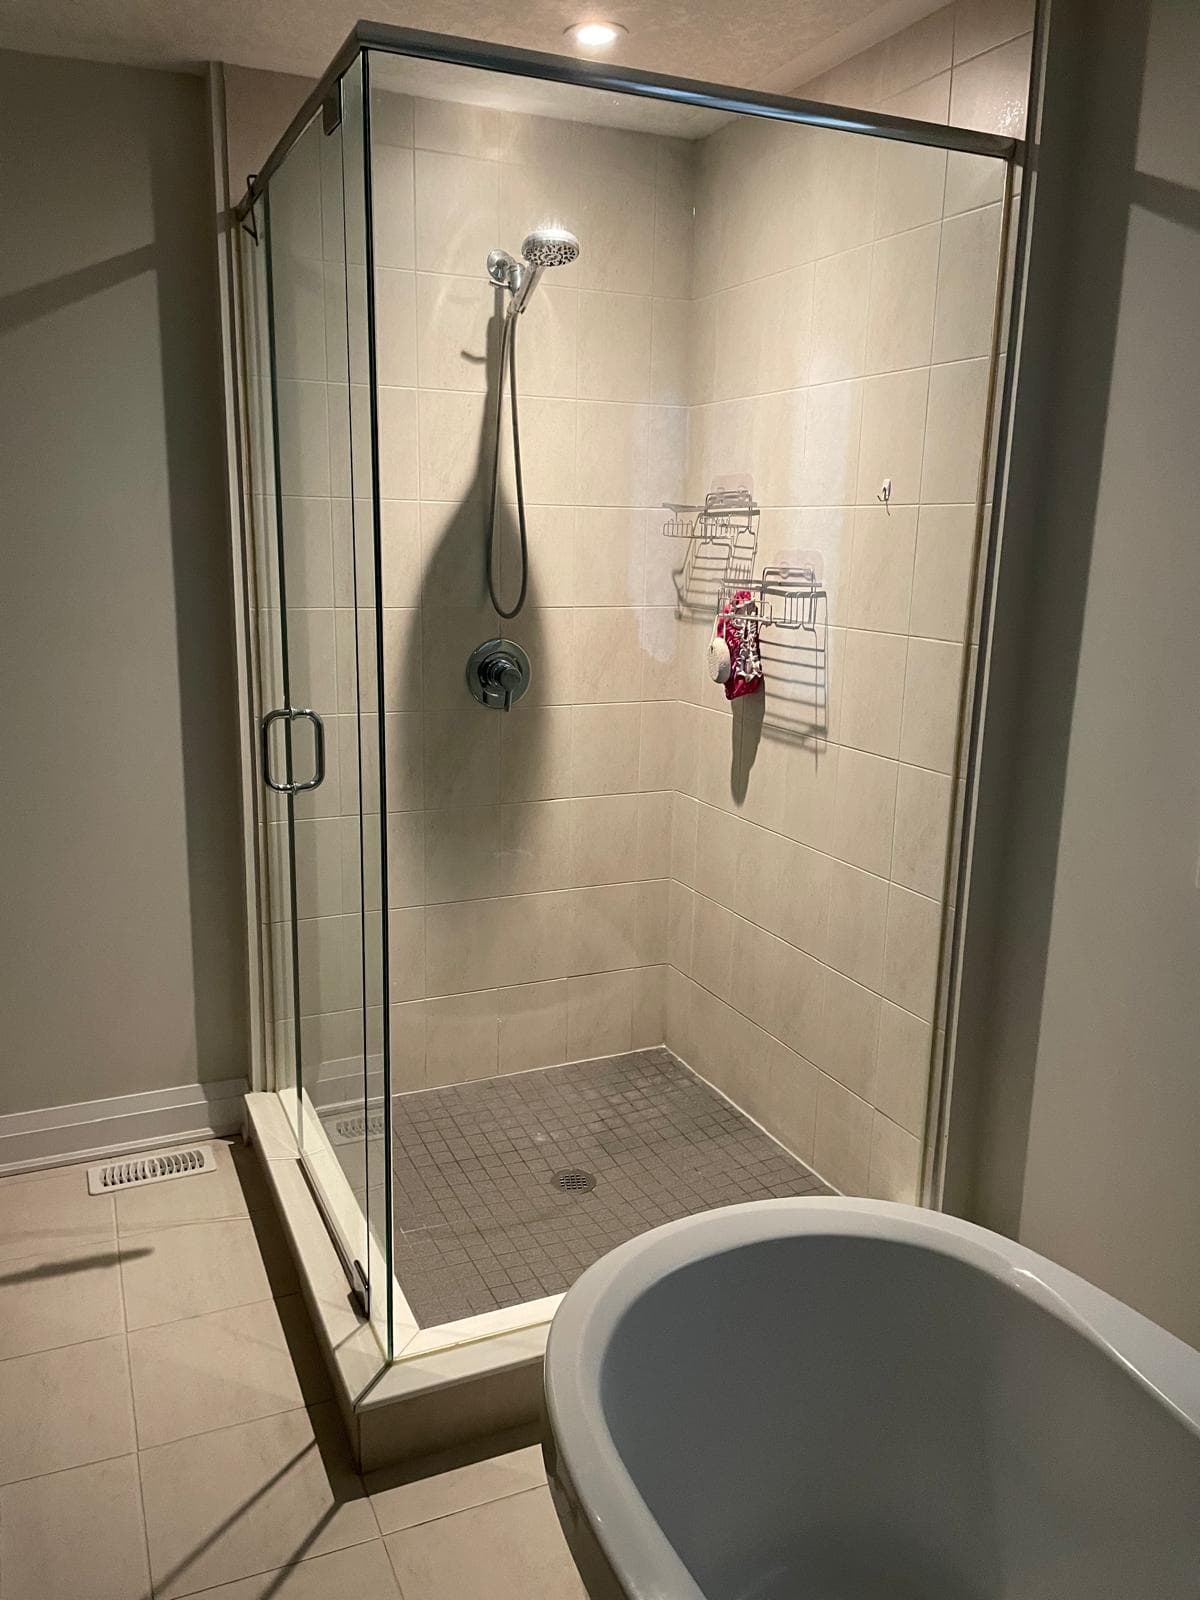
Ensuite Renovation with Freestanding Tub
An ensuite finished with a corner glass shower, a freestanding soaker tub and new tile throughout.
- Corner glass shower
- Freestanding soaker tub
- Floor and wall tile
- New fixtures and lighting
Gallery
Project gallery
Kitchens, bathrooms, basements, interiors and outdoor work.
Like what you see?
Tell us about your project and we’ll book a free site visit.