
Kitchener · Waterloo · Cambridge
Bathroom Renovation in Kitchener-Waterloo
We renovate bathrooms across Kitchener, Waterloo and Cambridge from our Waterloo office — main bathrooms, ensuites, powder rooms and new basement bathrooms. One team handles demolition, plumbing, waterproofing, tile and finishing, with licensed trades and permits where your project needs them.
Below you’ll find two Kitchener-Waterloo bathrooms — one rebuilt from the studs, one transformed with new wainscoting, paint and fixtures — and what local homeowners said about the work.
Local Waterloo office
Site visits, estimates and the build are handled by our Kitchener-Waterloo team.
Waterproofing first
A continuous membrane on every wet wall and shower floor before any tile goes up.
Permits handled
We apply to the City of Kitchener, Waterloo or Cambridge and book the inspections.
Recent project in Kitchener-Waterloo
Full Bathroom Renovation in Kitchener-Waterloo
Kitchener-Waterloo, Ontario
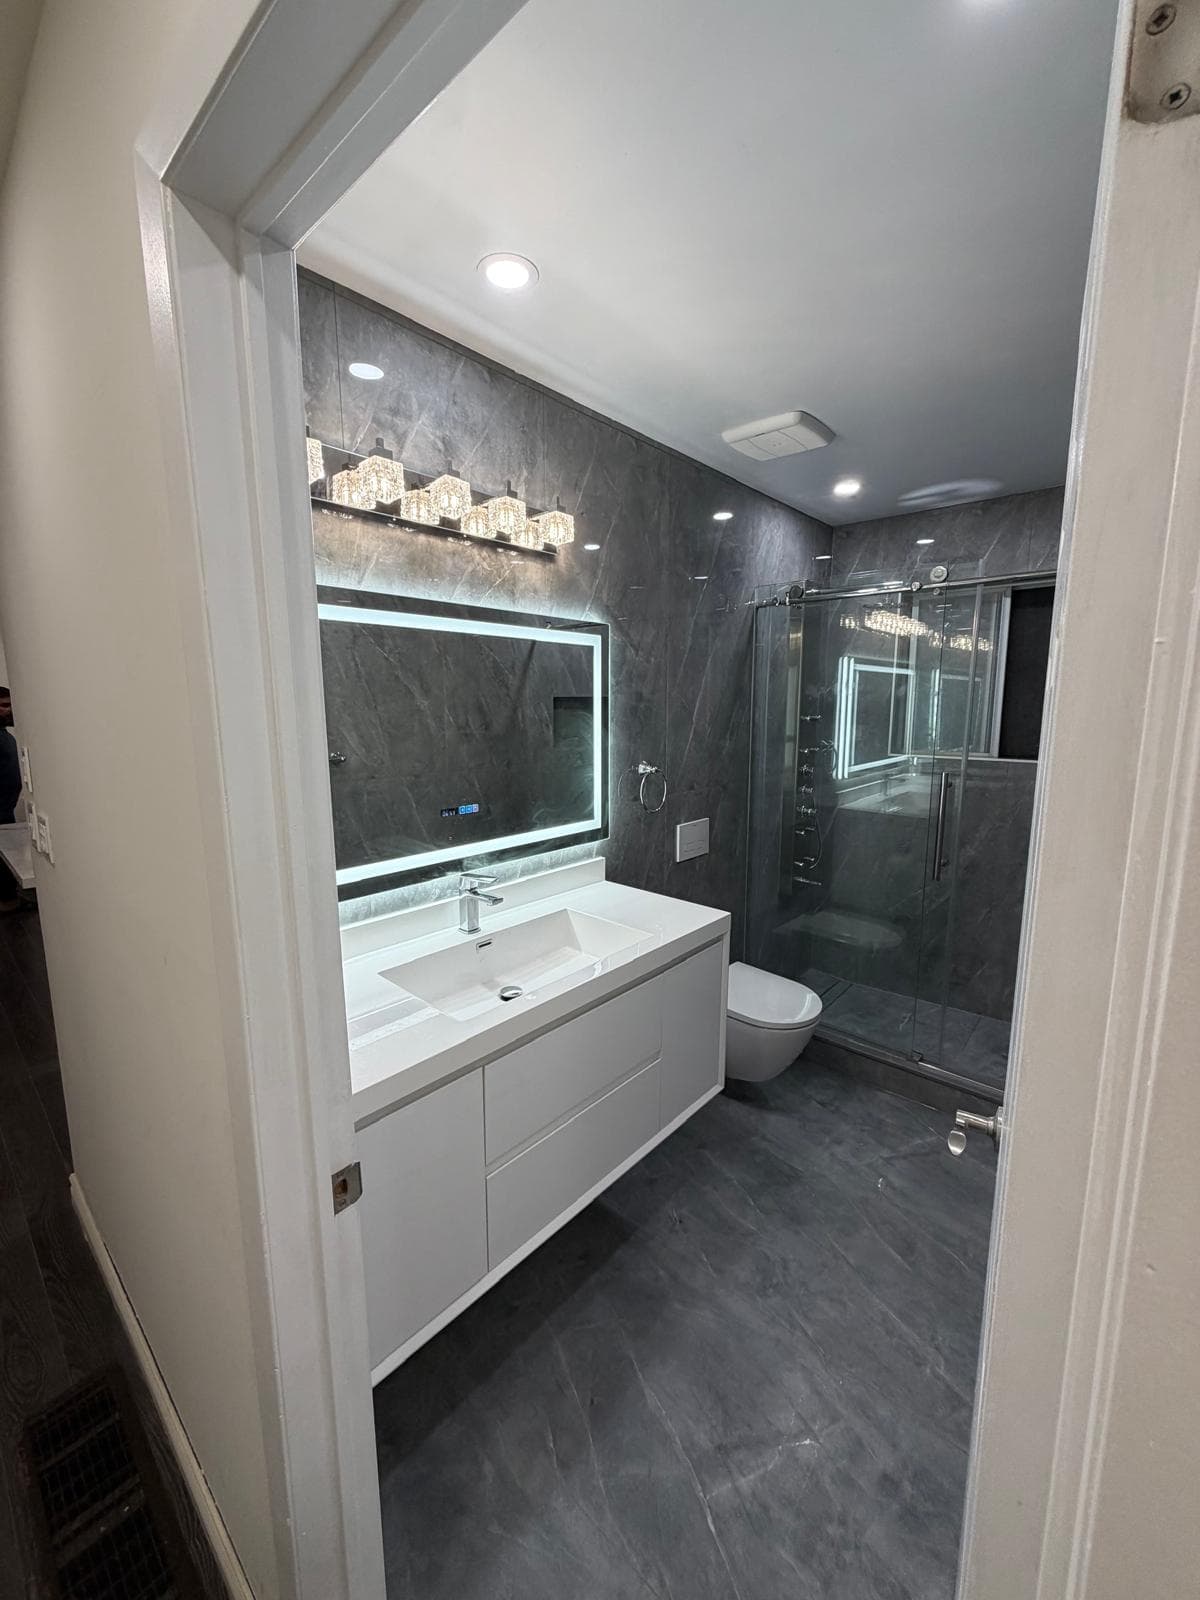
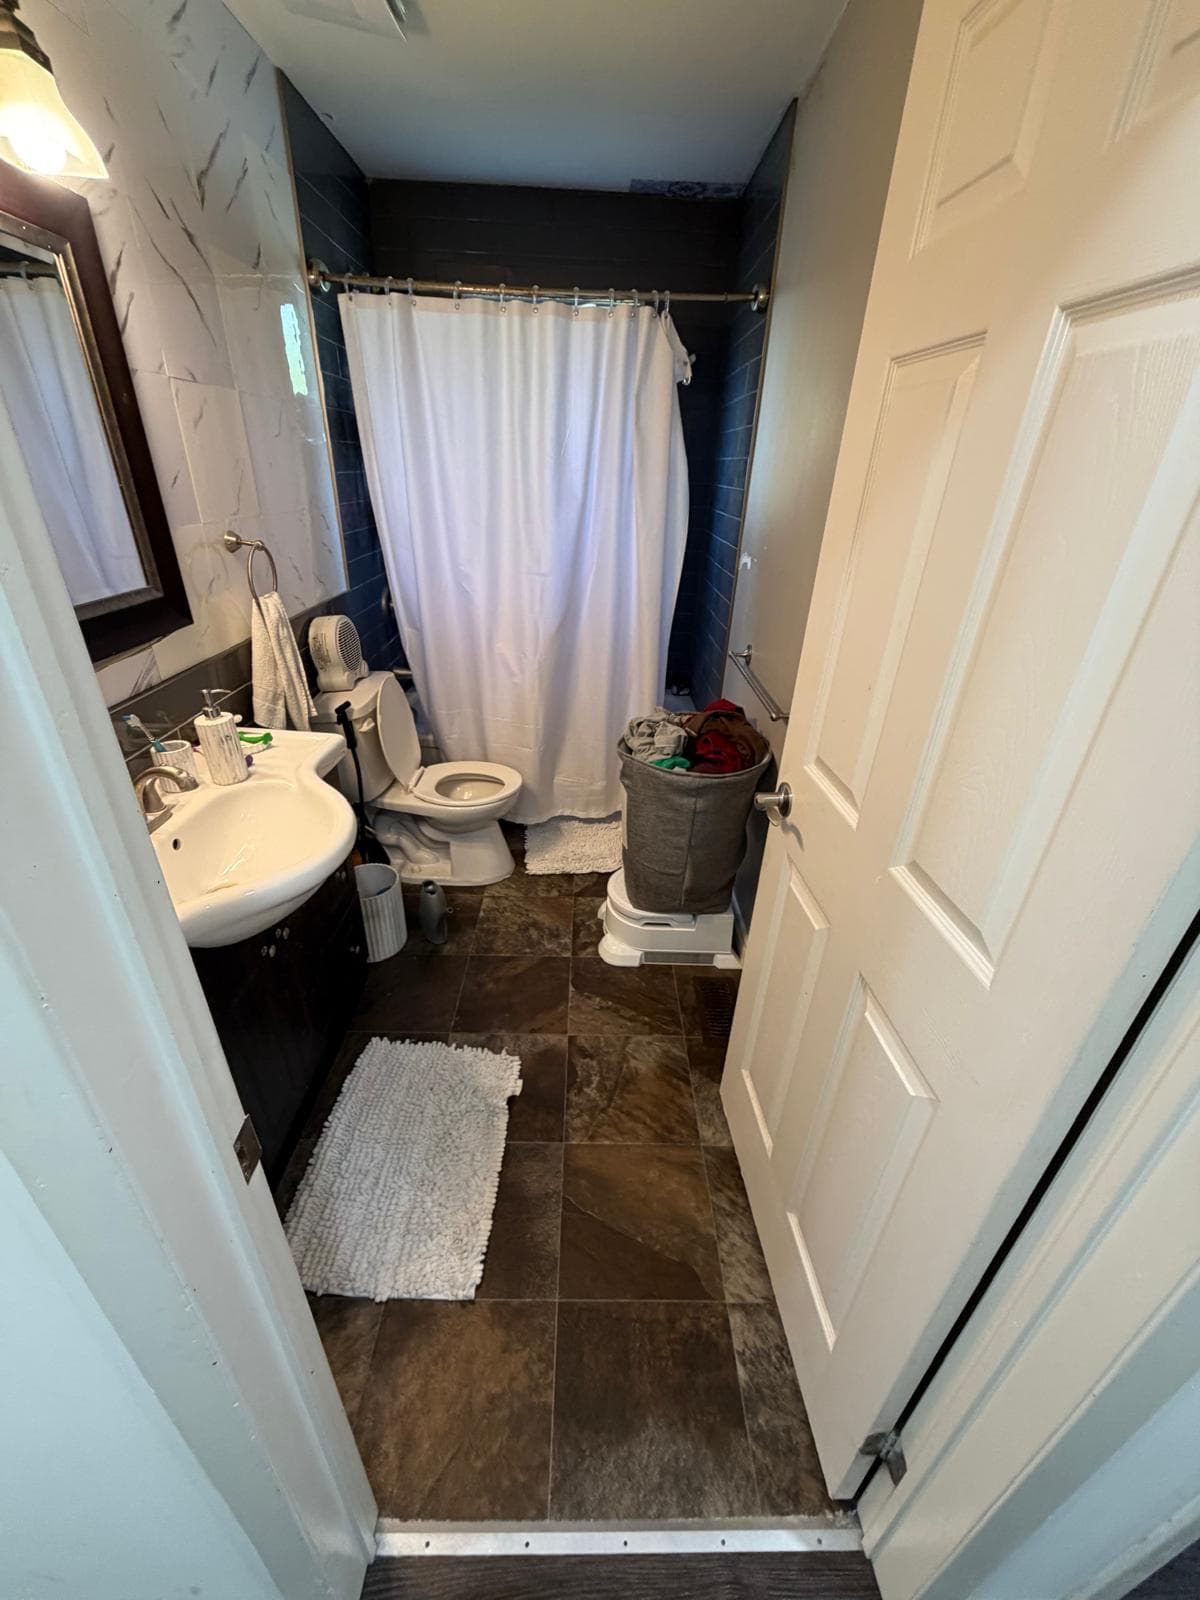
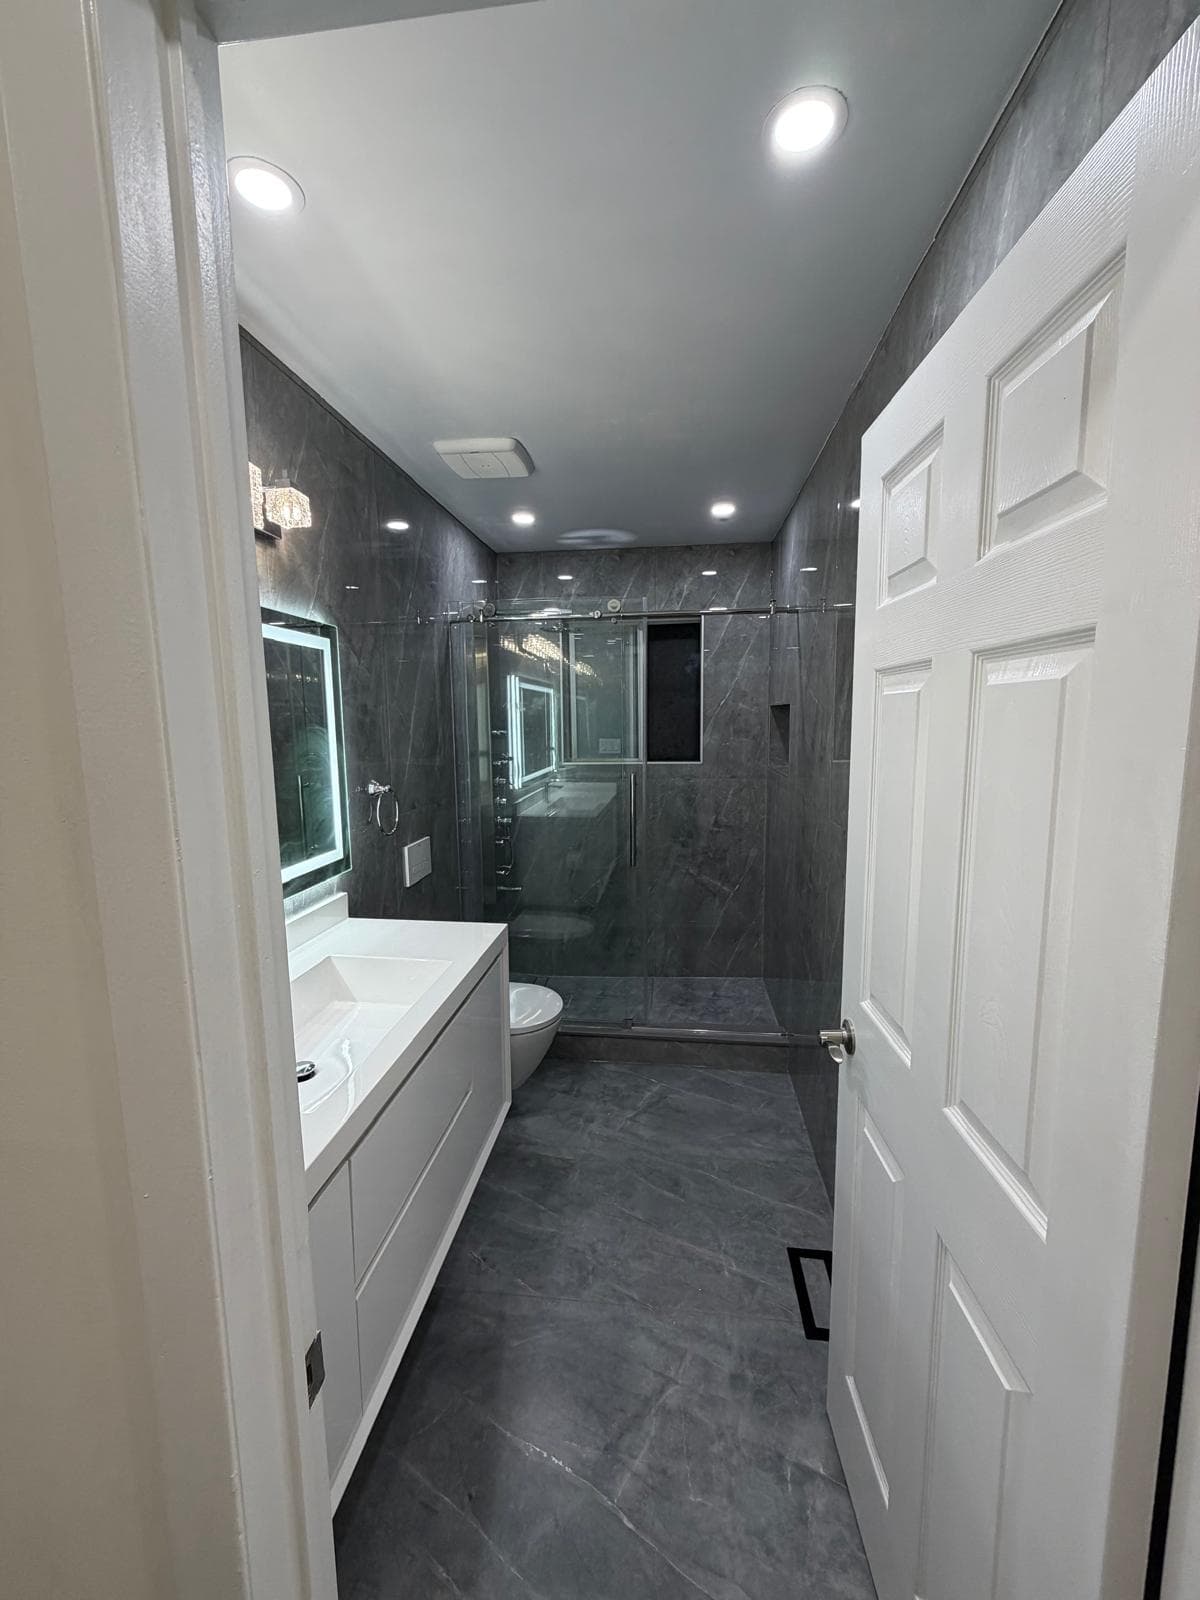
This dated bathroom had a curtain shower, a pedestal sink and worn floor tile. We took the room down to the studs and subfloor and rebuilt it as a modern spa-style bathroom with a glass walk-in shower, a wall-hung toilet and a floating vanity.
Drag the slider to compare the room before and after, then scroll through the build to see what goes on behind the tile.
- Gutted to the studs and subfloor
- Wall-hung toilet on an in-wall carrier
- Glass walk-in shower with built-in niches
- Cement board and sloped mortar shower base
- Liquid waterproofing membrane on all wet walls
- Large-format porcelain tile on walls and floor
- Floating vanity, LED mirror and pot lights
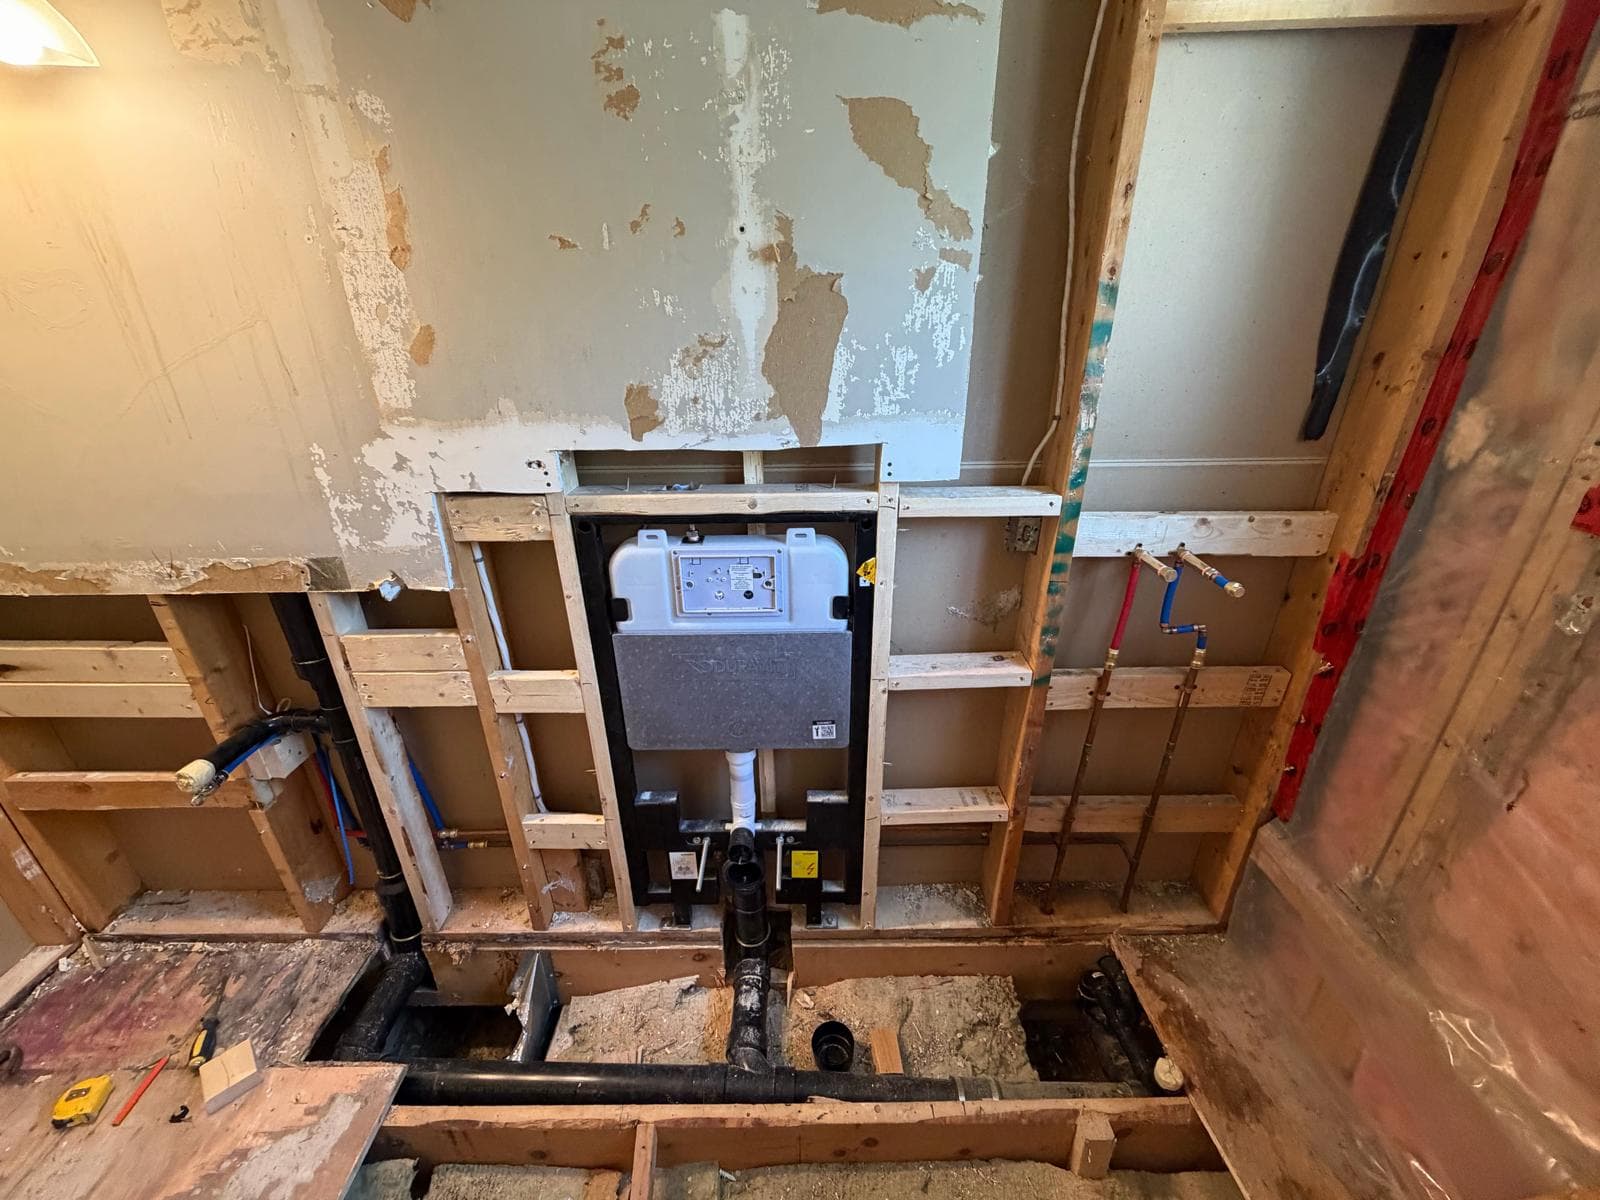
How we built it — behind the tile
 1
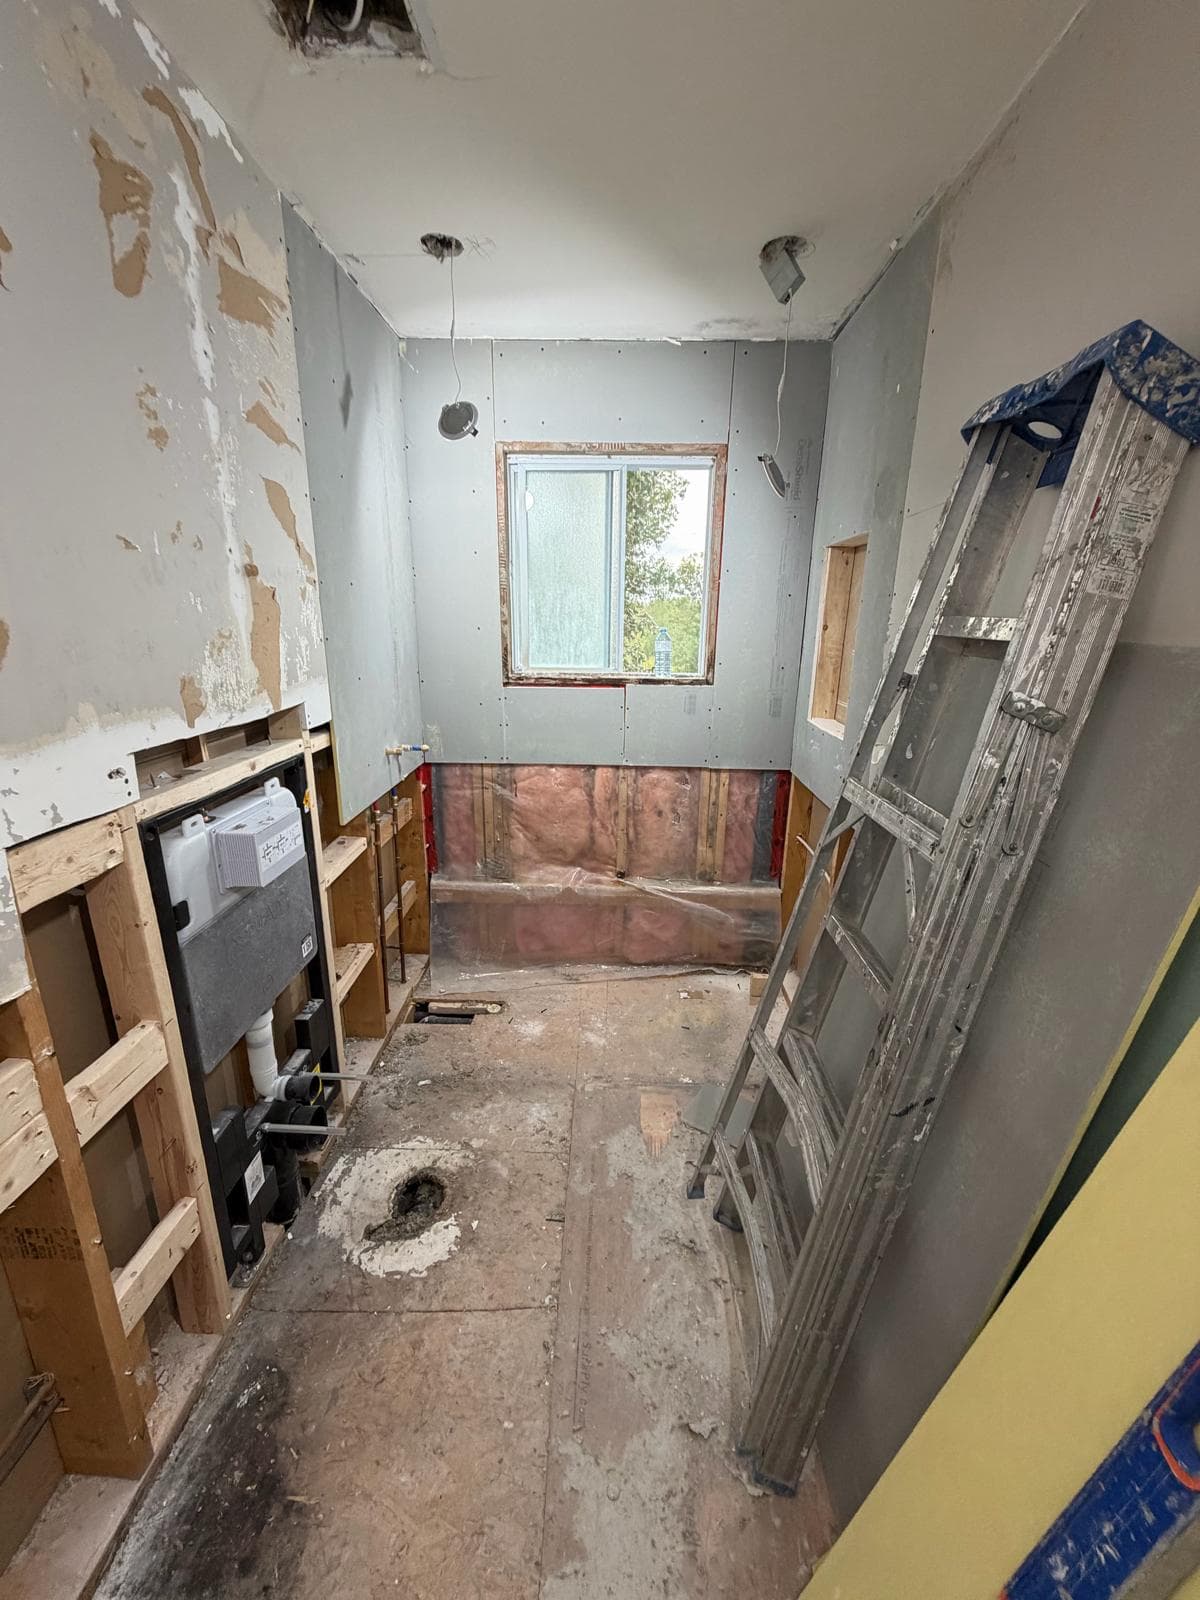
Demolition & plumbing rough-in
Walls and floor opened up, new drain and supply lines run, and an in-wall carrier installed for the floating toilet.
 2
Framing & structural backing
Solid framing and backing so the wall-hung toilet, vanity and glass shower are anchored securely.
 3
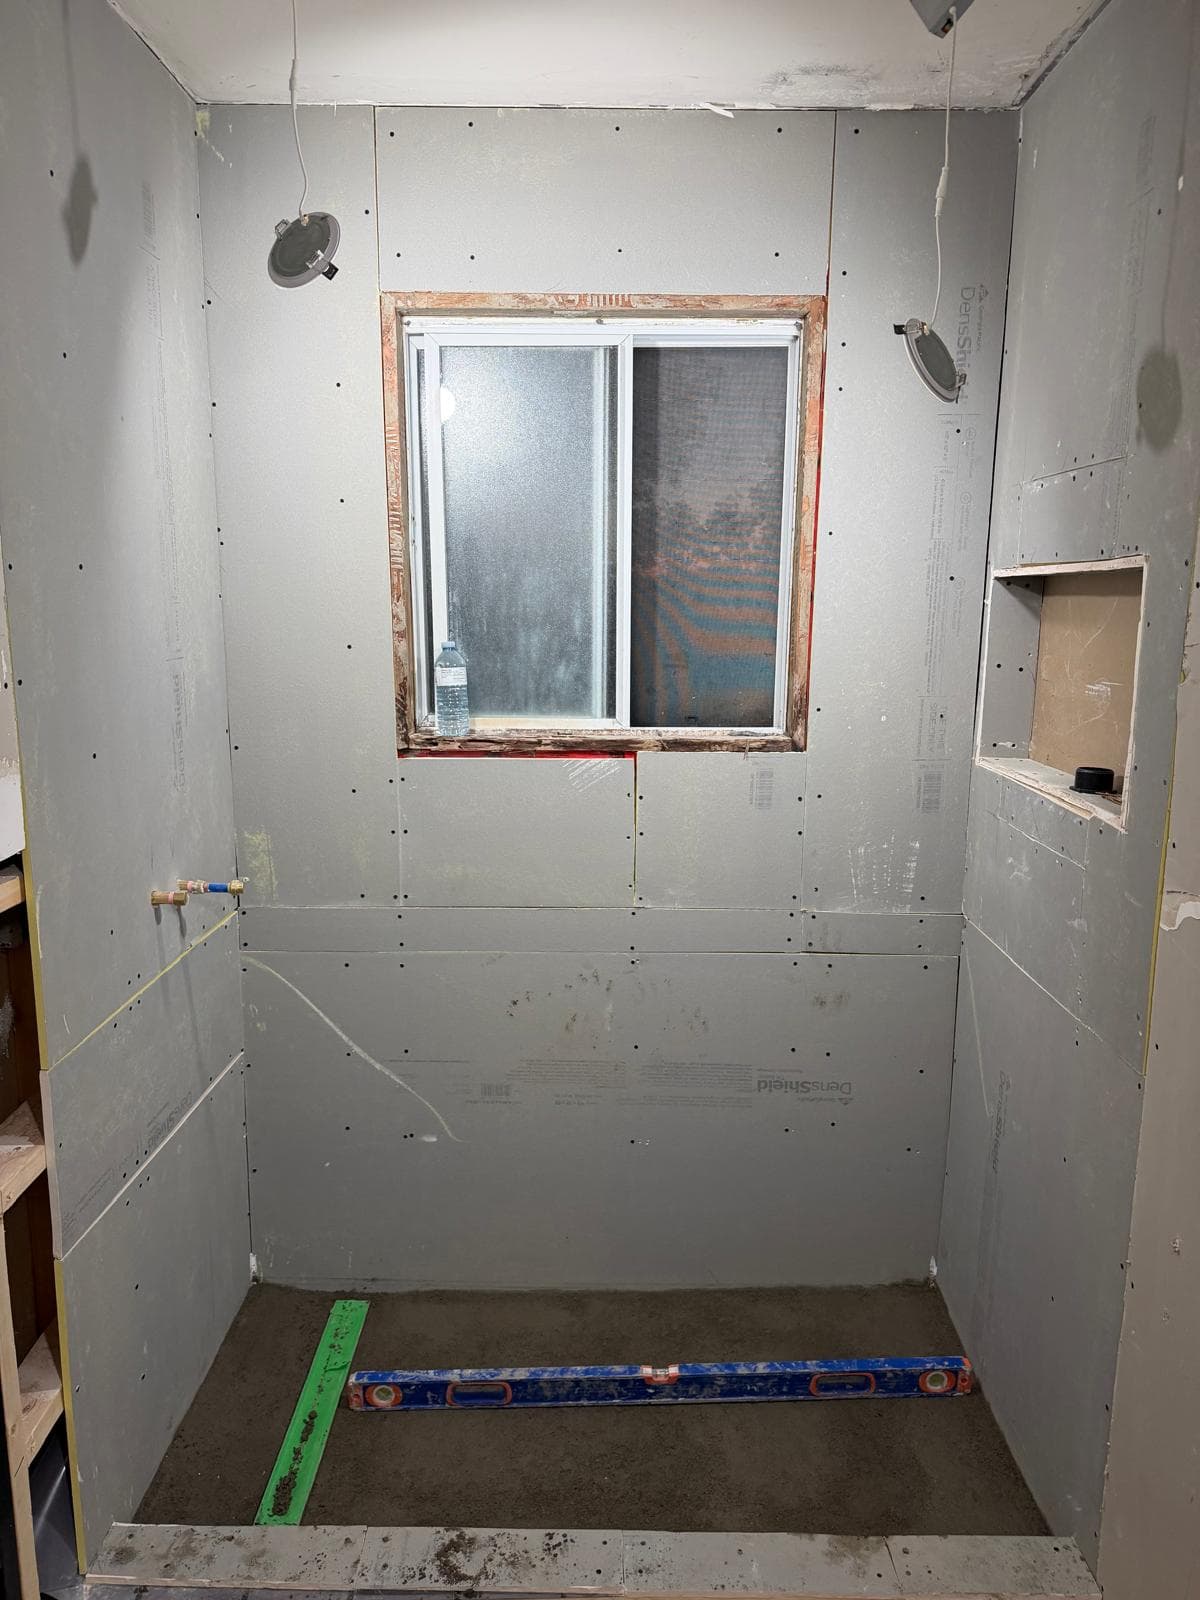
Cement board & shower base
Cement board on the shower walls, a recessed niche framed in, and a mortar base sloped to the drain.
 4
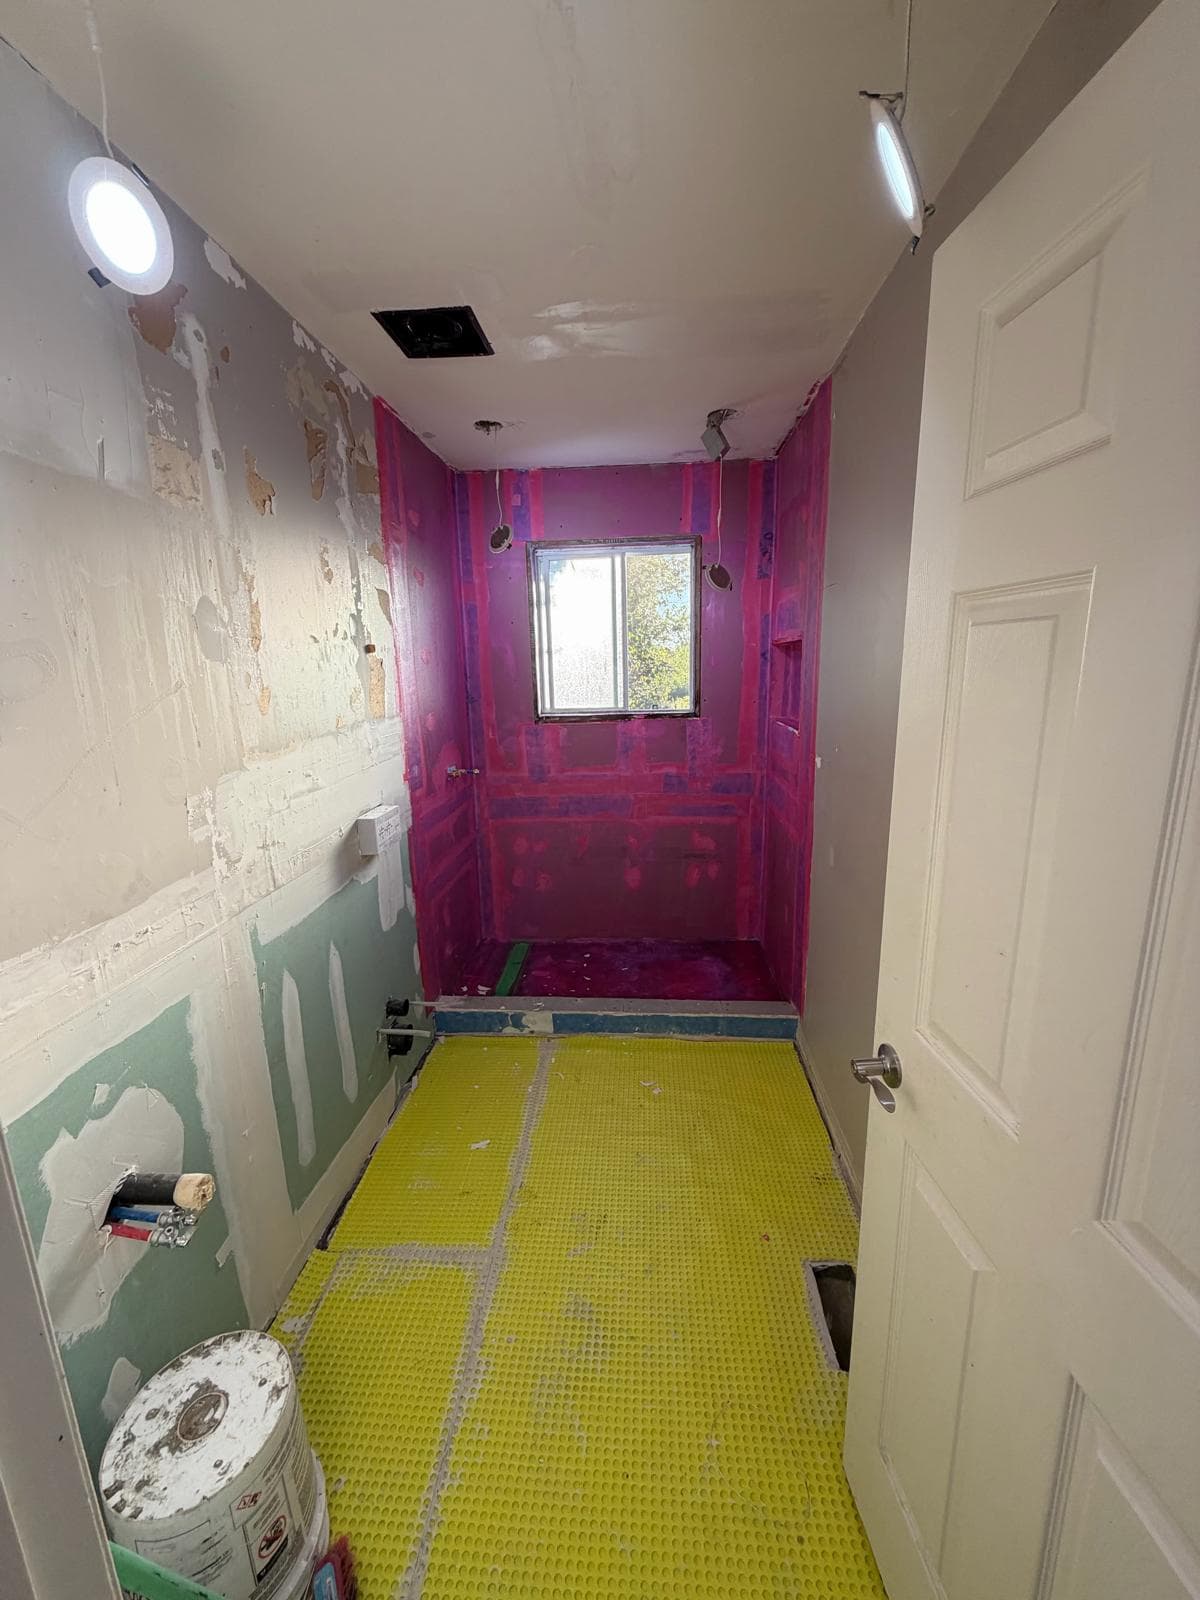
Waterproofing
A continuous waterproofing membrane on the shower walls and across the floor before any tile goes down.
 5
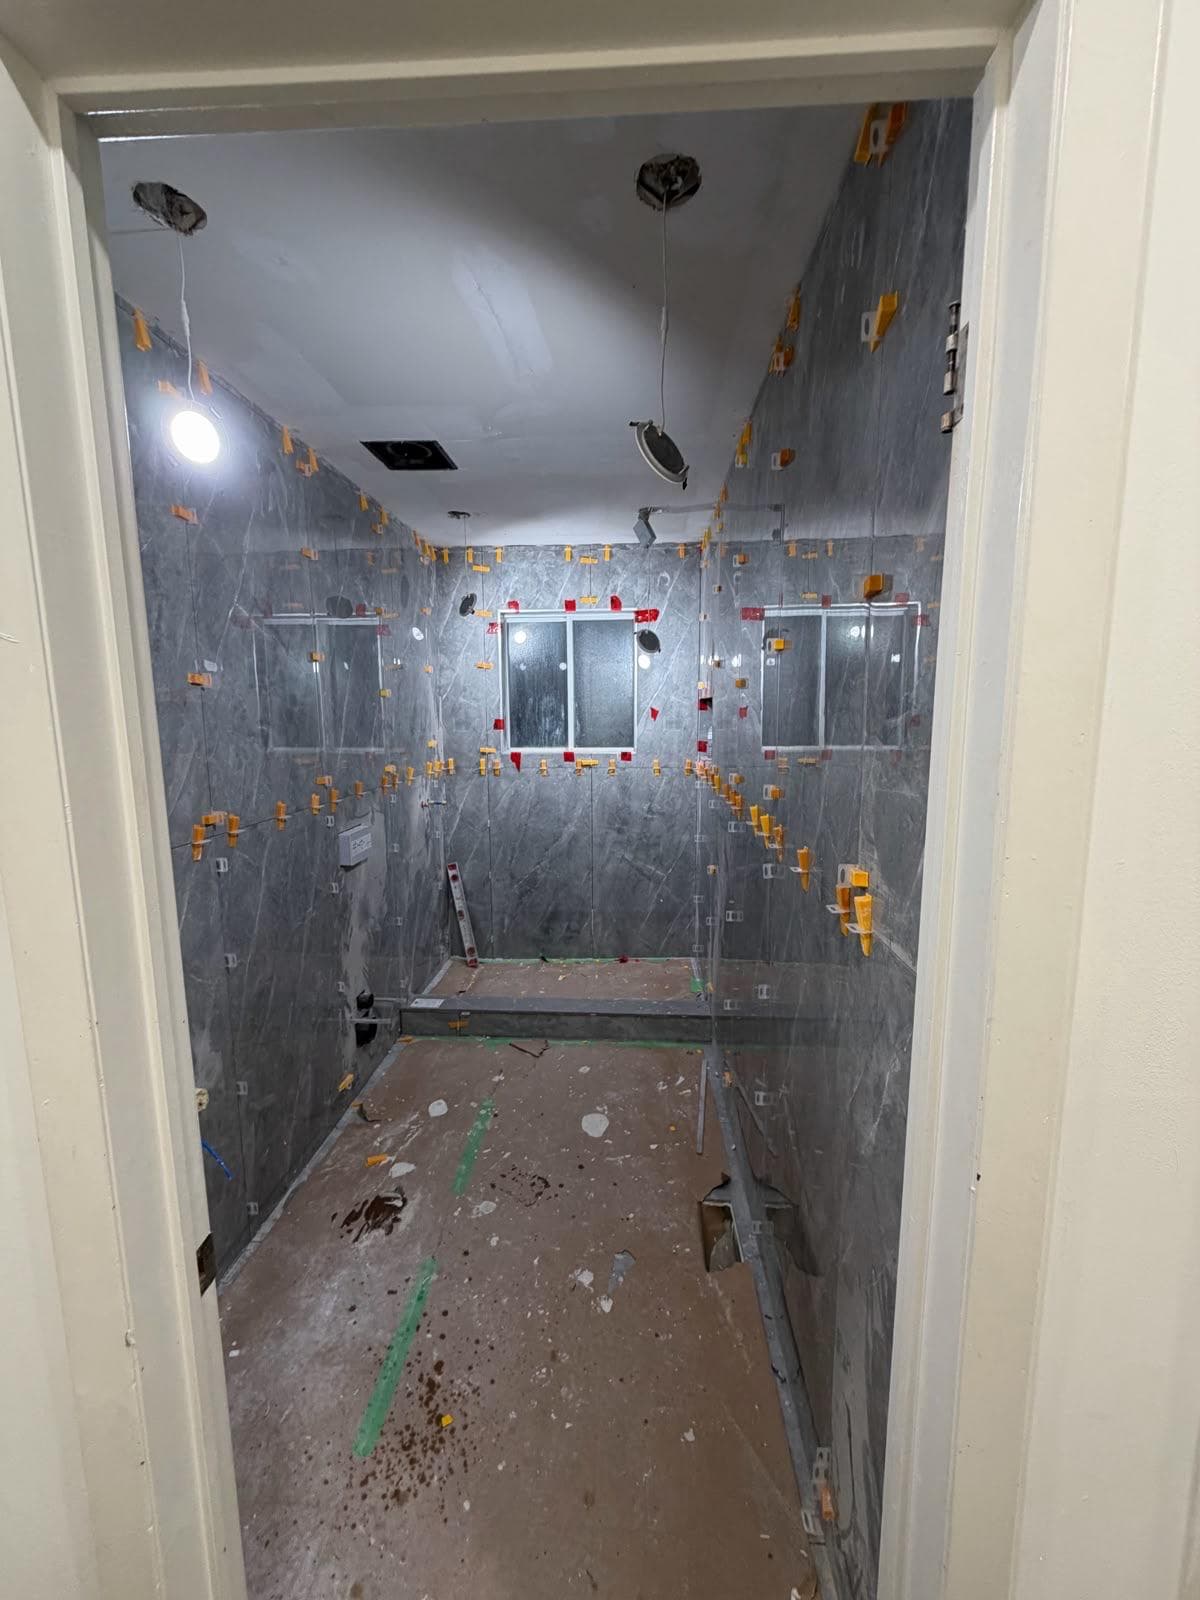
Tile installation
Large-format porcelain set with a levelling system for flat, tight joints on the walls and floor.
- 6
The finished bathroom
Glass walk-in shower, floating vanity with LED mirror, wall-hung toilet and new pot lights.
Another Kitchener-Waterloo project
Beige to Board-and-Batten: A Bathroom Refresh in Kitchener-Waterloo
Kitchener-Waterloo, Ontario
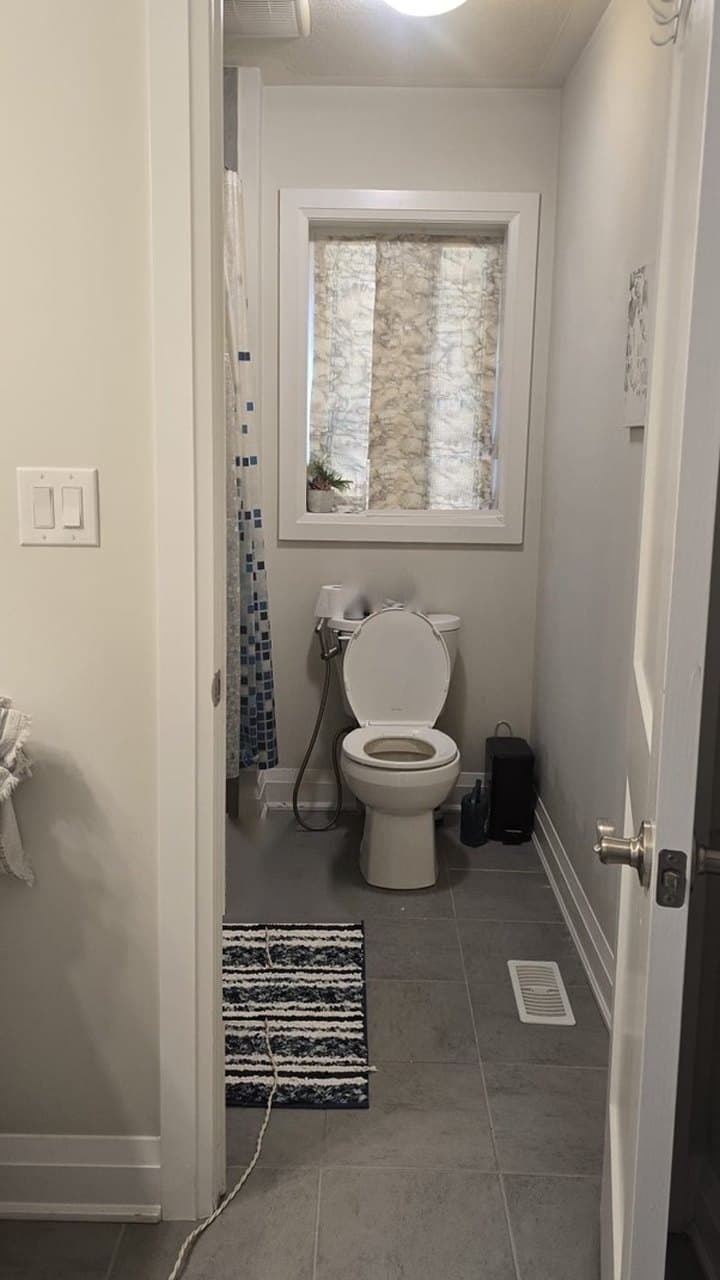
This bathroom worked, but it felt plain: light beige walls, builder baseboards, dated chrome fixtures and a bare window. The owners wanted a custom, designer look without the cost, dust and downtime of tearing it out.
We started by protecting the floor and fixtures, then repainted the whole room. Walls and ceiling went from beige to Benjamin Moore White Dove in a satin finish. The door and window casing got White Dove in a pearl finish, a touch shinier, so the trim reads crisp and stands up to handling and steam.
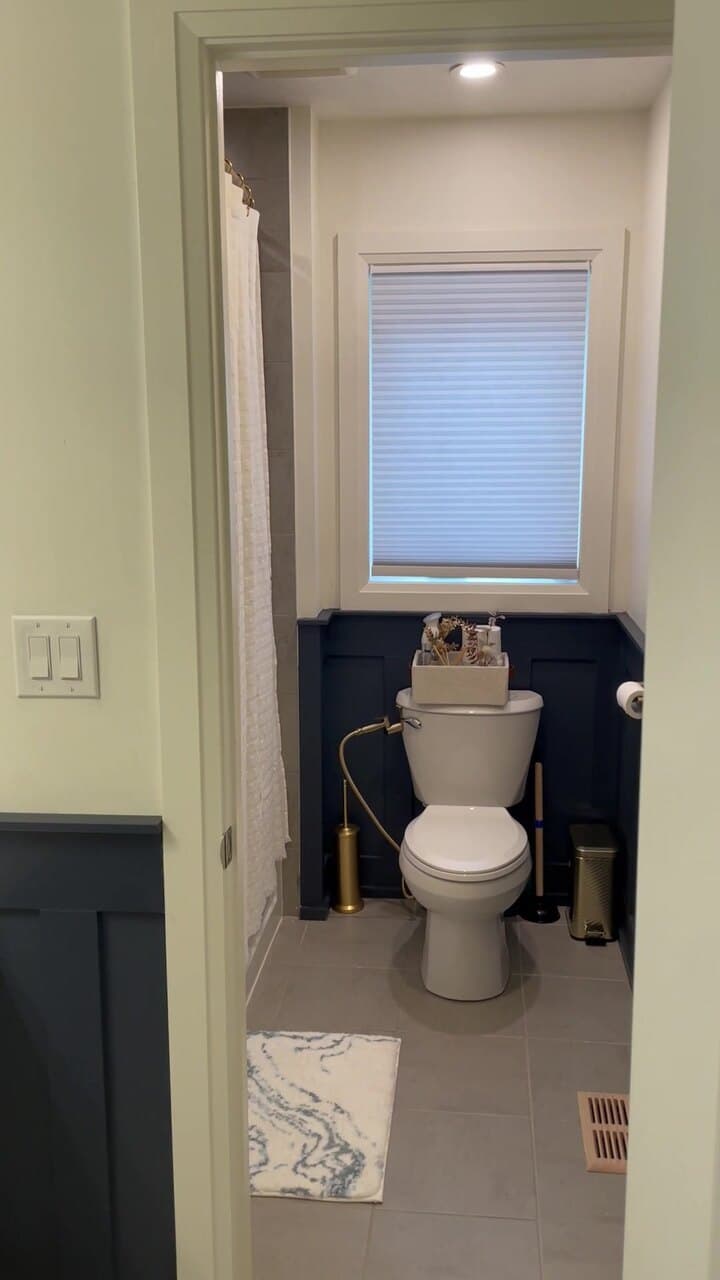
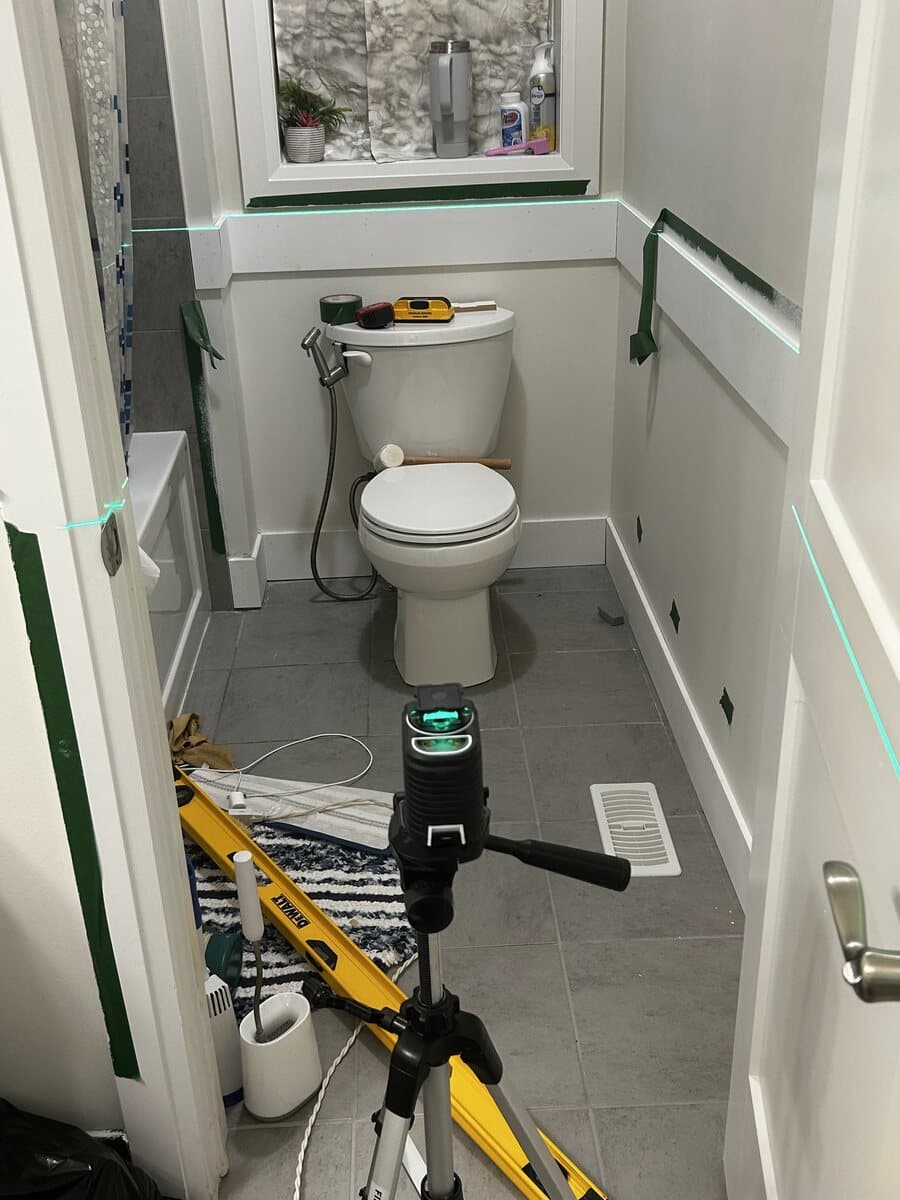
Next came board-and-batten wainscoting on every wall. A laser level set one level height around the room, and every batten was spaced equally from wall to wall. The top rail is taller than the bottom boards for a heavier cap. We replaced the old baseboards, added a small moulding at the floor, filled and sanded every joint, and painted it all Benjamin Moore Hale Navy in satin.
To finish, everything was switched to brushed gold: the faucet, door handles and privacy lock, the shower system, curved curtain rod, bidet sprayer, towel bar, toilet paper holder, garbage bin, toilet brush and hanging shower caddy. A new toilet, new pot light, new window blinds and a new exhaust fan complete the room.
- Floors and fixtures fully protected
- White Dove satin on walls and ceiling
- White Dove pearl on door and window casing
- Board-and-batten on every wall, laser-level layout
- Taller top rail, new baseboards and moulding
- Wainscoting in Hale Navy satin
- Brushed gold fixtures and accessories throughout
- New toilet, pot light, window blinds and exhaust fan
Paint and finishes
- Walls and ceiling
- Benjamin Moore White Dove, satin
- Door and window casing
- Benjamin Moore White Dove, pearl
- Wainscoting, baseboards and moulding
- Benjamin Moore Hale Navy, satin
- Fixtures and accessories
- Brushed gold throughout
How we did it, step by step
 1
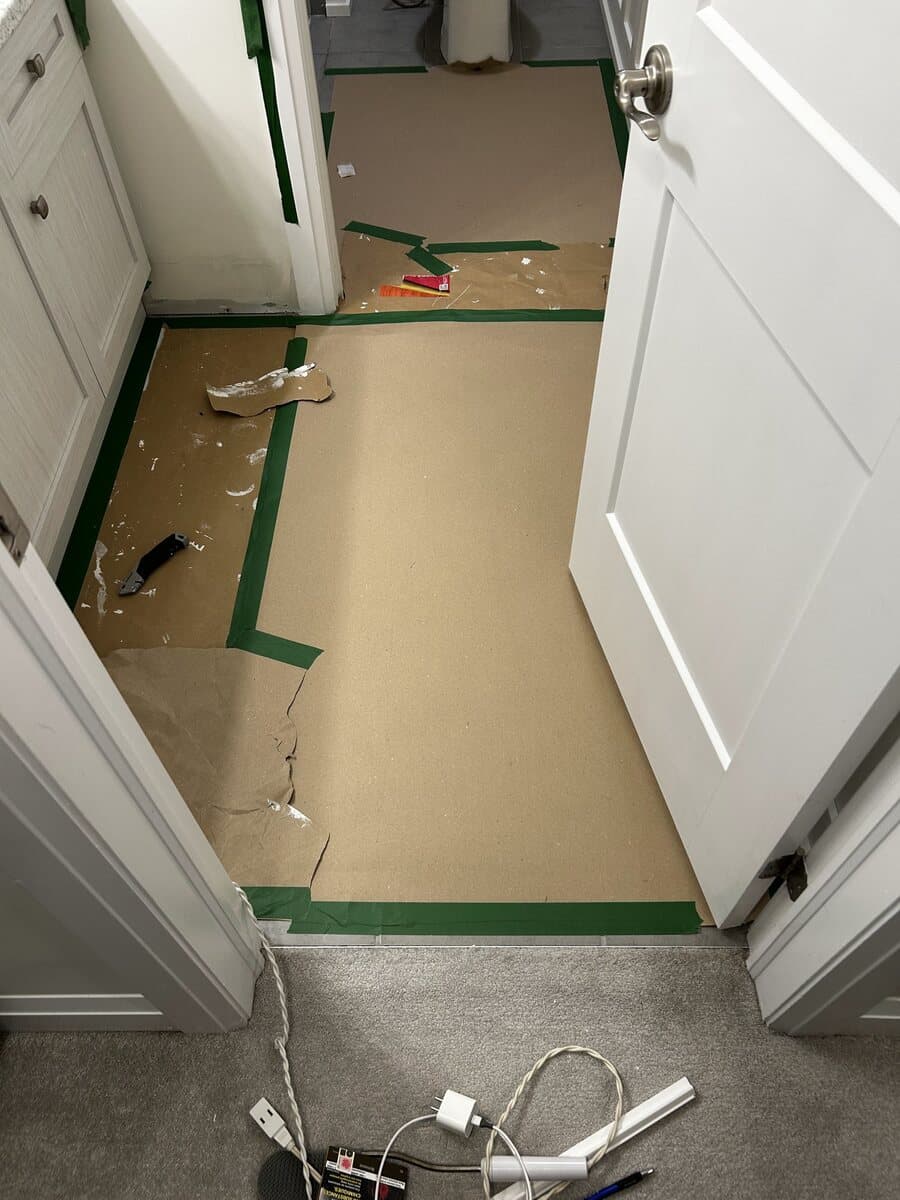
Protect everything first
Before any paint is opened, the floor is covered wall to wall and taped at every edge, and the toilet, tub and vanity are masked off.
 2
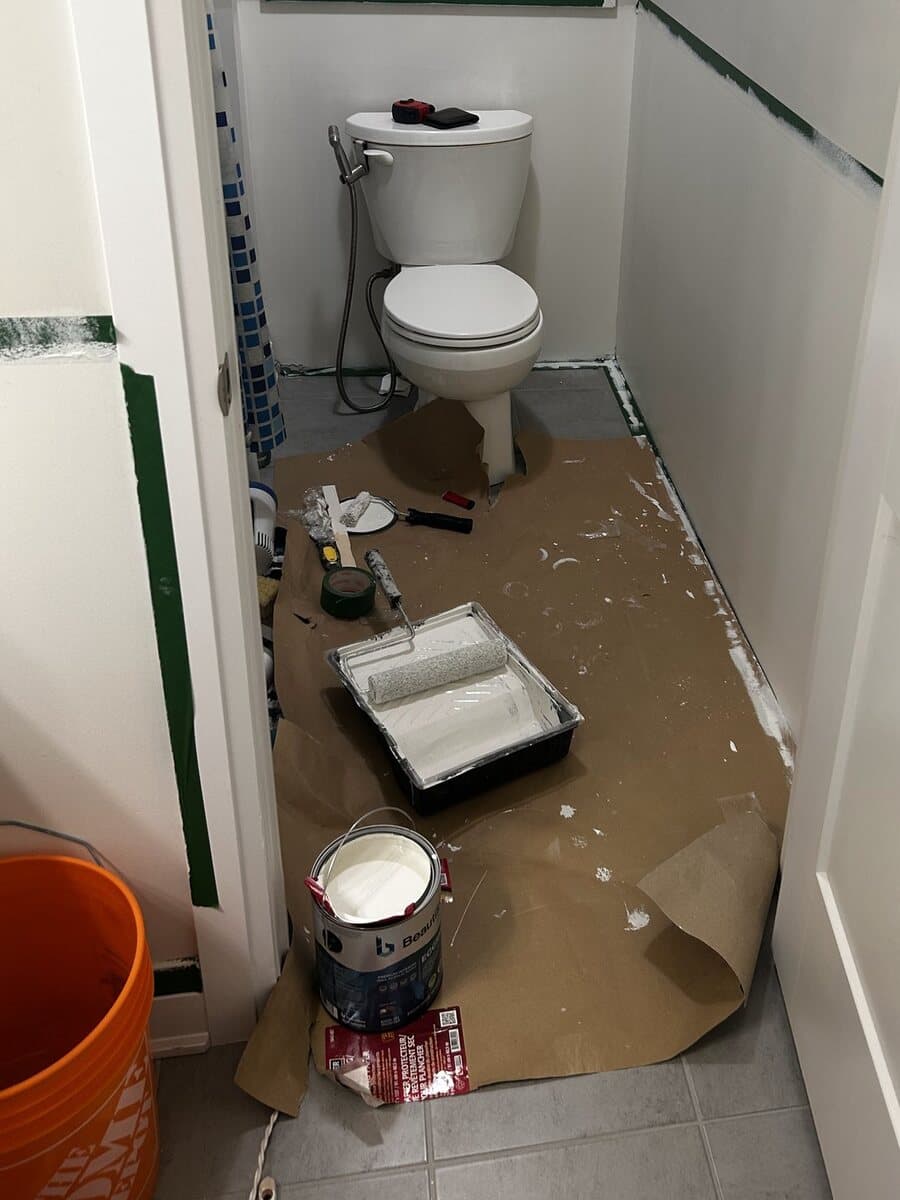
White Dove, top to bottom
The beige is gone. Walls and ceiling are rolled in Benjamin Moore White Dove satin, which wipes clean in a bathroom. The door and window casing get White Dove in pearl, a slightly shinier finish that keeps the trim crisp.
 3
Laser-level layout
A laser level sets one dead-level height around the whole room, then every batten is marked out at equal spacing so the panels line up wall to wall.
 4
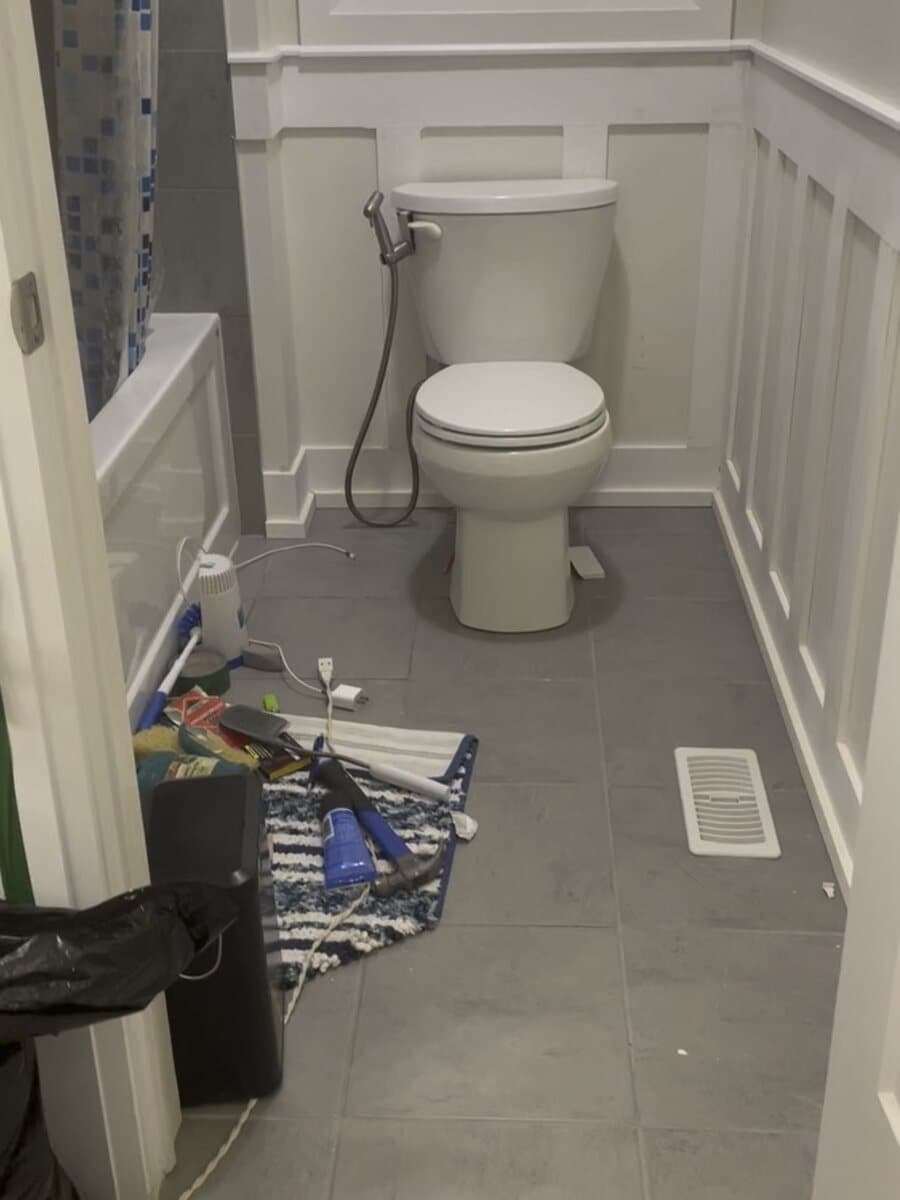
Board-and-batten installed
The wainscoting goes up on every wall: a top rail, then evenly spaced vertical battens between the rail and the base.
 5
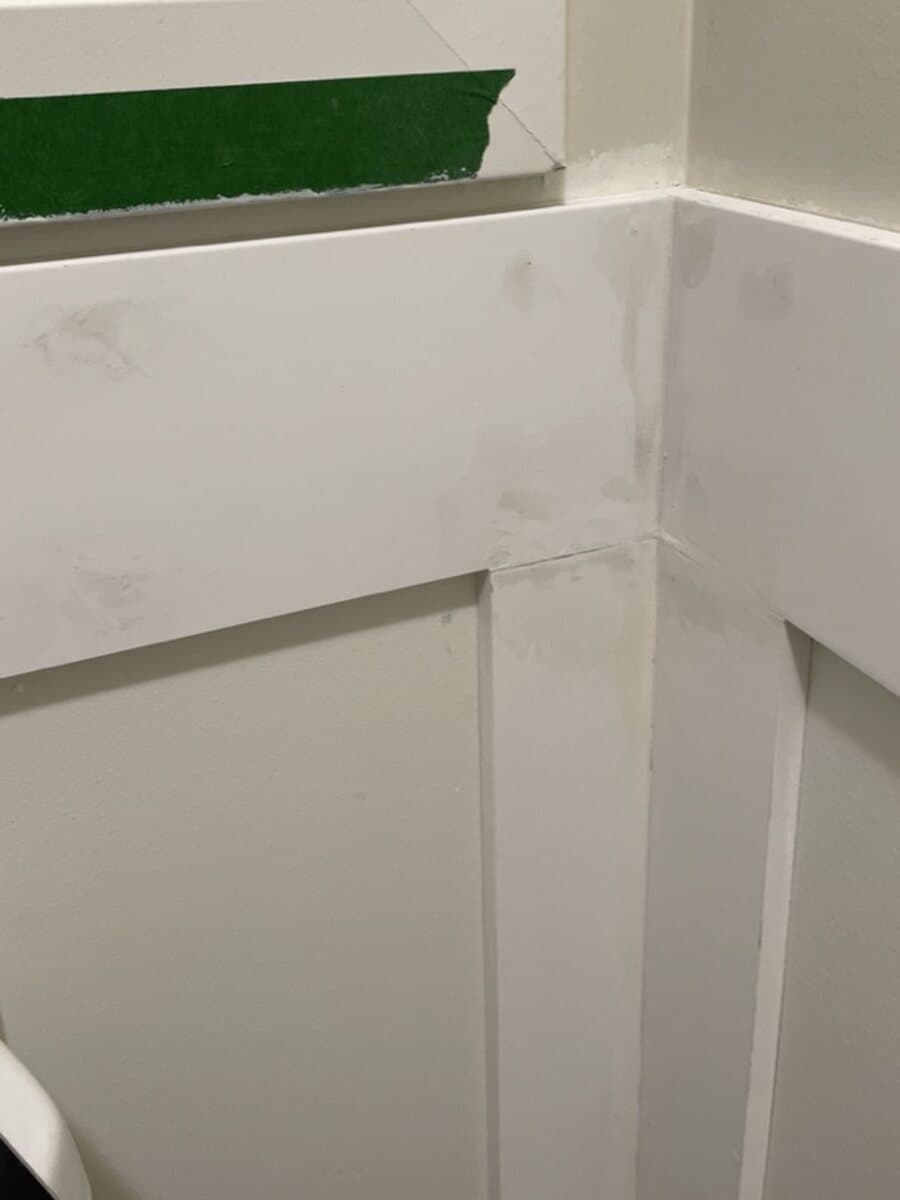
A taller top rail, filled and sanded
The top board is deliberately taller than the bottom boards for a heavier, more finished cap. Every joint and nail hole is filled with wood filler and sanded smooth, so no gaps or seams show once it is painted.
 6
New baseboards and moulding
The old baseboards came off. New baseboards and a small moulding along the bottom finish the panels cleanly at the floor.
 7
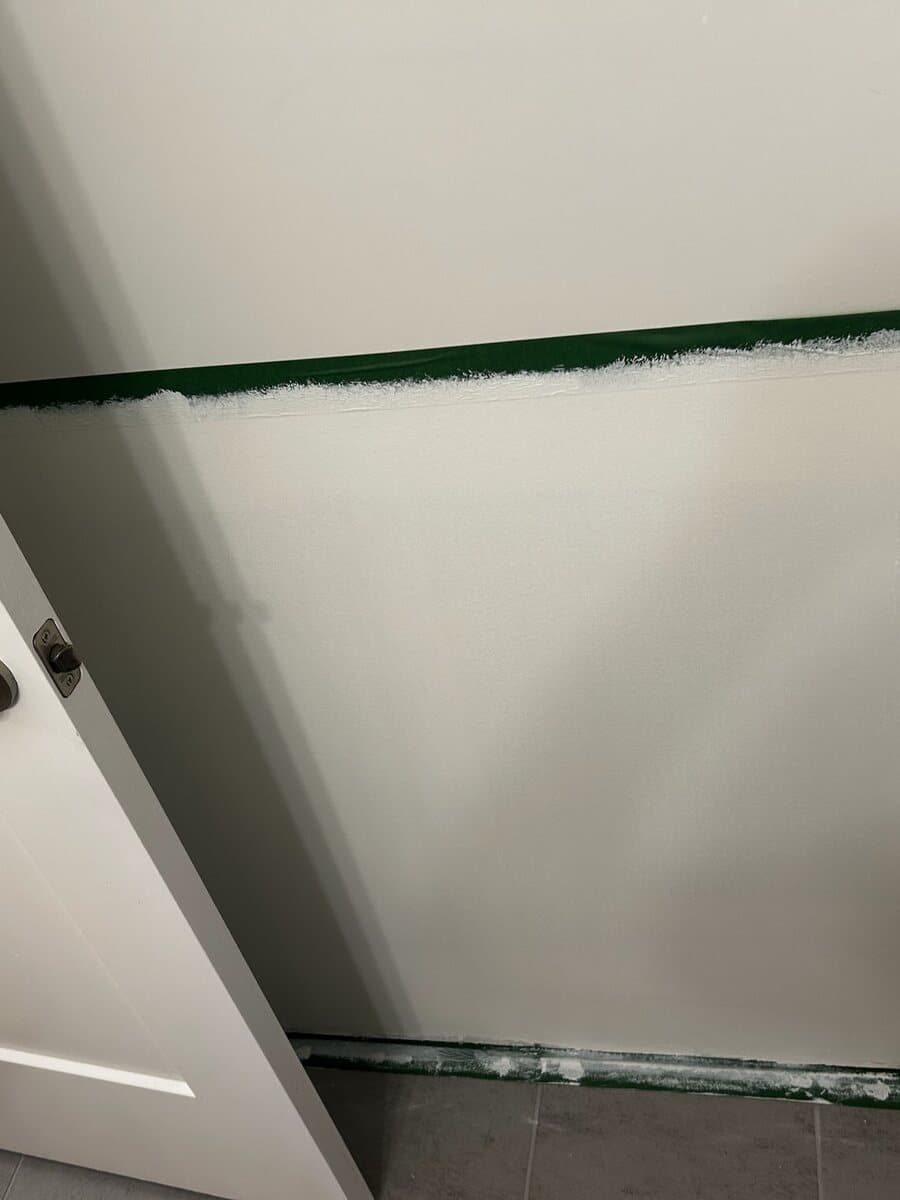
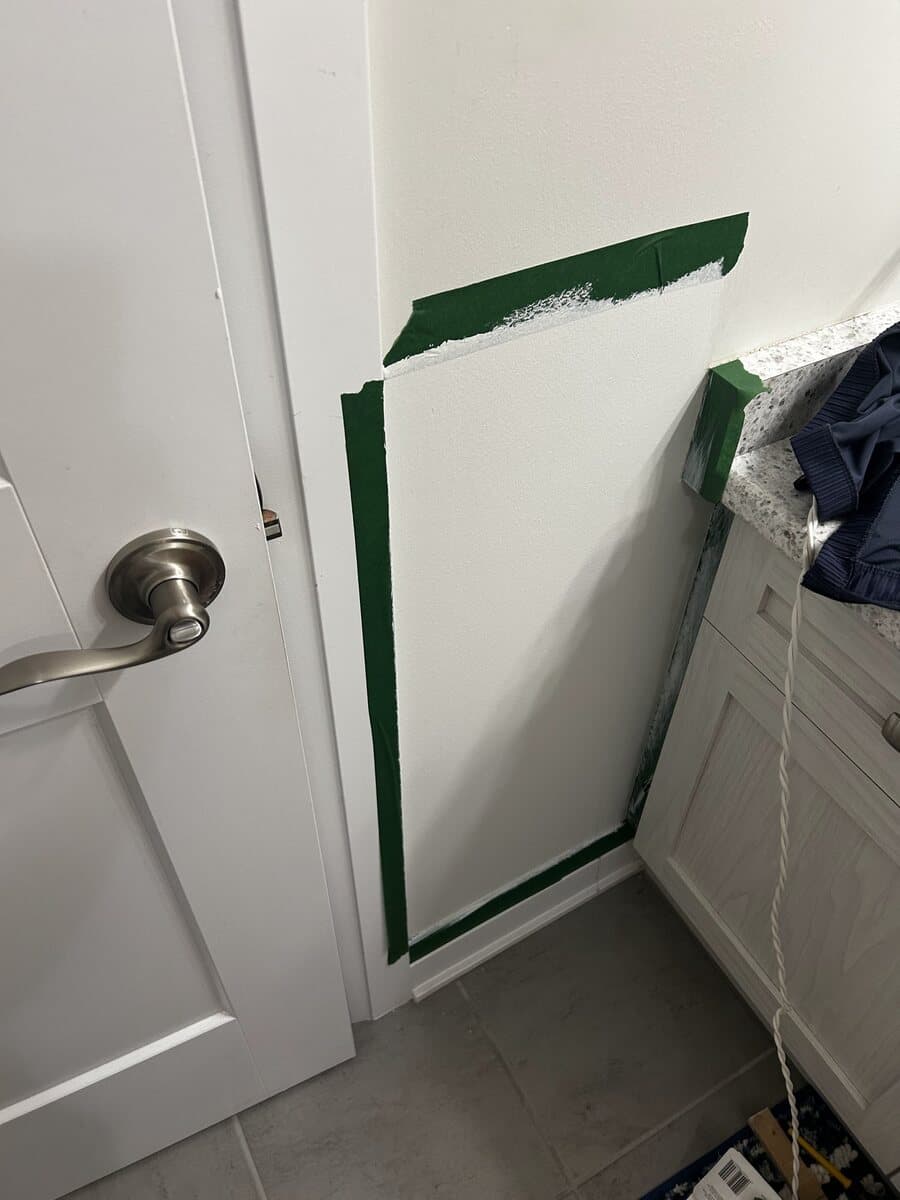
Crisp tape lines
Tape goes along the top rail and the casings so the Hale Navy and White Dove meet in a sharp, straight line.
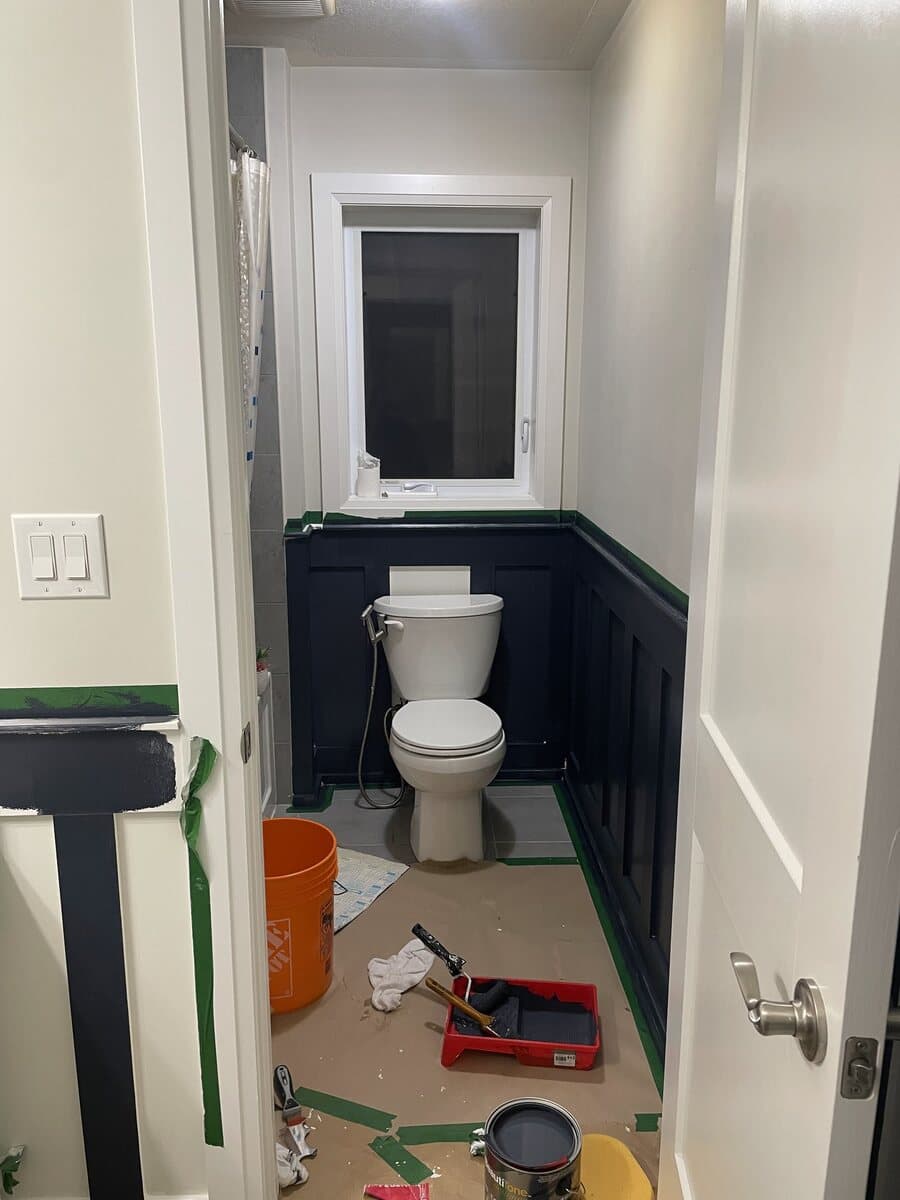 8
Hale Navy wainscoting
The wainscoting, baseboards and moulding are painted Benjamin Moore Hale Navy in satin, a deep blue that grounds the room against the White Dove walls.
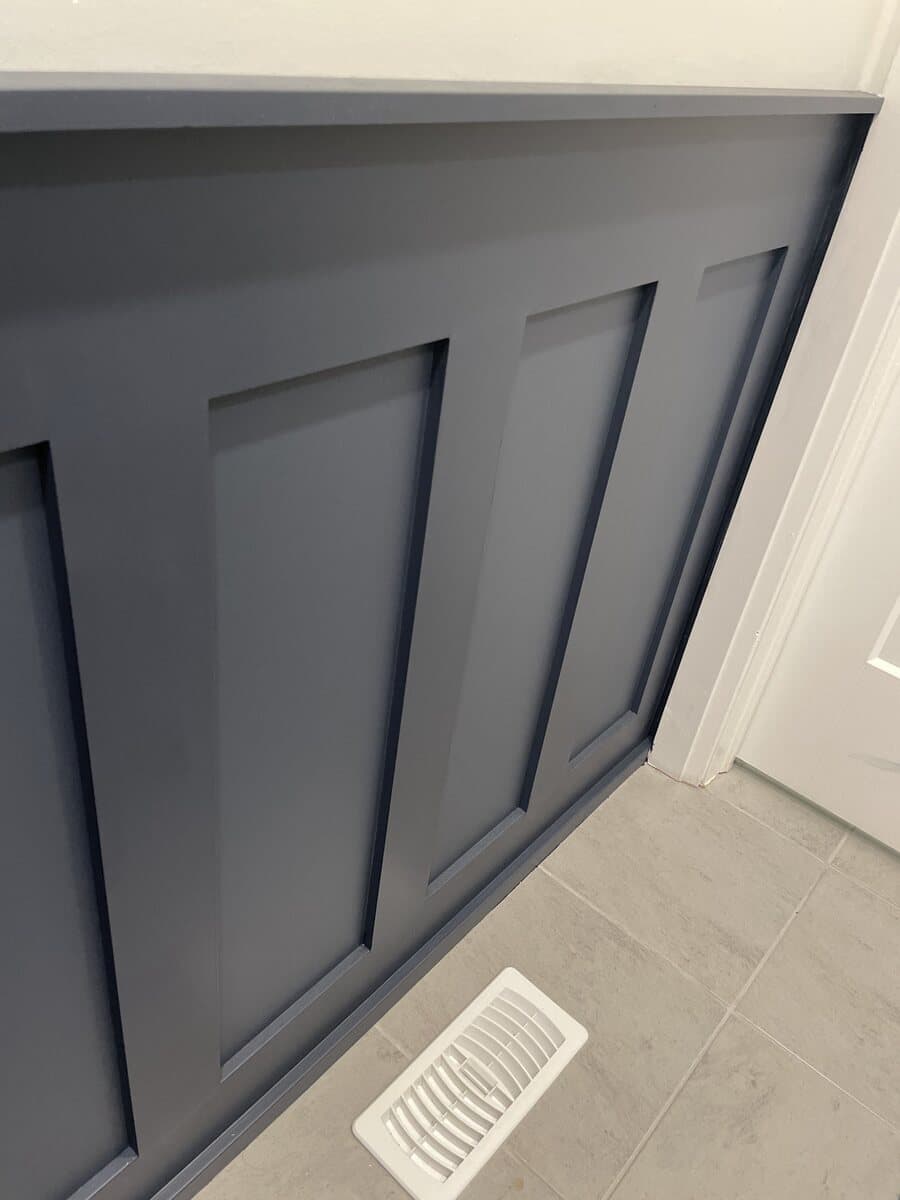 9
Finish detail
Smooth, even coats into every panel edge, along the top rail and down to the new baseboard.
Tour the finished bathroom
A closer look at each part of the room once the paint was dry and the new fixtures, lighting and accessories were in. Every metal finish is brushed gold, so the whole room matches.
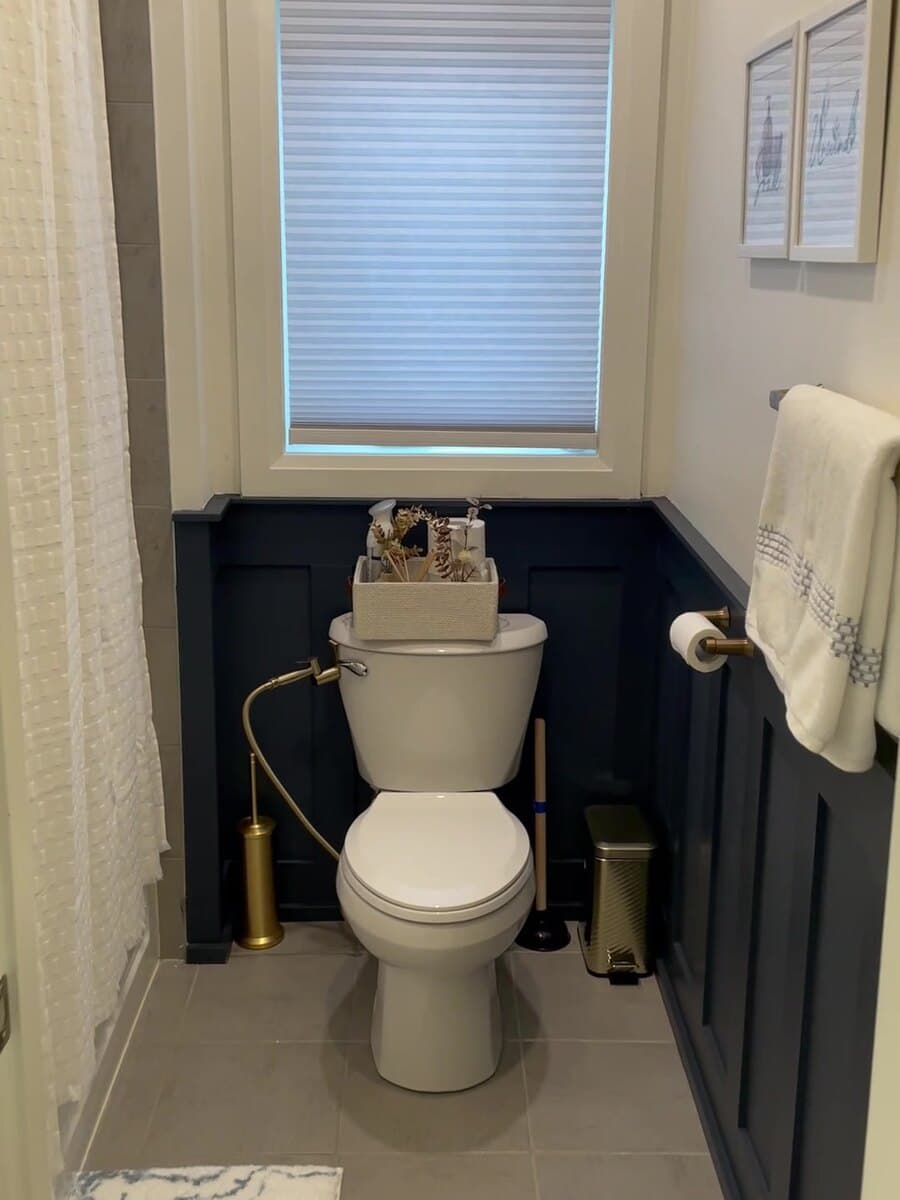
New toilet, bidet and gold accessories
A new toilet with a brushed gold bidet sprayer, toilet paper holder, towel bar, garbage bin and toilet brush, all set against the navy panels.
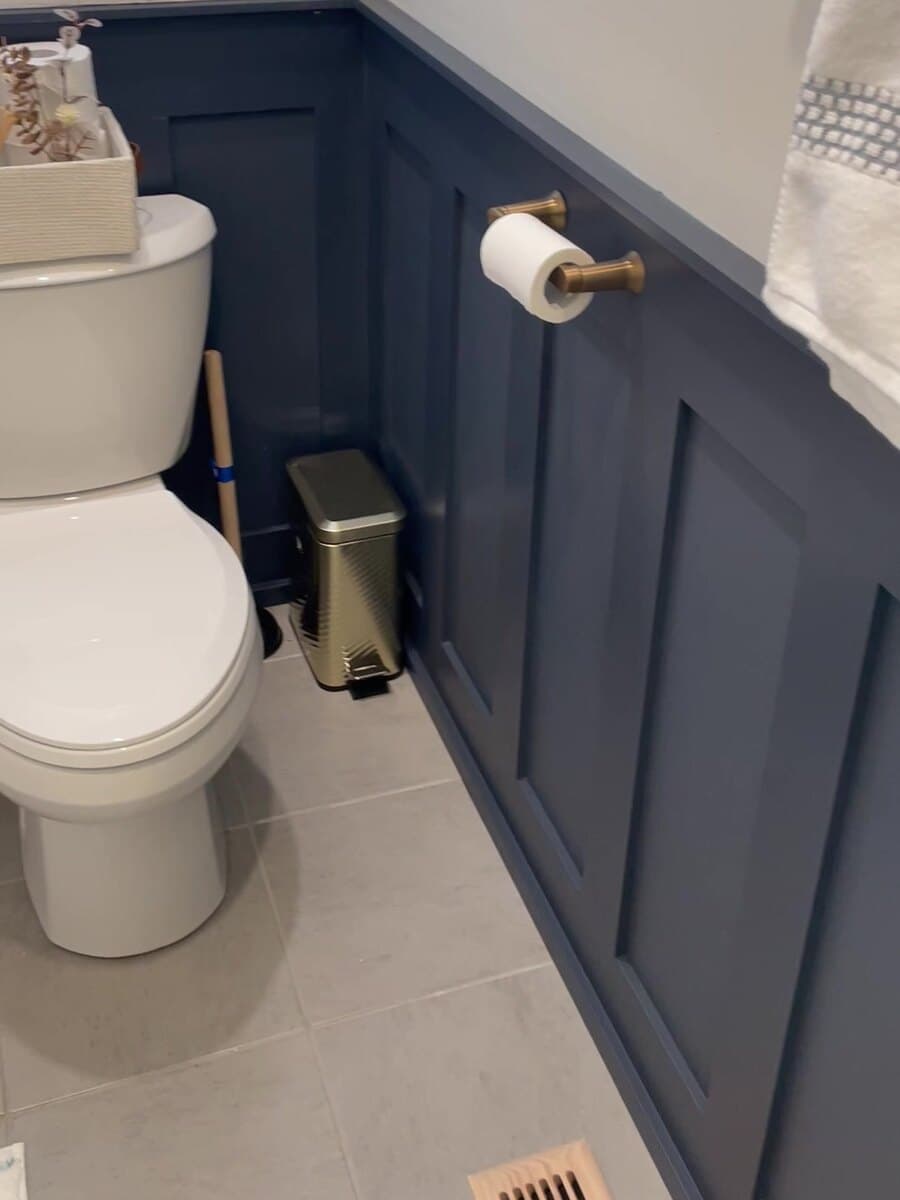
Even spacing, wall to wall
Every batten is equally spaced, the top rail is taller than the base, and the new baseboard ties it into the floor.
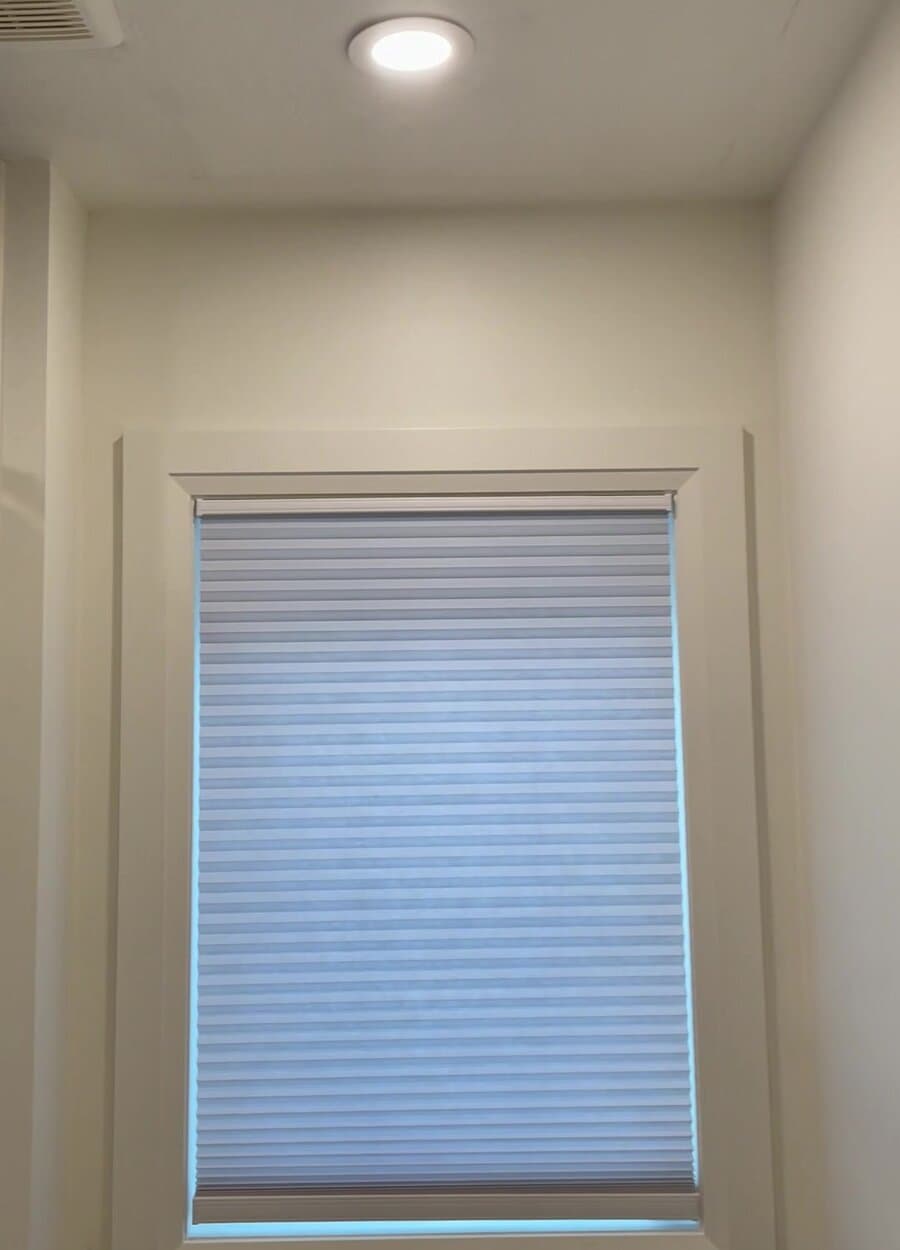
New pot light and window blinds
A new pot light brightens the toilet end of the room, and new blinds give privacy while still letting daylight through. The casing is White Dove in pearl.
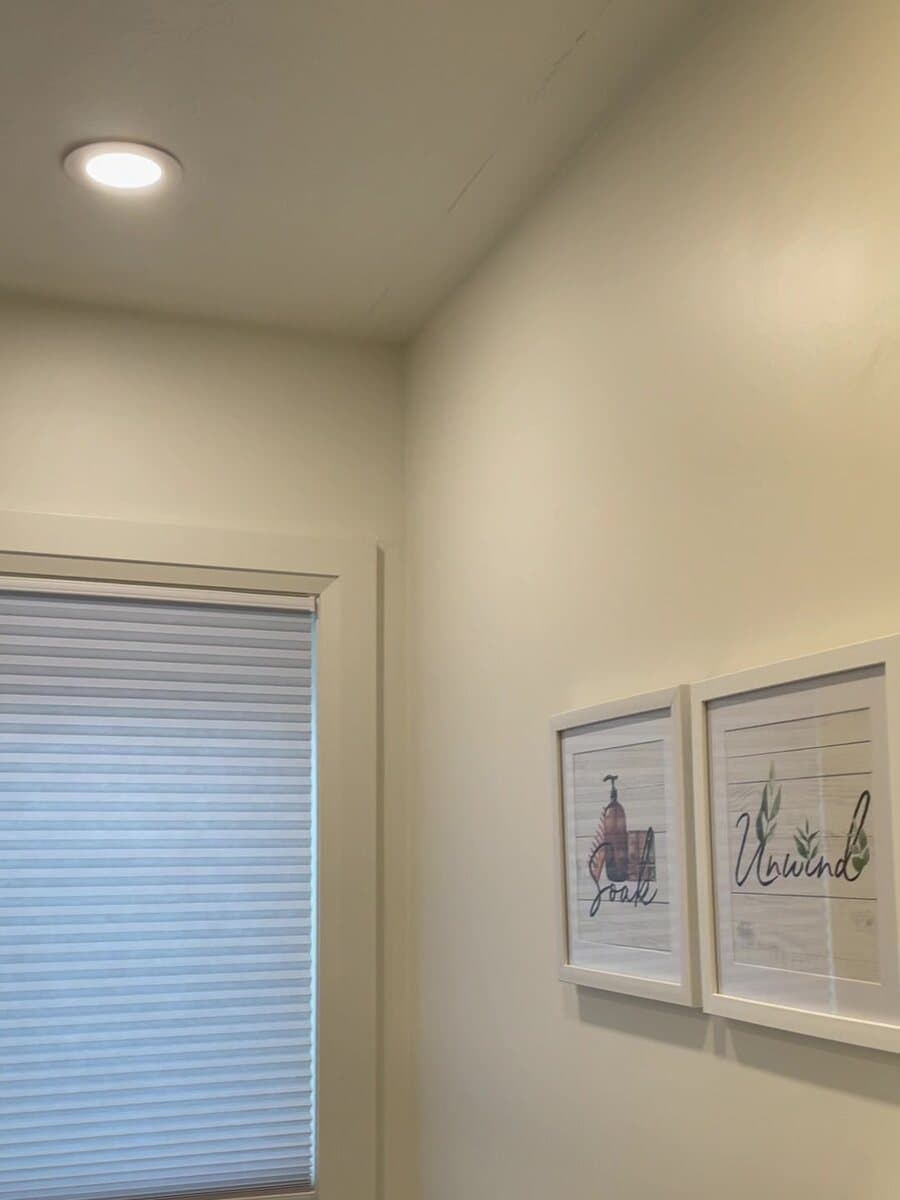
White Dove walls and ceiling
White Dove satin on the walls and ceiling keeps the room bright above the dark wainscoting.
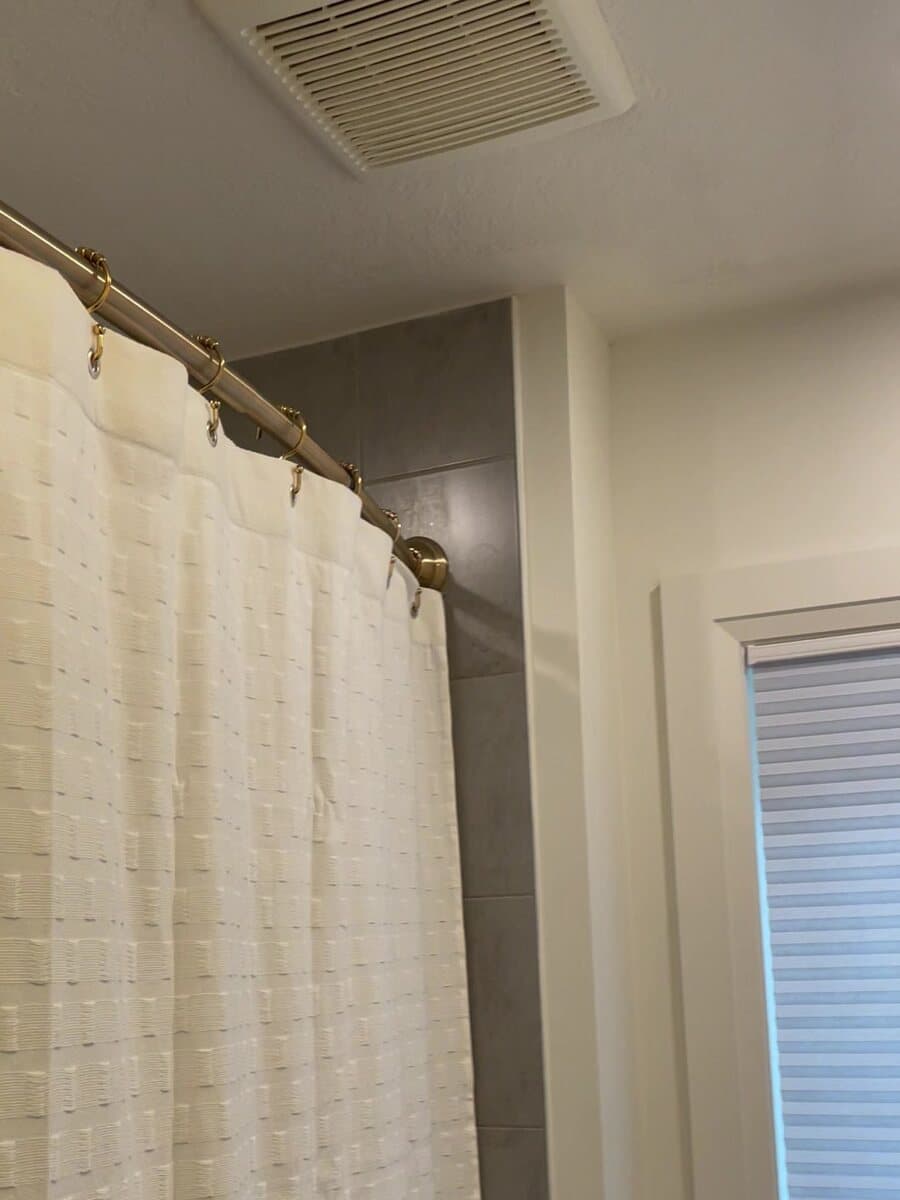
New exhaust fan and curtain rod
A new exhaust fan clears steam quickly to protect the fresh paint. The curved shower curtain rod is brushed gold to match.
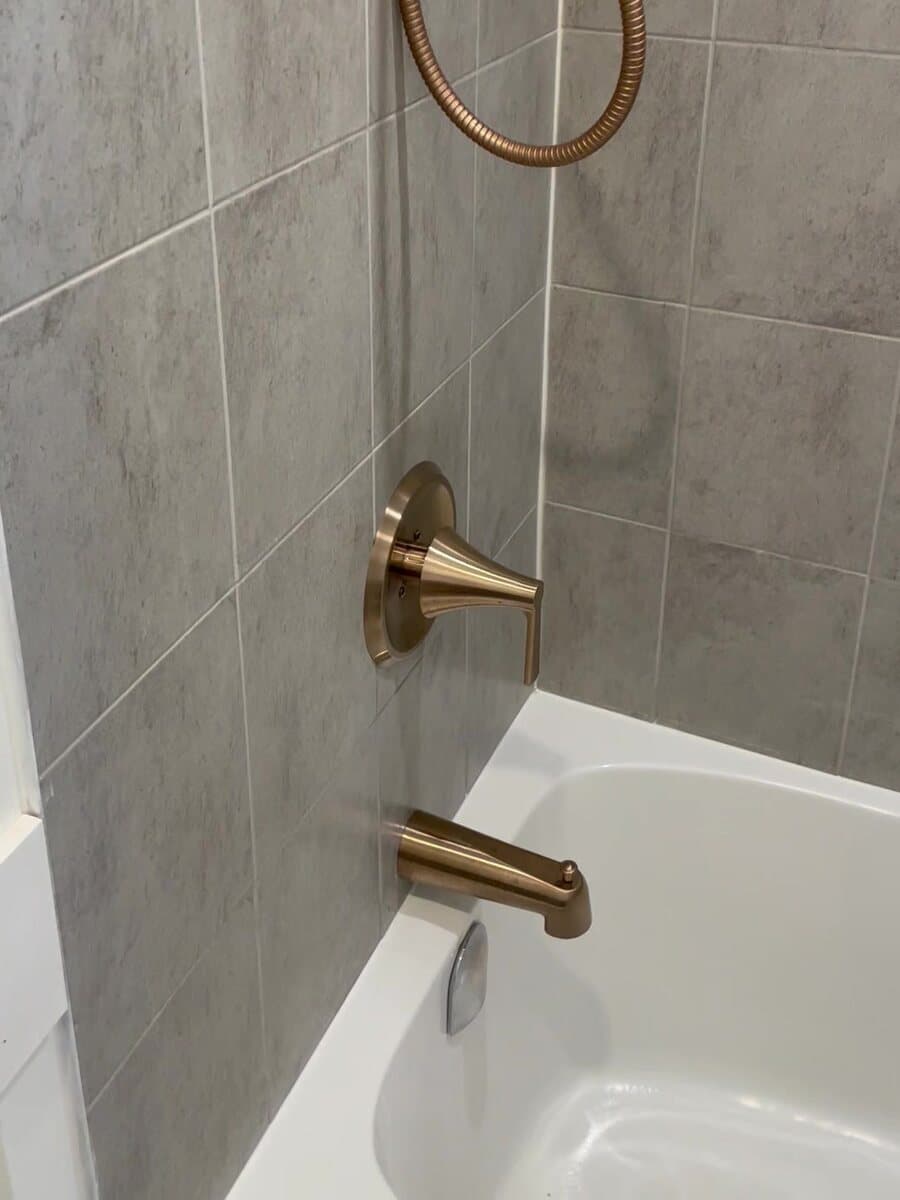
Brushed gold shower system
The old chrome is replaced with a brushed gold shower system: shower head with handheld, valve trim and tub spout.
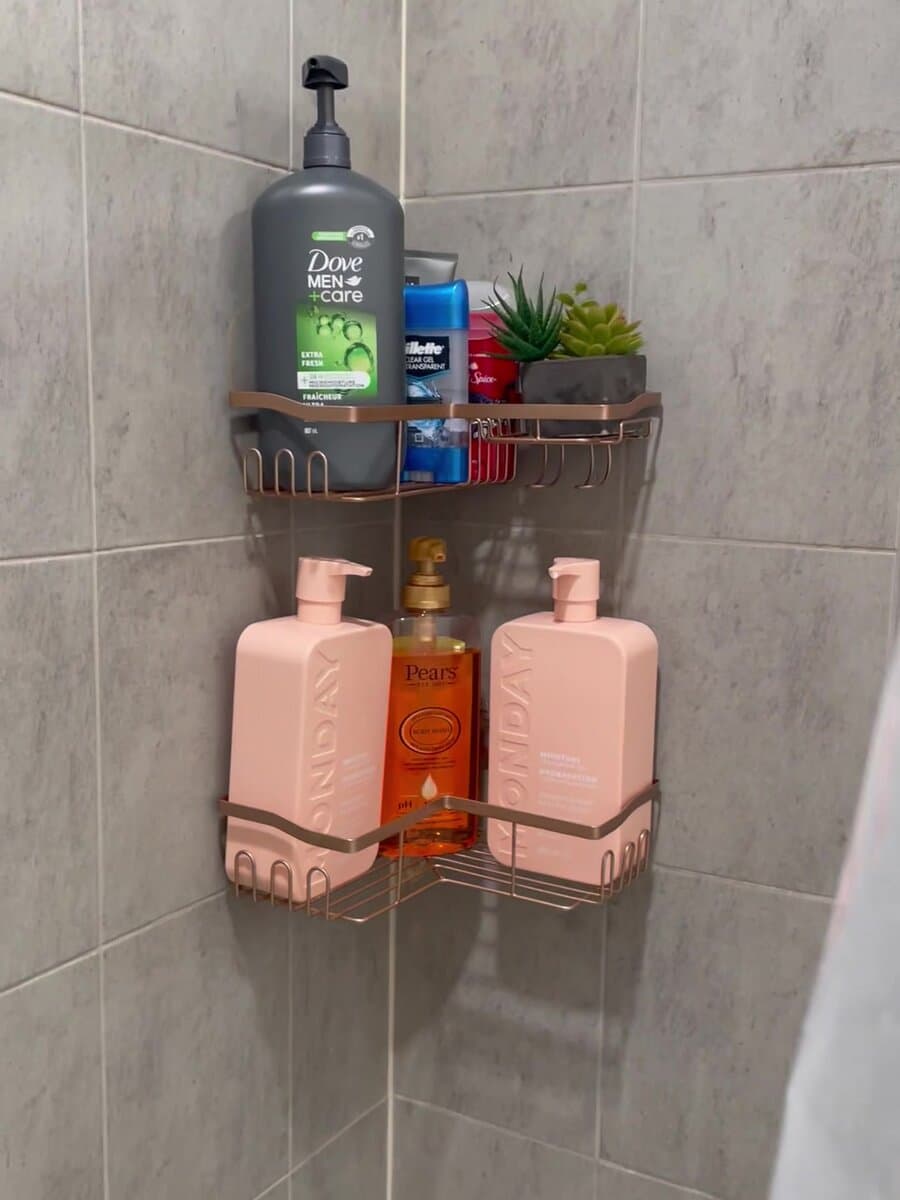
Matching shower accessories
Hanging shower caddies in the same brushed gold keep bottles off the tub ledge and match the fixtures.
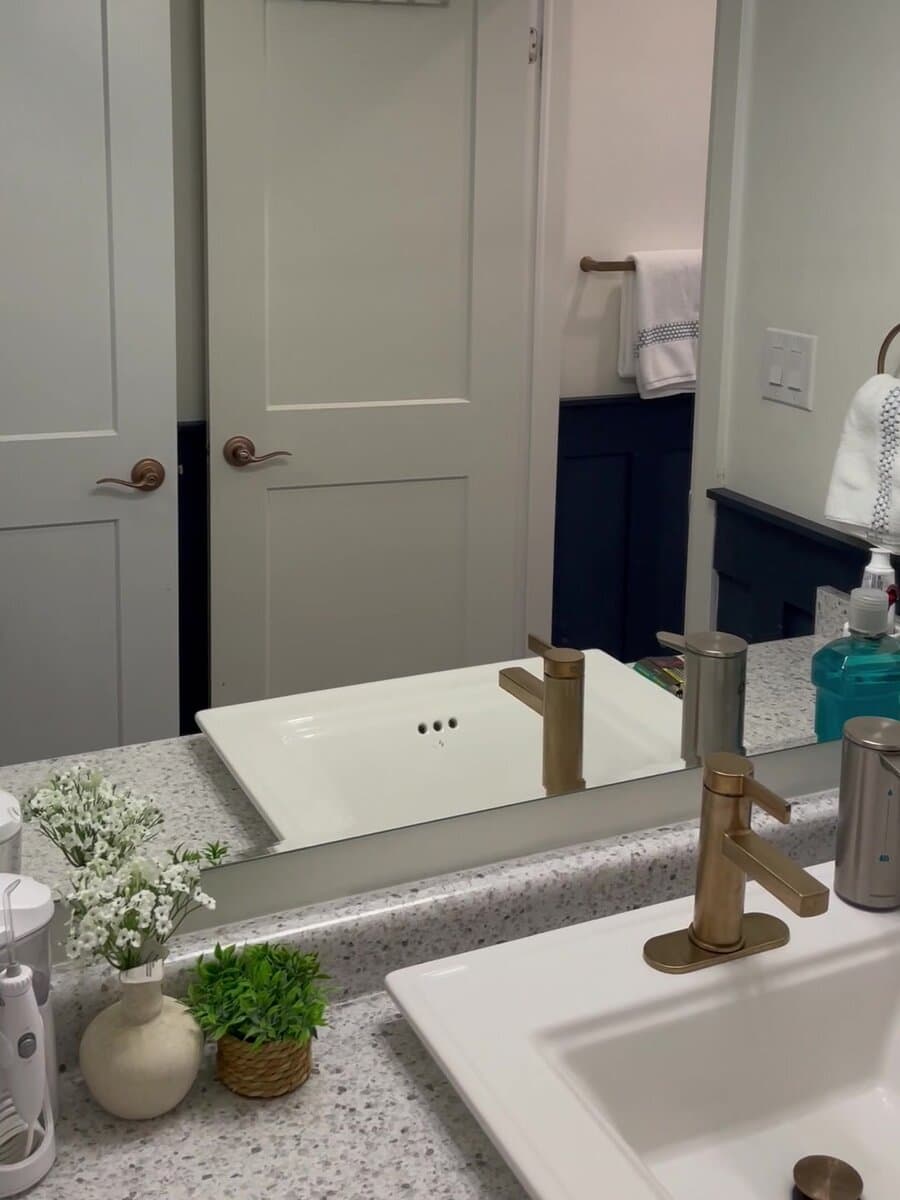
Faucet, door handles and lock
A brushed gold faucet at the vanity, with brushed gold door handles and a matching privacy lock, seen here in the mirror.
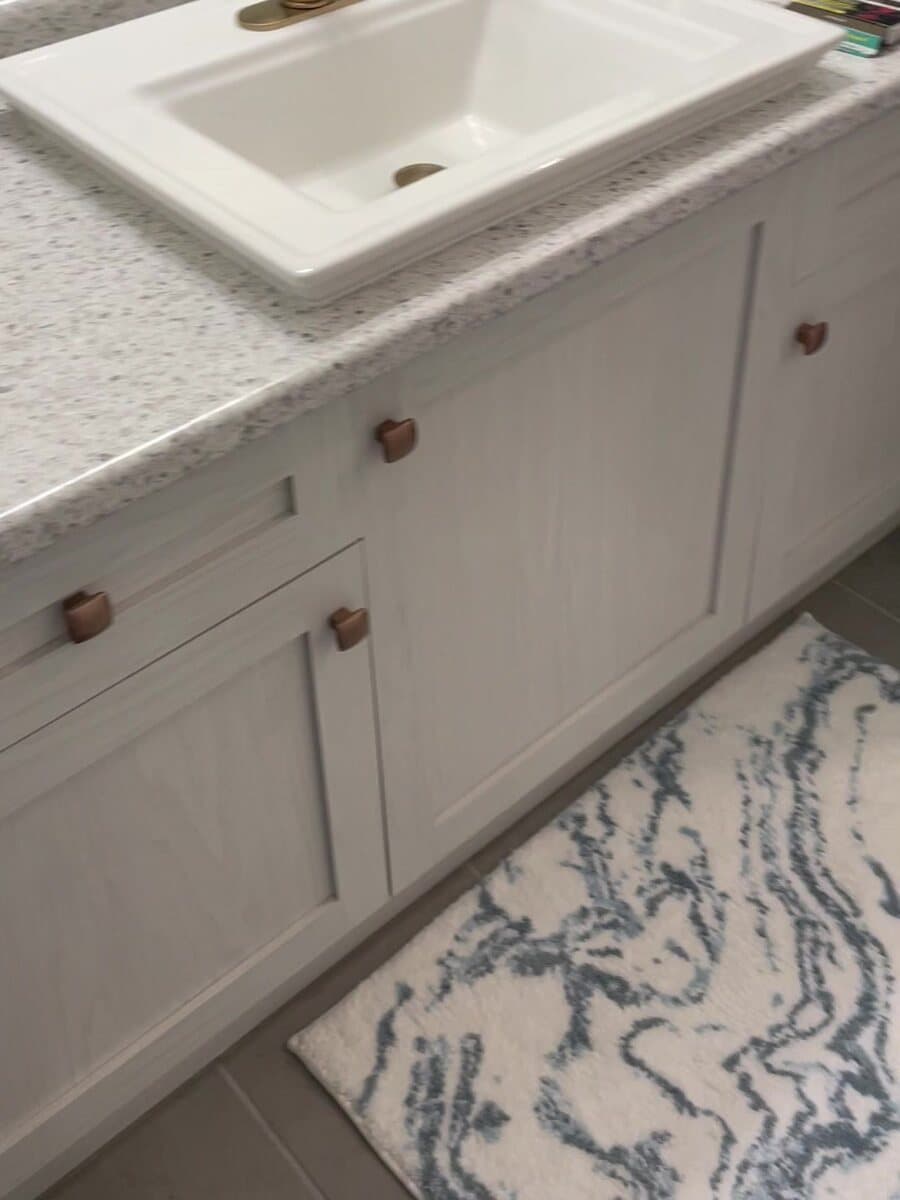
Vanity hardware to match
New brushed gold knobs carry the same finish across the vanity.
Watch the project
Popular bathroom projects in Kitchener-Waterloo
- Tub-to-shower conversions with a tiled walk-in shower and glass
- Wall-hung toilets on an in-wall carrier
- Floating vanities, LED mirrors and pot lights
- Ensuite upgrades with freestanding tubs and double vanities
- New basement bathrooms, including drains and venting
- Large-format porcelain tile on walls and floors
- Bathroom refreshes: new wainscoting, paint and fixtures without demolition
Bathrooms in Kitchener-Waterloo homes
Waterloo Region’s homes range from 1960s bungalows and 1970s backsplits in neighbourhoods like Stanley Park, Forest Heights and Lakeshore to newer builds in Doon South, Clair Hills and Laurelwood. Older homes often hide galvanized supply lines, cast-iron stacks or tile set straight onto drywall; newer homes usually have builder-grade fibreglass showers that are ready for tile and glass.
We open the walls, show you what we find, and plan the bathroom around the house you have — so the surprises are dealt with before the tile goes up, not after.
Planning for hard water
Most of Waterloo Region’s tap water comes from groundwater and is hard, which leaves scale on shower glass, tile and fixtures. We recommend an easy-clean coating on the glass, fixtures with replaceable cartridges, and tile and grout that wipe clean. If you have a water softener, we plan the new plumbing around it.
Bathroom permits in Kitchener, Waterloo and Cambridge
Replacing a vanity, toilet or tub in the same spot usually doesn’t need a permit. Adding a bathroom, moving drains or vents, or changing walls generally does, and each city issues its own. We prepare the drawings, apply to the right city and book the plumbing inspections.
Reviews
Reviews from Kitchener-Waterloo homeowners
5.0
8 Google reviews
We had an amazing experience working with Canvas Build Incorporation, owned by Waqas Malik, on our bathroom renovation. Waqas truly brought my dream bathroom to life and transformed our space into something even more beautiful than I had imagined! … We wouldn’t hesitate to recommend you to anyone looking for quality workmanship and a beautiful renovation.
Ranim A.
Bathroom renovation · via Google
They completely transformed our space by renovating our kitchen, replacing all the cabinets, demolishing a wall and installing a structural beam to create a beautiful open-concept layout. … What we appreciated most was his honesty and transparency. The pricing was very reasonable, and everything was done according to our agreed budget with no surprise costs or added expenses.
Jaafar S.
Main floor & kitchen renovation · via Google
Had my laundry area redone with them and they did an incredible job — great finish and immaculate organization by their team!
Mufaddal A.
Laundry room renovation · via Google
Reviews powered by Google
FAQ
Bathroom Renovation in Kitchener-Waterloo: FAQs
Can’t find your answer? Call or send us a message — we’re happy to help.
How much does a bathroom renovation cost in Kitchener-Waterloo?
It depends on the size of the room, whether plumbing moves, and the shower, tile and fixtures you choose — a refresh with paint, wainscoting and new fixtures costs far less than a full gut renovation. We visit, measure and send a written, itemized quote at no cost.
How long does a bathroom renovation take?
Most full bathrooms take about 3 to 5 weeks on site, depending on the tile work and whether plumbing moves. Choosing fixtures, vanity and glass before demolition is the best way to avoid delays.
Do I need a permit for a bathroom renovation in Kitchener or Waterloo?
Not usually for replacing fixtures in the same locations. Adding a bathroom, moving drains or vents, or structural changes generally need one from the City of Kitchener, Waterloo or Cambridge. We confirm what applies and handle the application.
Can you add a bathroom to my basement?
Yes. A new basement bathroom needs drains and venting and a plumbing permit. If the fixtures sit below the sewer line, a sewage ejector pump may be needed. We plan the layout around your existing plumbing to keep the cost down.
Which areas do you serve for bathroom renovations?
Kitchener, Waterloo and Cambridge, plus Guelph, Elmira, Baden, New Hamburg, Breslau and Ayr.
Contact
Get a free bathroom renovation estimate in Kitchener-Waterloo
Tell us a little about your project. We’ll reply within one business day to book a free site visit.
- info@canvasbuilds.ca
- Mon–Fri, 9 am – 6 pm
Kitchener-Waterloo
108 Foamflower Pl, Waterloo, ON N2V 0G9Directions & Google reviews for Kitchener-Waterloo